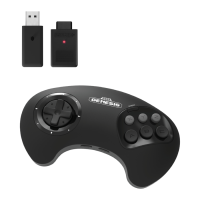
2.4GHz Wireless Arcade Pad
INSTRUCTION MANUAL
MANUAL DE INSTRUCCIONES
GUIDE D’UTILISATION
Includes controller, Micro USB® Cable for charging, Original Port & USB
®
Receivers, Deluxe storage
case and instruction manual.
NA
USB-C
®
port
FEATURES
• Includes SEGA Genesis® and USB® wireless receivers
• Retains the familiar grip and sleek design
• Additional Home, Select, and shoulder buttons
• Includes 3.3ft / 1m USB®-C charge cable
• Rechargeable 500mAh Li-ion battery
• Compatible with SEGA Genesis®/Mega Drive consoles via Genesis receiver
• Compatible with PC, Mac®, and other USB®-enabled devices via USB® receiver
• Up to 30ft / 10m gaming range
PAIRING
• Connect the appropriate receiver into the console’s controller port.
• Once connected, the LED on the receiver will blink to indicate it is in search mode.
• Press Start on the controller. The LED on the controller will blink as well.
• Press and hold the Sync button on the receiver.
• Release the Sync button once both the receiver and controller’s LED remain solid.
If you encounter an issue while pairing, you can reset the controller in one of two ways:
• Press and Hold Start + R for 4 seconds
• Inserting a thin metal wire (an unbent paperclip for example) into the small hole on the
back of the controller. Gently press and hold until the LED stops glowing. Then restart the
pairing process.
CHARGING
When the controller’s battery is low, plug the USB®-C charge cable into the controller and the
USB® end into a powered charger or available port on a console. It is compatible with fast-charging
plugs. The LED will remain lit when fully charged.
SEGA GENESIS®
• The controller’s LED will be red to indicate it is in 6-Button Mode and blue if it is in 3-Button
mode. To switch between the two modes, press and hold Start + B until it changes color.
SEGA GENESIS® MINI
• If the LED on the controller is blue, press and hold Start + B until it changes to red. The
controller will not function on the console if it is blue.
SEGA SATURN® (REQUIRES V2 SATURN RECEIVER)
• If the LED on the controller is blue, press and hold Start + B until it changes to red. The
controller will not function on the console if it is blue.
INSTRUCTION MANUALEN
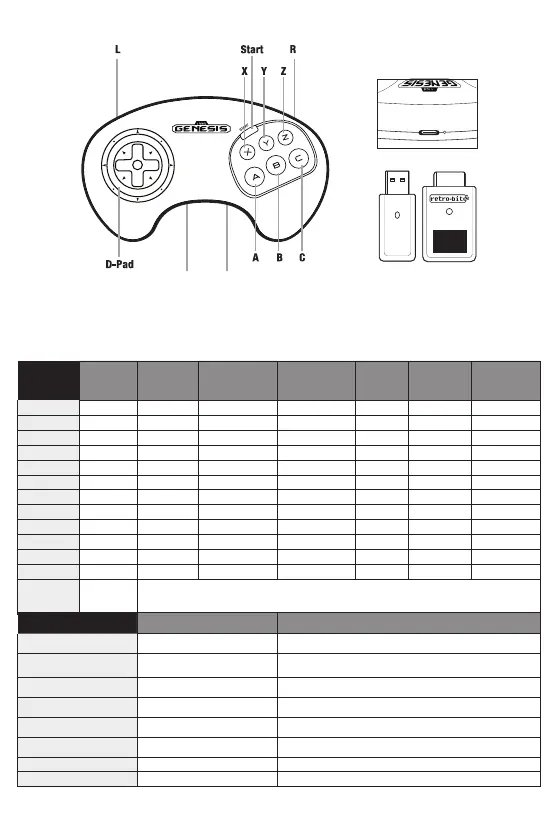
DEFAULT BUTTON MAPPING
LAYOUT DIAGRAM
Retro-Bit is a registered trademark of Kool Brands, LLC. SEGA is registered in the U.S. Patent and Trademark Office. SEGA, the SEGA logo and GENESIS
are either registered trademarks or trademarks of SEGA Holdings Co., Ltd. or its affiliates. Mac is a registered trademark of Apple Inc. USB is a registered
trademark of Universal Serial Bus Implementers Forum, Inc. All other mentioned trademarks are either trademarks or registered trademarks of their
respective owners. This product is licensed by SEGA of America, Inc.
© 2012 Kool Brands, LLC.
©SEGA
SWITCH
• If the LED on the controller is blue, press and hold Start + B until it changes to red. The
controller will not function on the Switch if it is blue.
• To set the DPad to Left Analog mode, press and hold Left + Start for 3 seconds
• To set the DPad to Right Analog mode, press and hold Right + Start for 3 seconds
• To set the DPad to back to normal, press and hold Up + Start for 3 seconds
• To flip the face buttons A/B & X/Y, press and hold Down + Start for 3 seconds
PC / ANDROID®
• The controller’s LED indicates the input mode it is in. To switch between the modes, press
and hold Start + B until it changes color.
» Red indicates it is in D-Input mode.
» Blue indicates it is in X-Input mode.
MAC®
• If the LED on the controller is blue, press and hold Start + B until it changes to red. The
controller will not function on the console if it is blue.
SUPPORT
To stay up to date with the latest news, manuals, and firmware updates, visit
www.retro-bit.com/support.
Controller
SEGA
Genesis
®
SEGA
Genesis
®
Start + Up Dpad
Change the DPad to act as a DPad.
Start + Down AB / XY Flip
Flips the A and B buttons and the X and Y buttons.
FCC WARNING
This device complies with Part 15 of the FCC Rules. Operation is subject to the following two conditions:
(1) This device may not cause harmful interference, and (2) this device must accept any interference received,
including interference that may cause undesired operation.
NOTE 1: This equipment has been tested and found to comply with the limits for a Class B digital device, pursuant to
part 15 of the FCC Rules. These limits are designed to provide reasonable protection against harmful interference in
a residential installation. This equipment generates uses and can radiate radio frequency energy and, if not installed
and used in accordance with the instructions, may cause harmful interference to radio communications. However,
there is no guarantee that interference will not occur in a particular installation. If this equipment does cause harmful
interference to radio or television reception, which can be determined by turning the equipment off and on, the user is
encouraged to try to correct the interference by one or more of the following measures:
- Reorient or relocate the receiving antenna.
- Increase the separation between the equipment and receiver.
- Connect the equipment into an outlet on a circuit different from that to which the receiver is connected.
- Consult the dealer or an experienced radio/TV technician for help.
NOTE 2: Any changes or modifications to this unit not expressly approved by the party responsible for compliance
could void the user’s authority to operate the equipment.
For more information, please visit www.retro-bit.com
@retrobitgaming
BIG6
Home Select
RF exposure statement
This equipment complies with the FCC radiation exposure limits set forth for an uncontrolled environment.
This transmitter must not be co-located or operating in conjunction with any other antenna or transmitter.
 Loading...