58
Taking Pictures
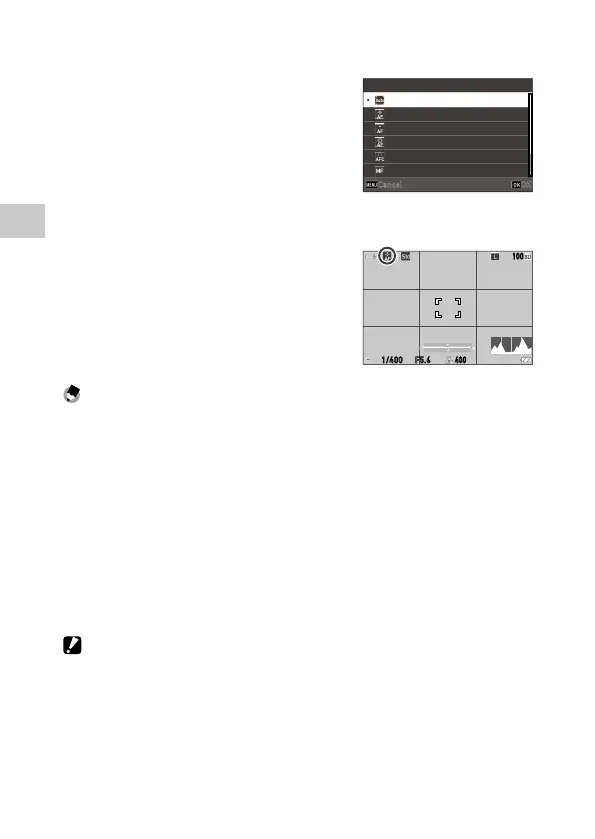
1 Select [Focus] in the A1/B1 menu, and press d.
2 Use ab to select a setting.
In B mode, select from [AF], [MF], [Snap],
and [Z].
3 Press e.
4 Press f.
The focus mode icon appears on the shoot-
ing screen.
Memo ---------------------------------------------------------------------------------------------------------
• This function can be registered to [ADJ Mode Setting] or [Fn Button Setting] of the D2 menu.
(p.121, p.123)
If [Set MF], [Set Snap], or [Set Tracking AF] is set to [Fn Button Setting], the focus modes can be
switched with button operation only.
• When [Auto-area AF], [Select AF], or [Pinpoint AF] is set, faces of people are automatically detected.
The setting can be changed to [Use only in Auto-area AF] or [Off] in [Face Detection] of the A1
menu.
• When [Auto-area AF], [Select AF], or [Pinpoint AF] is set, the AF assist light on the front of the camera
lights as necessary. The AF assist light can be set to [Off] in [AF Assist Light] of the A1 menu.
• When [Focus Peaking] is set to [Highlight Edge] or [Extract Edge] in the A1/B1 menu, the out-
line of the subject in focus is emphasized, and this makes it easier to check the focus.
• By default, the autofocus works with h. The action of h can be set in [Focus Settings] of [Fn
Button Setting] in the D2 menu. (p.124)
Caution -------------------------------------------------------------------------------------------------------
• When [Shutter Button Setting] is set to [AE Lock] in the D2 menu, the autofocus does not work
when z is pressed halfway. (p.125)
Auto-area AF
MF
Select AF
Pinpoint AF
Tracking AF
Continuous AF
Focus
Cancel OK
100
 Loading...