Rifton · PO Box 260 · Rifton NY 12471 · www.rifton.com
Accessories
(from top to bottom of the chair)
Accessories
(from top to bottom of the chair)
Seat Adjustments Seat Adjustments Seat AdjustmentsFrame Adjustments Frame Adjustments
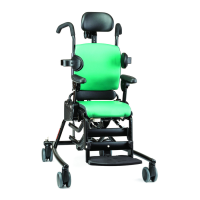
RiftonActivityChair
Thank you for using the Rifton
Activity Chair. A glance at this Quick
Reference Guide will help you with the
basic adjustments. For more details,
please consult the product manual or
call Rifton at 800.571.8198.
Quick Reference Guide
Quick tip: All adjustment levers and buttons are white,
so look for white whenever you’re trying to adjust the chair.
Quick Reference Guide
NOTE: Photo view is from
the top of the chair.
Seat Adjustments
Back
spring
Seat
spring
Seat Adjustments
Seat Adjustments
Tilt-in-space
adjustment
Angle
adjustment
lever
U
n
l
o
c
k
L
o
c
k
L
o
c
k
U
n
l
o
c
k
Angle
lever
Caster swivel lock
Push down to lock the caster and keep the chair
from drifting sideways. Pull it up to allow the
caster to swivel for tight maneuvers.
Dynamic backrest adjustments
The dynamic backrest (if installed) is controlled by the dynamic cylinder
behind the backrest.
The dynamic backrest has three functions:
1. Dynamic spring unlocked. Turn the white twist-lock collar clockwise to
unlock it and give 10° dynamic movement. Using the backrest angle adjustment
lever, adjust the dynamic range between -20° and +5°.
2. Spring locked – forward adjustment. With the backrest tilted forward, turn
the white twist-lock collar counterclockwise to lock it. Using the angle adjustment
lever, adjust the backrest angle between -10° and +5°.
3. Spring locked – reclining adjustment. While the spring is unlocked,
push the backrest into a reclining position. This is easier to do with the client in the
chair. Turn the white twist-lock collar counterclockwise to lock it. Using the angle
adjustment lever, adjust the backrest angle between -20° and -5°.
Dynamic seat (standard base only)
The dynamic seat (if installed) is controlled by the dynamic cylinder
underneath the seat.
The dynamic seat has three functions:
1. Dynamic spring unlocked. Turn the twist-lock collar clockwise to unlock it
and allow 10° of dynamic movement. Using the seat tilt adjustment lever, adjust the
dynamic range between -15° and +15°.
2. Spring locked – forward adjustment. With the chair tilted forward, turn
the white twist-lock collar under the seat counterclockwise to lock it. Using the seat
tilt adjustment lever, adjust the angle of the seat between -5° and +15°.
3. Spring locked – reclining adjustment. While the spring is unlocked, tilt the
seat into a fully reclined position. This is easier to do with the client in the chair. Turn
the white twist-lock collar counterclockwise to lock it. Using the seat tilt adjustment
lever, adjust the tilt between -15° and +5°.
Backrest angle
The backrest adjusts 15˚ by squeezing the angle
lever and tilting the backrest forward or back to
the desired position.
Backrest height
To adjust, push down on the height lever and raise
or lower the backrest as desired.
Seat depth
The seat depth adjusts with one hand, even with a
client in the chair. Facing the front of the chair, reach
beneath the seat, pull the handle (on the left side),
and slide the seat forward or backward.
Lateral supports
Lateral supports adjust independently up or down,
in or out, and rotate with a single knob. Loosen
the knob, slide the metal key into the extrusion,
adjust to fit the client, then tighten the knob.
Tray
Armrests must be at the same height and angle
before you attach the tray. With one hand, pull the
handle under the front center of the tray and slide it
onto the armrests. Note that the tray cannot be used
with forearm prompts.
When the tray is attached and both arm angle
adjustment latches are lifted, the tray can be rotated
to provide a tilted surface.
Tilt-in-space
Squeeze the tilt lever and safety lock together, then
tilt the whole chair forward or back. Use the angle
indicator on the side for proper positioning.
PS07 Rev 04