Do you have a question about the Rockville Rockforce 192 and is the answer not in the manual?
Advises against opening the unit, exposure to moisture, and ensures proper ventilation and stable placement.
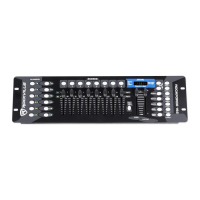
Used to select one or more of the 12 fixtures, each representing 16 DMX channels.
Shows which page (A or B) is active for channel selection.
Buttons to select a scene within the scene bank for programming or playback.
Switches between Page A (channels 1-8) and Page B (channels 9-18).
Displays active scene/bank, chase/step numbers, and fader levels.
Buttons to select a chase for programming or playback.
Selects a scene bank (01-30) and used for chase programming.
Enters/exits programming mode; holds for 3 seconds.
Records chase steps or scene settings in program mode.
Activates Auto-Run or deletes scenes/chases in program mode.
Activates Music Auto-Run or copies scene banks.
Controls chase/scene speed or switches display modes.
Toggles blackout mode, disabling all DMX channel output.
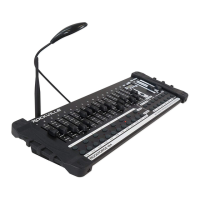
Adjusts the fade time for scenes and chases.
Adjusts the speed of auto-triggered scenes or chases.
Adjust the output level of the corresponding DMX channel.
Turns the unit on/off and aids in erasing scenes/chases.
Outputs the main control signal to fixtures and DMX devices.
Port for connecting the external power supply (DC 9V-12V).
Details how each fixture is assigned a 16-channel block of DMX addresses.
Explains the need to know channel assignments for fixture functions like pan, tilt, color.
Covers DMX-512 channels, starting addresses, and daisy-chain wiring.
Describes 3-pin and 5-pin XLR DMX cables and connector types.
Explains the necessity of a 120 Ohm resistor to terminate the last fixture in a DMX chain.
Details how to select fixtures and use channel faders for manual control.
Introduces 30 scene banks, each with 8 programmable scenes.
Step-by-step guide to recording a scene by setting fixture levels and saving.
Instructions for modifying existing scenes by adjusting fixture levels.
Method to copy settings from one fixture to another during scene programming.
Process for copying a scene to another location within the same or different bank.
Procedure to duplicate an entire bank of scenes to another bank.
How to remove a specific scene by setting its output to zero.
Procedure to delete all scenes contained within a selected bank.
Method to erase all scenes from all banks simultaneously.
Steps to record a chase by sequencing scenes and setting steps.
How to transfer the content of a scene bank into a chase.
Process for adding a new step to an existing chase at a specific position.
Instructions for removing a specific step from a chase.
Procedure to remove an entire programmed chase.
Method to erase all steps from all programmed chases.
Steps to manually select and activate a specific scene.
How to set a bank of scenes to cycle automatically with speed and fade control.
Enables scenes to run automatically synchronized to music via the built-in microphone.
How to manually step through a chase, typically used during programming.
Setting chases to run continuously with adjustable speed and fade time.
Synchronizes chases to music using the built-in microphone.
Lists the controller's capabilities, including DMX channels, banks, chases, and physical details.
Defines key terms related to DMX lighting control, fixtures, scenes, and chases.
| Brand | Rockville |
|---|---|
| Model | Rockforce 192 |
| Category | Controller |
| Language | English |