Do you have a question about the Rockwell ShopSeries RS8151 and is the answer not in the manual?
Follow basic safety precautions to reduce risk of fire, electric shock, and personal injury.
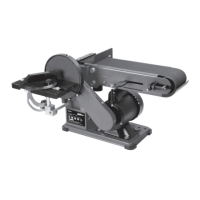
Steps to assemble the belt and disc sander components correctly.
Assemble the disc guard using screws, lock washers, and flat washers.
Slide the sanding disc plate onto the drive shaft, fitting the key into the keyway.
Peel backing from the sanding disc and press it firmly onto the disc plate.
Position and tighten the disc guard with dust outlet to the disc.
Insert worktable support bar and position worktable, then tighten set screw.
Mount washer and fix screws on the upper sanding drum guard.
Position the tool feet in the groove of the plastic feet for table protection.
Disassemble work table, loosen screws, and mount worktable support bar.
Procedures for adjusting the belt tracking and worktable alignment.
Adjust tracking knob to ensure the sanding belt runs correctly on pulleys.
Check and adjust worktable angle to 90° with the sanding disc.
Adjust the height of the worktable by twisting the screw with a hex wrench.
Instructions for operating the belt and disc sander for various tasks.
Press the on/off switch to start or stop the machine.
Tilt the worktable from 0 to 45 degrees for bevel sanding.
Use a miter gauge for sanding small end surfaces on the disc.
Operate the machine vertically, removing the belt sanding baffle if needed.
Hold workpiece firmly, keep fingers away from belt, and move work evenly.
Release tension, loosen screws, remove covers, pull out old belt, and install new one.
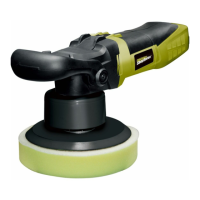
| Type | Random Orbit Sander |
|---|---|
| Voltage | 120V |
| Speed | 12, 000 OPM |
| Dust Collection | Yes |
| Power Source | Corded Electric |
| No Load Speed | 12, 000 OPM |
| Pad Size | 5 inch |