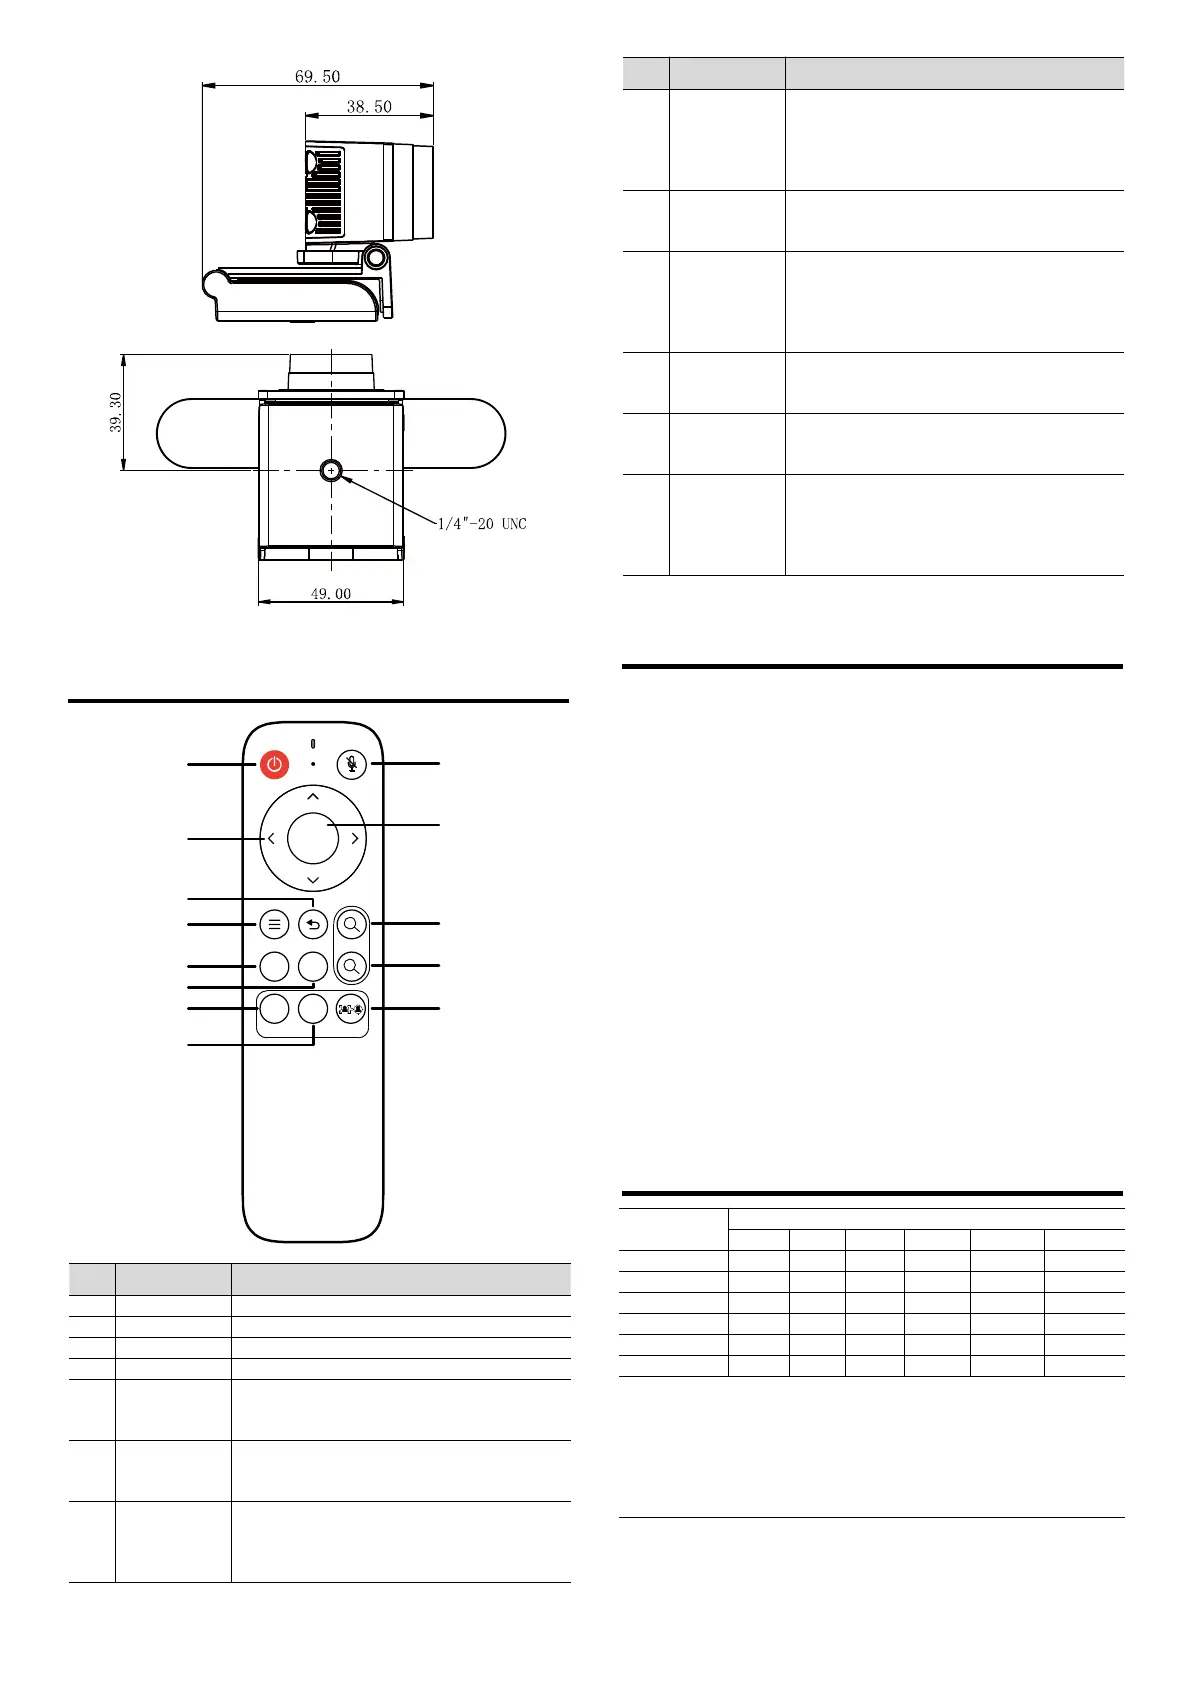
H O M E
ZO O M
O N O FF
1 2
+
_
TRA C K IN G
SW ITC H
1
9
10
2
4
3
5
6
7
8
11
12
13
Turn on/off or wake up the device.
Adjust the menu cursor and menu parameters.
Return to the upper level of the menu.
Open the menu or exit the menu.
No. 1 preset position, long press for 3 seconds
to set the preset position, short press to adjust
the preset position.
No. 2 preset position, long press for 3 seconds
to set the preset position, short press to adjust
the preset position.
Tracking on key, you need to click the SWITCH
button first and then click the "ON button" to turn
on the tracking function or automatic frame
selection function.
Tracking off key, when the tracking function or
automatic frame selection function is turned on,
directly click the "OFF button" to turn off the
tracking function or automatic frame selection
function.
Turn the microphone on or off. When the
microphone is turned off, there is a mute icon
on the video.
When the menu is not turned on, click the
"HOME button" to restore to the state of the
maximum angle of view without calling zoom.
When the menu is opened, click the "HOME
button" to confirm menu and enter submenu.
Digital Zoom In (zoom in or zoom out is not
supported when the tracking function or the
automatic frame selection function is turned on).
Digital Zoom Out (zoom in or zoom out is not
supported when the tracking function or the
automatic frame selection function is turned on).
Click the first "SWITCH Key", the image display
is currently the tracking function (target
tracking) or automatic frame selection function
(auto framing). Click the second "SWITCH Key"
to switch the current function.
7 Maintenance and Troubleshooting
Camera Maintenance
If the camera is not used for a long time, please disconnect the power
after use.
Use soft cloth or cotton paper to remove dust from the camera housing.
When cleaning the camera lens, please use dry soft cloth to wipe, if dirt
is serious, use neutral cleaner gently. Do not use strong or corrosive
detergent, lest the lens scratch, affect the image effect.
Avoid Using
The camera should avoid shooting particularly bright objects, such as
sunlight, lights, etc.
The camera should not work under unstable lighting conditions,
otherwise the image will flash.
Do not use around facilities that can transmit high-power radio waves,
such as television station or radio-transmitting station.
Troubleshooting
Image have jitter after the camera is properly connected.
1) Check whether the camera installed position be stabled.
2) Check whether have vibrating machinery or object near the camera.
8 Toxic and Harmful Substances
Toxic or harmful substances or elements
This form is compiled in accordance with SJ/T 11364.
Ο: Indicates that the content of the hazardous substance in all
homogenized materials of the component is subject to the limit specified
in GB/T 26572.
x: Said the hazardous substance in at least one of the components
homogenized material content in excess of the GB/T 26572 limit
requirements, and there are no mature alternatives.
 Loading...