1. Attach XL Pro Soft Box Diffuser to the
FlashBender XL Pro Refl ector
With the FlashBender mounted on a light stand, attach
the sides of the Soft Box Diffuser to the sides of the
FlashBender using the hook-and-loop strips along the
left and right edges.
2. Snap Corners of Soft Box Diffuser
Fold the top corners of the Soft Box Diffuser over
and secure each of the snaps.
3. Attach Center Tab at Top
To close the top of the soft box, attach the hook-
and-loop tab at the top center of the Soft Box
Diffuser to the top of the FlashBender.
4. Pull Bottom Tab of Soft Box Diffuser
Pull the bottom center tab on the Soft Box Diffuser
tight, fl attening the front diffuser fabric. This tab
can be tucked under the FlashBender’s attachment
strap to hold it tight and to reduce light spill from the
bottom of the refl ector.
1. Shape the FlashBender
With the FlashBender mounted on a light
stand, curve the sides of the FlashBender
forward into a U-shape.
2. Attach Strip Grid
Using the hook-and-loop strips along the left
and right edges, attach the sides of the Strip
Grid to the inside edges of the FlashBender.
3. Attach Top of XL Pro Strip Grid
Attach the top cover of the Strip Grid to the top
of the FlashBender by securing the hook-and-
loop completely around the top outside edge of
the FlashBender.
4. Attach Bottom Flap
To close the bottom of the Strip Grid, attach the
hook-and-loop on the sides of the fl ap to the
bottom sides of the Strip Grid.
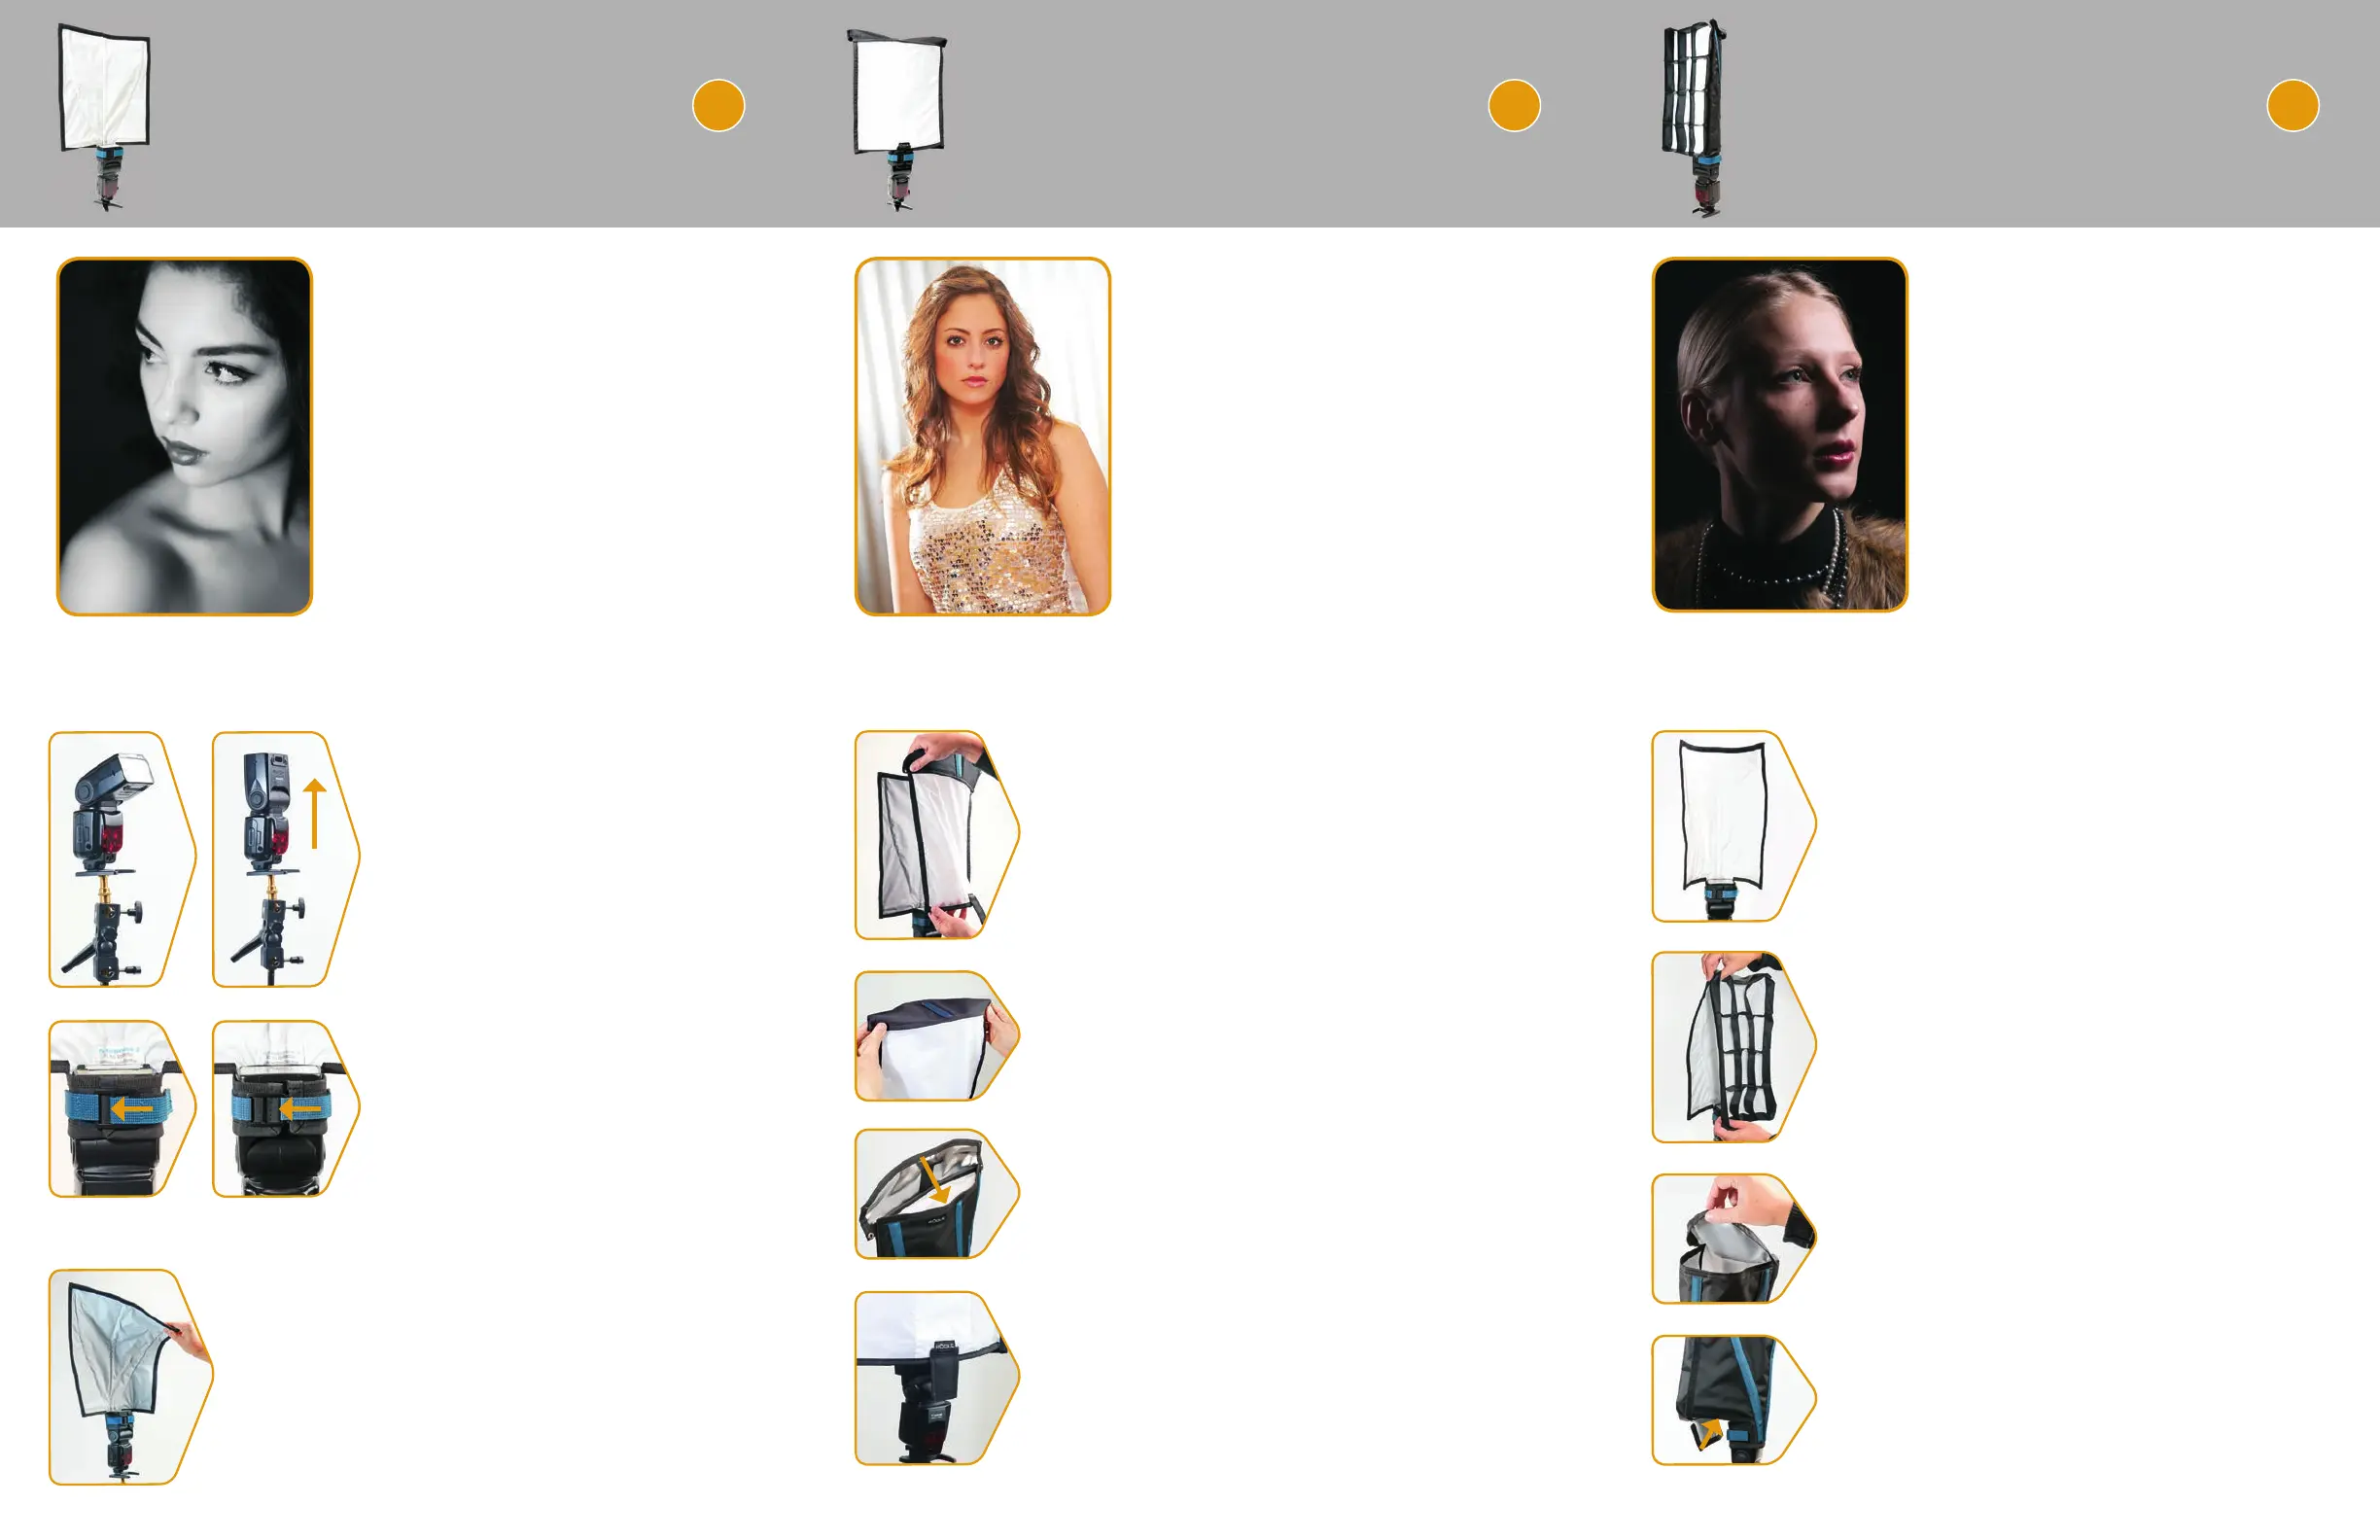
Reflector:
The versatile FlashBender Refl ector
can be used to control and shape
your main, background, hair, rim, or
accent lights. Attach the refl ector to
your fl ash and change its shape to
quickly and easily manipulate light
and shadow in your image.
Soft Box:
The soft box makes a beautiful
main light for portraiture because
it effectively softens light while
reducing contrast and specular
highlights. When confi gured as a
soft box the light becomes more
directional than the base refl ector
alone, effectively eliminating bounced
and refl ected light.
Strip Grid:
Combining diffusion material with
a fabric grid, the XL Pro Strip Grid
produces a long and narrow light
pattern frequently used for edge
and rim lighting with off-camera
fl ash. The bottom panel controls
light leakage from the base of the
strip grid.
3. Shape FlashBender Refl ector
Use the refl ector’s positionable rods to manipulate
its shape. Adjust the light refl ected up, forward,
or to the sides by shaping the top or sides of the
refl ector. Alternatively, position the refl ector parallel to
your background and adjust the leading edge to shape
the light and shadow on the background.
© Frank Doorhof 2015 © Bob Harrington 2013
© Frank Doorhof 2015
© ExpoImaging, Inc., 2016
XL Pro Reflector
FLASHBENDER
®
2
XL Pro Soft Box
FLASHBENDER
®
2 2
XL Pro Strip Grid
FLASHBENDER
®
Set Flash Zoom to 50mm Set Flash Zoom to 50mm Set Flash Zoom to 50mm
1. Mount Flash on Light Stand,
Then Lock Flash Head Up
Rotate the fl ash head into its vertical,
fully-locked position before attaching
the FlashBender. If the fl ash head will
not lock in the upright position, rotate
the fl ash head 180˚ and angle the
fl ash forward on the tilt bracket.
RogueFlash.com
2. Strap FlashBender to Flash
Attach the FlashBender to the fl ash by
wrapping the strap around the fl ash
head. Pull the blue strap through one
of the two buckle positions and fasten
the hook-and-loop.
smaller fl ashes use
fi rst buckle position
bigger fl ashes use
second buckle position
 Loading...