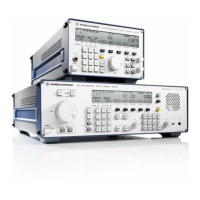
V L F > H F R E C E I V E R S
f
R & S E K 8 9 5 / R & S E K 8 9 6
User Manual
f
Altering the Type of Current (Single Current
N
Double Current)
A1.7 Altering the Type of Current (Single Current
N
Double
Current, Option)
1. Carry out preparations according to A1.1.
2. Disconnect socket on RF cable W1 from
plug X54 (see Fig. A1.8).
3. Disconnect socket on RF cable W8 from
plug X72.
4. Disconnect socket on RF cable W4 from
plug X41.
5. Undo connector X23 (see Fig. A1.5 (EK!895)
or Fig. A 1.6 (EK 896)).
6. Remove cable clamps, as necessary.
7. Undo and remove six screws (2, Fig. A1.3
(EK!895) or Fig. 1.4 (EK!896)) on the rear
and the two screws near the resonators, se>
curing the power supply.
8. Carefully pull out power supply towards
the rear until plug X60 becomes accessible.
9. Disconnect the female connector strip.
10. Push back locking levers of plug X12 on
right and left.
11. Disconnect female connector strip from
ribbon cable W1.
12. Undo four screws (3, Fig. A1.3 (EK!895) or
Fig. A1.4 (EK!896)) and remove together
with curved washers and other washers fix>
ing the TTY line current source and the
heat sink to the rear.
13. Remove heat sink and TTY line current
source.
14. Set the type of current by means of two
jumpers (see Fig. A1.12).
X3
X2
Single current *)
Double current
X3
X2
*) Basic setting ex works
15. Once the type of current has been set, carry
out steps 1 to 13 in the reverse order. Fold
ribbon cable W1 and turn by 90∞.
6164.0717.02_01
> A1.8 >

 Loading...