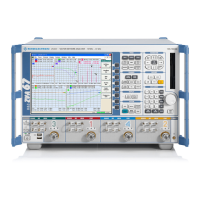
R&S ZVB Installing Options
1145.1078.82 4.2 E-4
Installing Options
The following options can be fitted to the R&S ZVB:
Oven Controlled Crystal Oscillator (OCXO)
Time Domain
Mixer and Harmonic Measurement
Direct Generator/Receiver Access
for R&S ZVB14 1145.1010.17 only (2-port)
for R&S ZVB14 1145.1010.19 only (4-port)
for R&S ZVB20 1145.1010.23 only (2-port)
for R&S ZVB20 1145.1010.25 only (4-port)
Generator Step Attenuator
for R&S ZVB4 and R&S ZVB8 only
for Port 1
for Port 2
for Port 3
R&S ZVAB-B4
R&S ZVAB-K2
R&S ZVAB-K3
R&S ZVB14-B16
R&S ZVB14-B16
R&S ZVB20-B16
R&S ZVB20-B16
R&S ZVB8-B21
R&S ZVB8-B22
R&S ZVB8-B23
1164.1757.02
1164.1657.02
1164.1592.02
1164.1240.17
1164.1240.19
1164.1240.23
1164.1240.25
1302.5480.02
1302.5073.02
1302.5496.02
Install according to the instructions that are supplied with the option.
These installation instructions can be appended to this chapter.
The OCXO option is permanently integrated on the frequency reference board (mod. 03, mod. 05) and,
as a rule, it is specified when the instrument is ordered. When it is retrofitted, the frequency reference
board must be replaced (replace mod. 02 or mod. 04 with mod. 05).
Installing hardware options:
CAUTION
Before installing the options, disconnect the mains cable.
Observe the safety instructions at the beginning of this manual.
The boards in the instrument are electrostatically sensitive devices (ESD). The
appropriate handling instructions for these devices must be observed (ESD
workstation).
Turn off the instrument and disconnect the mains cable.
Unscrew the 4 back-panel feet (460) and pull off the enclosure (400) towards the rear.
Follow the replacement instructions in Chapter 3
When installation has been completed, push the enclosure back into position and refit the the back-
panel feet.
CAUTION
When replacing the enclosure, ensure that no cables are damaged or pulled out:
Connect the mains cable and turn on the instrument.
 Loading...