Do you have a question about the Rokenbok Monorail Tower and Track and is the answer not in the manual?
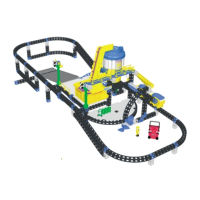
Initial assembly of the main track supports and base frame.
Securing the central tower component to the assembled base structure.
Building the lifting and transport mechanism for the tower.
Adding structural elements that will support the track sections.
Placing the first yellow curved track piece onto the supports.
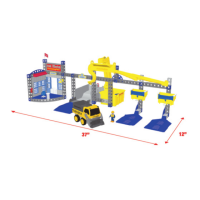
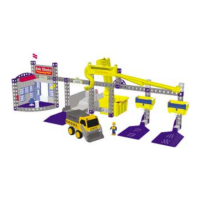
Adding the freight dock module to the main structure.
Attaching the conveyor belt system to the tower or dock.
Building out the track configuration towards the right side.
Incorporating a curved section of track into the layout.
Linking the extended track system to the central tower.
Expanding the track layout to form a more complete loop.
Creating a more intricate and multi-layered track arrangement.
Fine-tuning the connections and alignment of track pieces.
Further extension of the overall track layout for a larger circuit.
Completing the main track layout, ensuring all sections connect.
Incorporating additional structural elements and platforms.
Modifying and adding to the track design for improved play.
Attaching the last pieces of the track to complete the circuit.
Building an elevated section of track for dynamic play.
Incorporating stations for loading and unloading cargo.
Finalizing the base platform for the entire setup.
Attaching final accessories like signs, ladders, and figures.
Connecting extra components, such as the freight dock and water tower.
Completing the entire tower and track setup and performing a final check.
| Brand | Rokenbok |
|---|---|
| Material | Plastic |
| Category | Toy |
| Recommended Age | 6 years and up |
| Age Range | 6 years and up |
| Track Length | Varies by set |
| Compatibility | Compatible with other Rokenbok components |
| Power Source | Battery |