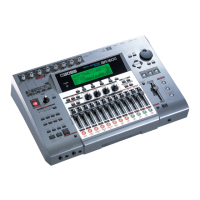
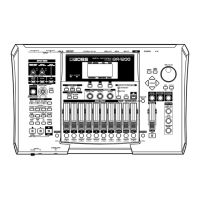
17
Feb. 2005 BR-1200CD
8. Press [ENTER/YES] once again.
The BR-1200CD will begin writing data to the CD-R/RW disc. When the
message “Complete!” appears, it indicates that the backup has been
successfully completed.
• The range of available write speeds can sometimes be limited by the type
of media being used. In such a case, the BR-1200CD will allow you to
select only the supported speeds.
• If an error occurs, try changing the write speed and then carry out the
writing process over again.
• The actual time required to complete writing to a disc will be longer than
the time calculated from the write speed. The data is converted into CD
format during the writing process, and this accounts for the extra time
requirement.
Reading backed-up hard disk
contents back into the hard disk
(HDD Recover)
1. Insert a CD-R/RW disc containing an HDD backup into the BR-1200CD’s
CD-R/RW drive.
The drive’s access indicator will begin to flash. Wait until this indicator
stops flashing and turns off before proceeding.
2. Press CD-R/RW [DATA SAVE/LOAD].
The Data CD Menu screen will appear.
fig.05-520d
3. Move the cursor to RECOVER icon, and press [ENTER/YES].
Alternatively, you can press [F2] (RECOVER) if the RECOVER icon is
currently displayed.
The Recover screen will appear.
fig.05-580d
4. Press [F3] (HDD).
The message “HDD Recover OK?” will appear.
fig.05-690d
5. Press [ENTER/YES].
The hard disk will be initialized and then the recovery process will begin.
When the message “Complete!” appears, it indicates that the recovery
has been completed successfully.
When HDD Recover is carried out, all data and songs that you have stored on
the hard disk will be overwritten with the contents of the CD-R/RW and
erased. As it will not be possible to restore data or songs erased in this way,
extra care should be taken.
TEST MODE
Required Equipment
• Oscillator
• Mixer or other device capable of balanced output (for input of signals to
XLR jacks)
• Oscilloscope
• EV-5 expression pedal
• FS-5U foot switch
• MIDI Cable
• Tester
• Noise meter
• Blank CD-RW disc (You can use one hundred times)
• Device equipped with DIGITAL IN (optical) connector
• Computer equipped with USB port (OS: Windows XP)
• Necessary cables for connections
• Stereo headphones
Initial Device Settings
INPUT SENS MAX
INPUT LEVEL MAX
VALUE 1-3 MAX
AUDIO TRACK 1-12 MAX
MASTER MAX
PHONES VOLUME CENTER
FOOT SW (FS-5U) Set the polarity switch to the jack side.
EXP PEDAL (EV-5) Set the MIN. VR to “0.”
Entering Test Mode
Simultaneously hold down the [TRACK1] and [UNDO/REDO] switches and
press the [POWER] switch.
Continue to hold down the [TRACK1] and [UNDO/REDO] switches until the
Test mode screen is displayed.
Switching Test Categories
Hold down the [STOP] button in press the following buttons to force a switch
to other test categories.
CURSOR [->]: Advance to the next category
CURSOR [<-]: Return to the previous category
To Exit Test Mode
Turn off the power to the unit.
Test items
Test mode covers the following items.
1. DEVICE
2. SW & LED
3. FOOT SW
4. EXP PEDAL
5. ENCODER & LCD
6. KNOB/FADER
7. MIDI
8. MUTE
9. GUITAR/MIC1 A/B
10. AF-AD
 Loading...