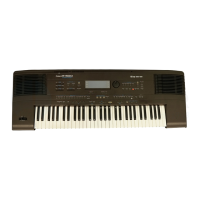
E-600
July, 1999
TEST MODE
Required items:
· MIDI Cable 1 (1.5 m)
· Microphone
· Oscilloscope
· KR-575 LCD Calibration sheet (part number 01675978)
· Touch-pen for PMA-5 (part number 00900545)
· 3,5inch Floppy Disk (formatted by E-600/ 2 HD x 1,2; DD x 1)
Test Main Menu'
In order to enter the different tests listed below, press each time the button "Next " or the button " Part Volume
Accomp ".
1. Calibration of the Touch Panel
2. Display of the Device Check and Rom Version
3. Factory Preset Setting
4. Control of buttons and LEDs
5. Control of the Speaker Panning and of Effect Sound
6. Esp check
7. A/D check
8. Touch Panel A/D check
9. Encoder check
10.MIDI check
11.Microphone check
12.FDD check
13.LCD check
14.LCD contrast check
15.Setup and Destination
16.Audio check
To enter the Test Mode
While pressing both [Track 4] and [Play] buttons, press Part Balance [Accomp].
The following display will appear and you will enter test mode.
How to go to the following test.
While you are in test mode, you can go to the following test by pressing the Part Balance [Accomp] button.
When the writing [Next] is displayed at the bottom of the screen, you can go on by touching it ([Next]).
NOTE: Do not play the keyboard while you are in test mode. If there is a malfunction, press the Part
Balance [Accomp]button several times until the display "Product Information" will be shown. Then
start the test again.
While you are in test mode (except in Device Check mode), you can adjust the LCD contrast by rotating the
Rotary Encoder keeping the Part Balance [Keyboard] button pressed.
1. Calibration of the Touch Panel
Calibrate the position of the Touch Panel this way.
To perform this test, original pen (Touch Pen for PMA-5, P/no. 00900545) and jig (KR-575Calibration Sheet,
P/No. 01675978) are required. Please order these jigs from the local Roland Service Center if necessary.
Place the Calibration sheet on the Touch Panel as shown in the following picture. The side with a notch should
become the upper.
After positioning the sheet, the display will appear as follows:
Touch the lower corner of each slit on the sheet with the Touch pen according to the
numbering shown in the following picture). When the E-600 recognizes the touch, "+" will change into "O".
This way, the writing "Touch Me" will appear to show the correct order, so please follow this indication. During
the Calibration, do not touch any point except "Touch Me". After touching the four points, the calibration step
ends and the display will show :

 Loading...