61
Arpeggio
Selecting an Arpeggio Template
1. Press the [Arpeggio] button.
The arpeggio function turns on, and the ARPEGGIO screen appears.
By holding down the [Shift] button and pressing the [Arpeggio] button, you can access the ARPEGGIO screen without turning the function on/o.
2. Use the Cursor [
K
] [
J
] buttons to select “Select Template,” and then press the [Enter] button.
3. Use the [-] [+] buttons to select an arpeggio template, and press the [Enter] button.
4. Press the [Exit] button to return to the program select screen.
MEMO
When you select a template, all arpeggio parameters are changed to the values of the template.
Creating an Arpeggio
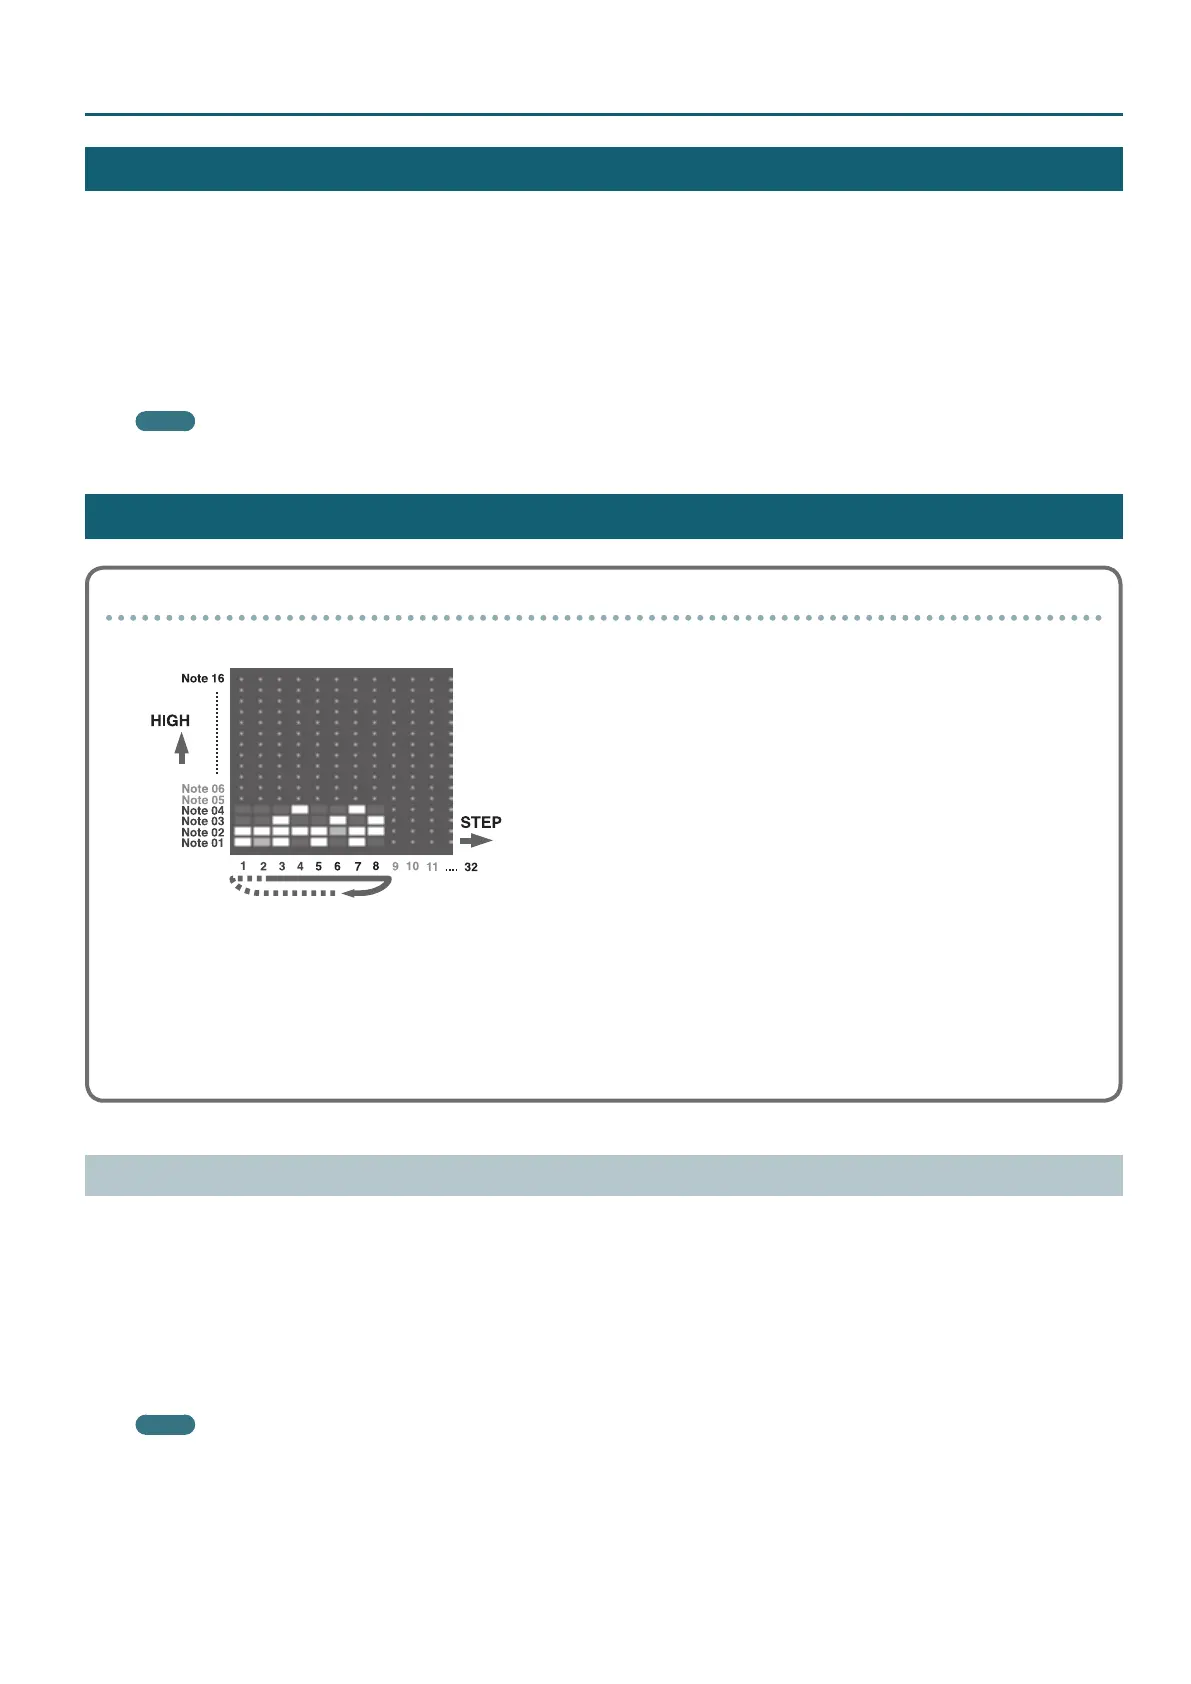
About arpeggios
An arpeggio contains data in a grid of up to 32 steps by 16 notes, with settings that specify the chord style and how the arpeggio is sounded.
Each grid location contains one of the following items of data.
5 On: Note-on (with velocity data)
5 Tie: Tie (hold the preceding note)
5 O (Rest): Rest (not sounded)
Based on “the lowest key you press during input,” the relative key position and order are stored in the arpeggio data.
Using the [-] [+] Buttons and [01]–[16] Buttons to Input Data
1. Hold down the [Shift] button and press the [Arpeggio] button.
The ARPEGGIO screen appears without changing the arpeggio on/o status.
2. Use the cursor [
K
] [
J
] buttons to select “Pattern Edit,” and press the [Enter] button.
3. Use the cursor [
K
] [
J
] buttons to select “End Step,” and specify the number of steps.
4. Use the cursor and [-] [+] buttons to select the note number that you want to input.
If data has been input for the specied note number, the [01]–[16] button corresponding to each step is lit.
MEMO
You can also use the keyboard to specify the note number and velocity at the same time.
5. Use the cursor and [-] [+] buttons to specify the velocity that you want to input.

 Loading...