Manual Version 3.21
Page. 20 of 73
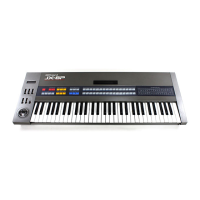
4.6 EDITING PROCEDURE – PATCH MODE (a)
1. Press the PATCH Edit button.
The PATCH button indicator lights up showing that you are now in EDIT mode. The Display changes as shown
below.
A. Factor Number and Factor Name are displayed
B. The value of each Factor is displayed
2. Using the Ten Keys, assign the number of the Factor whose value is to be changed. As shown below,
press the Ten Keys in the correct order to select the Factor number, then press the ENTER Key.
3. Using the α Dial, change to the desired value. It may be necessary to actually listen to the sound while
changing the value.
4. To continue to edit other Factors, repeat steps 2 and 3.
It is also possible to use the α Dial to call a Factor. After pressing the PARAM button, rotate the α Dial, and the
Factor shown in the Display will change sequentially. When the Factor you wish to edit appears in the Display,
press the VALUE edit button, then change the value with the α Dial.
This method is useful for when you are editing the Factor of a number close to what is already selected. However,
to continue to edit other Factors, be sure to press the PATCH then the PARAM buttons - then call the Factor you
want by using the α Dial.
When you have completed editing the Patch Memory, press the PATCH button. The PATCH indicator goes out and
the display returns to the usual indication except that the Bank and the Number of the Patch Memory flash -
showing that the Patch Memory has been edited but not yet written into memory. If you call another Patch Memory
at this stage, the edited Patch Memory will be erased. If you wish to keep your edit, execute the WRITE procedure.
b. Editing a Tone
A Tone consists of various parameters. Like any normal synthesizer, the JX-10 allows editing of these parameters
for sound synthesis. The JX-10, however, does not feature knobs or switches on its panel for you to touch or move.
Instead, there are two methods of synthesizing. One is to call each parameter and change the value. This method
does not allow editing of more than one parameter at a time, so may be used for making a slight edit during live
performance. Another method is to use the optional PG-800 programmer which works just like the panel controls
on a regular synthesizer. For quicker and easier editing or synthesis from scratch, the PG-800 may be essential.
1. Editing using the PG800 Programmer
As shown, connect the programmer and the JX-10 using the 6 pin DIN cable.
The PG-800 works just like the control panel of a normal synth, i.e., you can edit
the existing Tone or make a complete new Tone from scratch by actually using
physical sliders, knobs and buttons. Note: The PG-800 does not work when the
JX-10 is in WRITE mode.

 Loading...