Manual Version 3.21
Page. 29 of 73
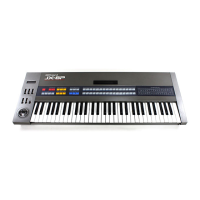
4.8 ARPEGGIATOR
This is a brand new function in place of the original sequencer (useless for today’s standards) featured in the
JX-10. The original Sequencer buttons [REC] [FUNCTION] and [START/STOP] now are used to trigger and
program the arpeggiator. There are 8 arpeggiator memories that can be recalled using buttons A–H. Buttons 1–7
are now used to recall arpeggiator parameters and settings.
Pressing the FUNCTION button toggles between an ARPEGGIATOR and INT/CART A1-H8 Patch.
To revert to Patch merely press the FUNCTION button again.
To start the arpeggiator press the START/STOP button
To edit arpeggiator parameters 1–7 press the FUNCTION button and edit settings with the α Dial.
To toggle the latch function on the arpeggiator press the REC button.
To save arpeggiator settings press the WRITE button, rotate the α Dial until “Write Arpeggiator” is displayed, then
press ENTER to save.
Important note:
• The Arpeggiator always works from the Upper Split point.
UP, DOWN, UP-DOWN, PLAYED, RANDOM
NONE, HIGHEST, LOWEST, UP 3 DOWN 1, UP 4 DOWN 2
1, 1/2 D, 1/2, 1/4 D, 1/2 T, 1/4, 1/8 D, 1/4 T, 1/8, 1/16 D, 1/8 T, 1/16'
1/16 T, 1/32
KEYBOARD, MIDI, ALL, KEYB+OUT, MIDI+OUT, ALL+OUT
The new firmware (ver. 3.x, 4.x) allows assigning the C1 and C2 sliders to select arpeggio parameters 1–7. To
assign one of the possible seven parameters either to slider C1 or C2:
PROCEDURE
1. Press the FUNCTION button. The Display responds with:
2. Press C1 or C2 button display responds with: (if it doesn’t, press ON/OFF button)
3. Using the α Dial, select the parameter 1–7 to assign either to C1 or C2 slider.
i.e.
These settings are relevant to the eight arpeggio memories available in the JX-10 and can be saved by pressing
the WRITE button, selecting “Write Arpeggiator” with the α Dial (see page 34)
and pressing ENTER to confirm the
operation. Also see page 63 – “arpeggiator addendum” section.
ARP-A 1 BPM
C1 ARPEG 11 BPM
C2 ARPEG 11 BPM
C1 ARPEG 12 MODE Up
C2 ARPEG 15 PLAY RATE 1

 Loading...