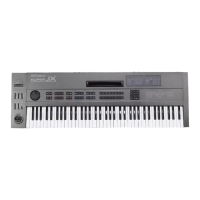
The JX-10 allows writing of some MIDI functions with each Patch Memory. Therefore, when the JX-10 is controlling
another MIDI device, changing Patch Memories on the JX-10 can automatically change the relevant transmitting
MIDI functions! In other words, some MIDI functions are Factors of Patch Memories.
a. Receiving and Transmitting MIDI Messages
1) Setting MIDI Channels
The JX-10’s MIDI allows setting of two different channels separately for the Upper and the Lower sections. Even
when different channels are assigned to the Upper and the Lower. In Dual Key Mode, the JX-10 will be played with
the Note ON/OFF messages (Key Information) sent on the MIDI channel assigned to the Upper. The MIDI channel
of the Lower is ignored. Likewise, when the Key mode is set to Lower Whole, the JX-10 is played with the Note
ON/OFF messages of the Lower section. When in Split Key mode, the Upper and Lower sections are played
independently with messages sent on each MIDI channel.
The Program Change messages basically work to change the Tone Numbers. Therefore, if two different MIDI
channels are separately set for the upper and the lower sections, the Tone of each section can be changed
independently.
The Program Change messages can also change the Patch Memories. This is fully explained later in “
Selecting a
Patch Memory with MIDI Program Change”.
1. Using the edit buttons, press the MIDI button.
The corresponding indicator will illuminate, and the Display will show the MIDI function previously selected.
Now, using the Ten Keys, assign the number of the MIDI Function you wish to change. Here, we are going to
assign the MIDI Channel for the Upper section, so enter the numbers 1, 3.
2. Press 1, 3 and ENTER using the Ten Keys.
3. Using the α Dial, change the MIDI channel number.
To set the MIDI channel for the Lower section, press 1, 4 and ENTER as in step 2.
Note that the MIDI channels you have set above will be erased from the memory of the JX-10 unless you follow the
WRITE procedure.

 Loading...