Quick Guide
14 1510 11 12
13
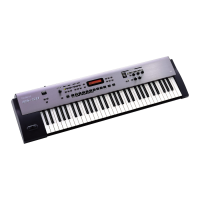
10 Display
This shows the Tone name, the Live Set names and the values of various
settings, etc.
* The explanations in this manual include illustrations that depict
what should typically be shown by the display. Note, however, that
your unit may incorporate a newer, enhanced version of the system
(e.g., includes newer sounds), so what you actually see in the
display may not always match what appears in the manual.
11 Cursor buttons/Value dial
[DEC] button, [INC] button
These are used to modify values.
If you keep on holding down one button while pressing the other, the
value change accelerates.
Value dial
This is used to modify values.
Cursor [ ] [ ] [ ] [ ] buttons
Press these to switch pages and to move the cursor.
[EXIT/SHIFT] button
Pressed to return to a previous screen or to cancel a procedure.
Additionally, you can easily call up Edit screens for related parameters
by holding down this button while pressing buttons, turning knobs, or
operating other controllers. For details, refer to “List of Shortcut Keys” (p. 64).
If you edit a parameter value while holding down this button, the value
will change more greatly.
[ENTER] button
This is used to nalize a value or execute an operation.
12 LIVE SET buttons
Select Live Sets in each bank.
13 TONE buttons
Select tones in each category.
page 13
page 13
14
[LIVE SET EDIT] button
This allows you to change the Live Set settings.
In addition, you can listen to the demo songs by simultaneously pressing
this button and the [RHYTHM/SONG] button.
[WRITE] button
Stores the current settings to “Live Set.”
In certain screens (such as the System screen), pressing this button will
store the system parameters (p. 43).
[SPLIT/LOWER SELECT] button
This button selects “Split mode,” whereby the keyboard is divided into
two regions, allowing you to play separate sounds with the right and left
hands.
15 Rhythm/Song
[RHYTHM/SONG] button
Accesses a screen where you can select songs or rhythms.
In addition, you can listen to the demo songs by simultaneously pressing
this button and the [LIVE SET EDIT] button.
[AUDIO REC] button
This is the record button. It allows you to record your performance on the
RD-800.
[PLAY/STOP] button
Start/stops playback of the song or rhythm.
16 [S1] button, [S2] button
You can assign various functions to these buttons. While performing, you
can press these buttons to use the assigned functions.
17 Pitch bend/Modulation lever
This allows you to control pitch bend or apply vibrato.
NOTE
The eect of moving the lever will dier depending on the tone. The
eect of this lever is xed for each tone, and cannot be changed.
page 21
page 23
page 13
page 24
page 24
page 25
page 30
page 12
17

 Loading...