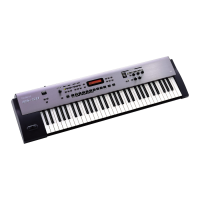
RS-5 Jan. 2001
12
1 : Memory Test
• Check the CPU and FLASH ROM (PROGRAM MEMORY).
• OK will be displayed if no problems occur and automatically
proceeds to the next test.
• Check the following parts if NG is displayed.
CPU NG : MAIN BOARD IC2,X1,R11
ROM NG : MAIN BOARD IC35
Pressing [ENTER] proceeds to the next test.
• Check the DRAM and EEPROM.
• OK will be displayed if no problems occur and automatically
proceeds to the next test.
• Check the following parts if NG is displayed.
DRAM NG : MAIN BOARD IC4
EEPROM NG : MAIN BOARD IC36,R41,R44
Pressing [ENTER] proceeds to the next test.
• Check the WAVE ROM and DSP.
• OK will be displayed if no problems occur and automatically
proceeds to the next test.
• Check the following parts if NG is displayed.
WAVE NG : MAIN BOARD IC15
DSP NG-INT : MAIN BOARD IC14,X2
DSP NG-EXT : MAIN BOARD IC23
Pressing [ENTER] proceeds to the next test.
2 : MIDI Test
• Connect MIDI IN and MIDI OUT with MIDI cable.
• OK will be displayed for proper function.
• Then, remove the MIDI cable from MIDI IN and MIDI OUT.
• OK will be displayed for proper function and automatically
proceed to the next test.
• Check the following parts if NG is displayed.
MAIN BOARD JK1, IC1, IC6, L3~8, R5~10, R12, R16, R20,
Q1
Pressing [ENTER] proceeds to the next test.
3 : Switch & LED Test
• All the LEDs will light up when entering this test.
• Pressing the switch will display the switch name on the screen.
• Pressing a switch with LED lit will turn the LED off after
flashing for one second.
• At the upper right of the screen, the number of switches are not
yet pressed are displayed.
• [MANUAL] - [CONTROL] - [LFO ON/OFF] - (FAVORITE
PERFORM BANK)[1] - [2] - [3] - [4] - [5] - [6] - [7] - [8] -
[PHRASE PREVIEW] - [UTILITY] - [SPLIT] - [DUAL] -
[TONE CATEGORY] - [PART <] - [PART >] - [ARPEGGIO
ON/OFF] - [EFFECT ON/OFF] - [PERFORM/TONE] -
[VALUE -] - [VALUE +] - [SHIFT] - [TRANSPOSE ON/
OFF] - [USER/PRESET] - (TENKEY)[1] - [2] - [3] - [4] - [5] -
[EDIT/EXIT] - (TENKEY)[6] - [7] - [8] - [9] - [0] - [ENTER]
Pressing the switches in this order generate a scale from low to
high.
• Check with headphones or speakers.
• Automatically proceeds to the next testing item when all
switches are pressed and functioning properly.
* However, pressing multiple switches simultaneously
cancels them out.
• Check the following parts when the LEDs fail to light up or go
out and the screen display is incorrect.
MAIN BOARD IC3, IC26, IC28, IC29, RA21~22, RA26~27,
Q13~23, CN7, CN8
PANEL A BOARD each LED, SW, DA, R36~38, CN4
PANEL B BOARD each LED, SW, DA, R11~14, CN3
Pressing [SHIFT] + [ENTER] proceeds to the next test.
4 : LCD & 7-segment LED Test
• When entering the test, all the LCD segments go out and the
contrast is maximum.
• When pressing the VALUE [+], all the LCD segments will
light up and the contrast will become dense from the minimum
value in order.
• If you keep on pressing VALUE [-], LCD contrast will become
light.
• When the contrast is 1 to 8, FAVORITE PERFORM BANK 1
to 8 will light up, and the 7-segment LED display will change
from "1.1.1.’ to "8.8.8.’

 Loading...