TBS195 ©2003 Roland Corporation U.S.
www.RolandUS.com
Faxback #20228 Page 2
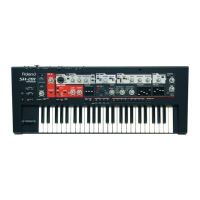
Active Expression
1. Press ACTIVE EXP so it’s lit.
2. Hold down several notes on the keyboard and
move your hand over the D Beam. The volume
of the notes you’re holding down varies
according to your hand movements.
Assignable
1. Press ASSIGNABLE so it’s lit.
2. Play the keyboard and move your hand over the
D Beam. The currently assigned effect is heard.
3. Use the VALUE -/+ buttons to select another
effect. This setting is automatically remembered
the next time you turn on ASSIGNABLE.
4. Press ASSIGNABLE so it’s not lit to turn off the
D Beam.
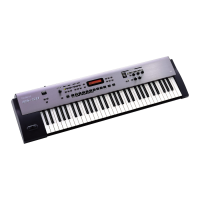
Using the Rhythm Guide
The Rhythm Guide provides an easy way to produce
great-sounding rhythm patterns:
Selecting a Rhythm Pattern
1. Press PERFORM so it’s lit.
2. Press RHYTHM GUIDE so it’s lit—the rhythm
begins playing.
3. Use the VALUE -/+ buttons to select various
rhythm patterns.
4. Press RHYTHM GUIDE again to halt playback.
Note: You can select a pattern without playing it by
holding SHIFT when you press RHYTHM GUIDE.
You can then press ENTER to start playback.
Switching Sounds
5. While the pattern is playing, press PART
SELECT so it’s lit.
6. Press the RHYTHM & SFX button so it’s lit, and
use the VALUE -/+ buttons to select a rhythm kit.
Changing the Tempo
7. Press TAP TEMPO so it’s lit—the current tempo
of the pattern is displayed in the screen.
8. Use the VALUE -/+ buttons to adjust the tempo.
9. Press EXIT to return to the previous screen.
Note: You can also press the TAP TEMPO button
three or more times to manually tap in the desired
tempo.
Splitting the Keyboard
Each patch on the RS-50 uses two tones called the
“upper tone” and the “lower tone.” The Key Mode
setting lets you determine how these two tones are
played from the keyboard. Use the following
procedure to split the keyboard and select sounds:
1. Press PATCH so it’s lit.
2. Press KEY MODE so SPLIT is lit. The upper
tone now plays in the upper part of the keyboard
and the lower tone plays in the lower part of the
keyboard.
3. Press PARAM beneath EDIT so it’s lit.
4. Press DESTINATION TONE so UPPER is lit,
and then use the VALUE -/+ buttons to select a
tone for the upper part of the keyboard.
5. Press DESTINATION TONE so LOWER is lit,
and then use the VALUE -/+ buttons to select a
tone for the lower part of the keyboard.
6. Press EXIT to return to the Patch Play screen.
Note: A good example of a split patch is Pf12: RS
Grand/Abs.
Creating a Layered Sound
Let’s set up a layer with a piano sound and a string
sound:
1. Press PATCH so it’s lit, and then press PIANO.
2. Press KEY MODE so DUAL is lit—both the
upper and lower tone play together across the
whole keyboard.
3. Press PARAM under EDIT so it’s lit.
4. Press DESTINATION TONE so UPPER is lit,
and then use the VALUE -/+ buttons to select a
piano tone.
5. Press DESTINATION TONE so LOWER is lit,
and then use the VALUE -/+ buttons to select a
string tone.
6. Press EXIT to return to the Patch Play screen.
Note: A good example of a layered sound is Pf13:
RS Grand&Pad.
 Loading...