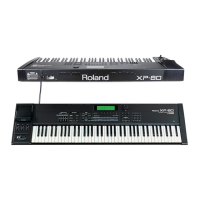
XP-60Apr. 1998
13
2) Next, aligning the positioning bosses of RUBBER
SWITCH with the circular holes of SPACER, and as
done for the spacer, place four RUBBER SWITCH 12PL,
and one RUBBER SWITCH 13P in order, starting on the
lower tone side.
In this procedure, make sure that RUBBER SWITCH and
SPACER are positioned with their cutout parts and
ascape grooves aligned, respectively.
(Refer to fig. 3 and fig. 4.)
3) Next, using the cutout part of PCB and the projecting part
of SPACER as positioning guide, place PCB so that the
positioning pin of SPACER fits into the positioning hole
of PCB. (Refer to fig. 5)
As fig. 6 shows, PCBs consist of three boards, "LOW"
and "HI".
fig.6
fig.5
Projecting Part of SPACER
PCB Cutout Part
Positioning Pin of SPACER
Bass Side Treble Side
32P LOW
29P HI
fig.3
Posisioning Boss(6 points)
RUBBER SWITCH
PCB SPACER
Chassis
fig.4
Air-Escape Groove
Cutout Part
2) 次に、SPACERの丸穴部にRUBBER SWITCHのボス
を位置決めして、SPACERと同様に低音側より順に
RUBBER SWITCH 12Pを4個、RUBBER SWITCH
13Pと置いていきます。
この際、RUBBER SWITCHとSPACERの外形切り欠
き部、及び空気溝の位置が合うように注意してくだ
さい。(fig. 3 fig. 4参照のこと)
3) 次に、PCBの切り欠き部とSPACERの凸部を目印と
して、SPACER の位置決めピンにPCBの位置決め穴
がはまるようにPCBをおきます。(fig. 5参照のこ
と)
PCBは、fig. 6で示されるようにLOW、HIの2枚で構
成されています。
 Loading...