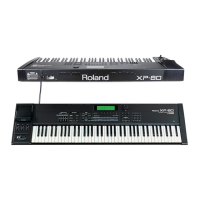
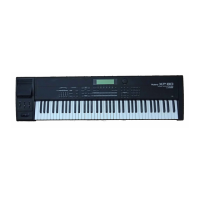
XP-60 Apr. 1998
16
FACTORY PRESET
1. Press the UTILITY button to access the Utility menu
display.
2. Press the 8(tenkey), and press the ENTER button to
access the display for factory preset function.
3. Press the F6.
VERSION UP THE FLASH ROM
XP-60 use FLASH ROM in the early lots. S/N from Z**0100
to Z**1099.
These following that, how to update FLASH ROM.
Required item
Two 2HD FDs for update of XP-60.
XP-60 Ver. UP DISK SET (PNO. 17048904).
Method
1. Load DISK 1 into the disk drive.
2. Power on.
3. LCD Backlight on , and display shows nothing in a few
seconds.
4. Display shows "Now Erasing Flash ROM".(for about 30
seconds)
5. Display shows "Now Writing Flash ROM". LED of Disk
drive lighting.(for about 40 seconds)
6. Display shows "Please Insert The 2nd Disk". LED of
STOP/PLAY lighting orange.
7. Pull out DISK 1, then load DISK 2.
8. Display shows "Now Writing Flash ROM". LED of Disk
drive lighting.(for about 40 seconds)
9. Display shows "Flash ROM Has Been Successfully
Updated". LED of STOP/PLAY lighting green.
10.Pull out DISK 2, then power off.
NOTE : When display shows error message, or any LED
light red, check IC7 and IC10 on main board. (solder
not complete)
NOTE : When update program ROM, the Bender &
Modulation must be readjusted.
For details, refer to the [Bender & Modulation
Adjust] item in the test mode. (p.20)
When updating the programmed MASK ROM from LOT 11
onwards (S/N Z**1100-), replace the MASK
ROM(01564056) or MAIN BOARD ASSY(71018956).
ファクトリープリセットの方法
1. UTILITYボタンを押してユーティリティ・メニュー
画面を表示させます。
2. 8(テンキー)を押してからENTERボタンを押す
と、ファクトリープリセットの画面になります。
3. F6を押します。
フラッシュROMのバージョンアップの方法
XP-60は初期ロットのみフラッシュROMを搭載してい
ます。(S/N Z**0100-Z**1099)
それらのバージョンアップは次のようにして行います。
用意するもの
バージョンアップ用ブートディスク2HD2枚。
XP-60バージョンアップディスクセット
(PNO. 17048904)。
方法
1. DISK 1 をディスクドライブに挿入します。
2. 電源を入れます。
3. LCDのバックライトが点灯しますが、暫くの間は何
も表示されません。
4. "Now Erasing Flash ROM"と表示されます。
(約30秒)
5.
"Now Writing To Flash ROM"と表示が変わりディスクド
ライブのインジケーターが点滅します。(約40秒)
6. "Please Insert The 2nd Disk"と表示されBEAT のLED
がオレンジ色で点滅します。
7. DISK 1 を抜いてDISK 2を挿入します。
8. "Now Writing To Flash ROM"と表示が変わりディスクド
ライブのインジケーターが点滅します。(約40秒)
9. "Flash ROM Has Been Successfully Updated"と表示さ
れBEATのLEDが緑色で点滅します。
10.ディスクを抜いて電源を落とします。
注: エラーメッセージが出たり、LEDが赤く点滅し
たら、メインボードのIC 7,10をチェックして下
さい。(半田不良)
注: プログラムROMのバージョンアップを行った
場合、ベンダーとモジュレーションの再調整が
必要になります。
詳しくはテストモードの「ベンダー&モジュレー
ション調整」(p.20)の項をご覧下さい。
11ロット以降(S/N Z**1100-)のROMのバージョンアップ
はMASK ROM(IC10 S/N 01564056) を交換して頂くか、
メインボードASSY(71018956)を交換してください。
 Loading...