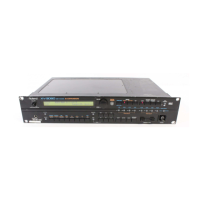
JAN, 2000 XV-3080
11
•
When the test ends normally, the processing will automatically pro-
ceed to the next test item.
6 : MIDI Test
fig_test9.eps
•
Connect MIDI IN to MIDI OUT with a MIDI cable. Check that "Connec-
tion OK" appears on the display.
fig_test10.eps
•
Detach the MIDI cable from MIDI IN and MIDI OUT. Check that "OK"
appears on the display.
fig_test11.eps
If the display is not correct, check IC86 and IC87 on the main board.
•
When the test ends normally, the processing will automatically pro-
ceed to the next test item.
7 : Sound Test #1
fig_test12.eps
•
Press [VALUE], and sound will be output to each output terminal in the
following order and the output destination will appear on the display.
Check the sound output with the monitor speaker and the headphones.
NOTE: Since the output terminals are different, reconnect the audio
cable as necessary.
1) OUTPUT 1 & Headphone L (Sine wave)
2) OUTPUT 2 & Headphone R (Sine wave)
3) OUTPUT 3 (Square wave)
4) OUTPUT 4 (Square wave)
5) OUTPUT 5 (Saw tooth wave)
6) OUTPUT 6 (Saw tooth wave)
•
The number of the output destination disappears when sound is output.
•
You can directly select an output destination by pressing [1/9] to [6/14].
If sound is not output correctly, check the following points depending
on the output destination.
No output at all : Main board Q23 to Q2626, IC76
OUTPUT 1, 2 & Headphone L, R
: Main board CN16, Phones board CN5
OUTPUT 1, 2 : Main board IC70 to 72, Phones board IC1
OUTPUT 1 only : Main board Q19, C233, C220, Phones board C3
OUTPUT 2 only : Main board Q20, C245, C228, Phones board C7
Headphone L, R : Main board IC69
Headphone L only : Main board Q17, C214
Headphone R only : Main board Q18, C226
OUTPUT 3,4 : Main board IC73 to IC75
OUTPUT 3 : Main board Q21, C253
OUTPUT 4 : Main board Q22, C259
OUTPUT 5,6 : Main board IC80, IC78, IC79
OUTPUT 5 : Main board Q27, C283
OUTPUT 6 : Main board Q28, C292
•
When the test is completed and [VALUE] is pressed, the processing
will proceed to the next test items.
8 : Sound Test #2
fig_test13.eps
•
A test sound is output from OUTPUT1 and 2 and headphones L and
R. Check the connection of the monitor speaker.
•
Press [VALUE], and the test sound will begin.
fig_test14.eps
•
Press [VALUE], and the test sound will be stopped.
fig_test15.eps
If no sound is output or the sound does not stop, check IC90, IC92,
IC93, and IC105 on the main board.
•
When the test is completed and [VALUE] is pressed, the processing
will proceed to the next test items.
9 : Factory Reset
fig_test16.eps
•
Press [VALUE], and factory reset will be performed.
* Factory reset must always be performed at the end of the TEST
mode.
•
Press [EXIT], and the display will show the top page in the TEST
mode.
・ テストが正常に終了すると、自動的に次のテスト項目になります。
6 : MIDI Test
・ MIDI IN と MIDI OUT を MIDI ケーブルで接続します。
"Ccnnection OK" が表示されることを確認します。
・ MIDI IN と MIDI OUT から MIDI ケーブルを抜きます。
OK の表示が出ることを確認します。
表示が正しくない場合は、メインボードの IC86,IC87 をチェックし
て下さい。
・ テストが正常に終了すると、自動的に次のテスト項目になります。
7 : Sound Test #1
・ [VALUE] を押していくと各出力端子に以下の順序でサウンドが出力さ
れ、出力先がディスプレイに表示されます。
出力される音をモニタースピーカーとヘッドホンで確認します。
注:出力される端子が それそれ異なるので、適宜オーディオケーブル
を接続し直してください。
1) OUTPUT 1 & ヘッドホン L ( サイン波 )
2) OUTPUT 2 & ヘッドホン R ( サイン波 )
3) OUTPUT 3 ( 方形波 )
4) OUTPUT 4 ( 方形波 )
5) OUTPUT 5 ( のこぎり波 )
6) OUTPUT 6 ( のこぎり波 )
・ サウンドが出力されると、出力先の番号が消えます。
・ [1/9] - [6/14] を押すと出力先を直接選択できます。
音が正しく出力されない場合は、その出力先によって以下の個所を
チェックして下さい。
全て出力されない メインボード Q23 ~ 26,IC76
OUTPUT 1,2 & ヘッドホン L,R
メインボード CN16, フォーンズボード CN5
OUTPUT 1,2 メインボード IC70 ~ 72, フォーンズボード IC1
OUTPUT 1 のみ メインボ ード Q19,C233,C220, フォーンズボード C3
OUTPUT 2 のみ メインボード Q20,C245,C228, フォーンズボード C7
ヘッドホン L,R メインボード IC69,
ヘッドホン L のみ メインボード Q17,C214
ヘッドホン R のみ メインボード Q18,C226
OUTPUT 3,4 メインボード IC73 ~ 75
OUTPUT 3 メインボード Q21,C253
OUTPUT 4 メインボード Q22,C259
OUTPUT 5,6 メインボード IC80,IC78,IC79
OUTPUT 5 メインボード Q27,C283
OUTPUT 6 メインボード Q28,C292
・ テストを完了し、 [VALUE] を押すと、次のテスト項目になります。
8 : Sound Test #2
・ テスト発音は、OUTPUT1,2 とヘッドホン L,R から出力されます。モ
ニタースピーカーの接続を確認してください。
・ [VALUE] を押すとテスト発音を開始します。
・[VALUE] を押すとテスト発音を停止します。
音が出力されない、または停止しない場合、メインボード
IC90,IC92,IC93,IC105 をチェックして下さい。
・テストを完了し、 [VALUE] を押すと、次のテスト項目になります。
9 : Factory Reset
・ [VALUE] を押すとファクトリーリセットを実行します。
※ テストモードの最後には必ずファクトリーリセットを行ってく
ださい。
・[EXIT] を押すとテストモードトップページになります。

 Loading...