Operation of Quick Release Mechanisms
IMPORTANT: IF YOU DO NOT UNDERSTAND ANY PORTION OF THESE INSTRUCTIONS,
HAVE YOUR ROLF PRIMA DEALER SHOW YOU PROPER INSTALLA-
TION OR CONTACT ROLF PRIMA DIRECTLY.
1. Check both wheels before every ride.
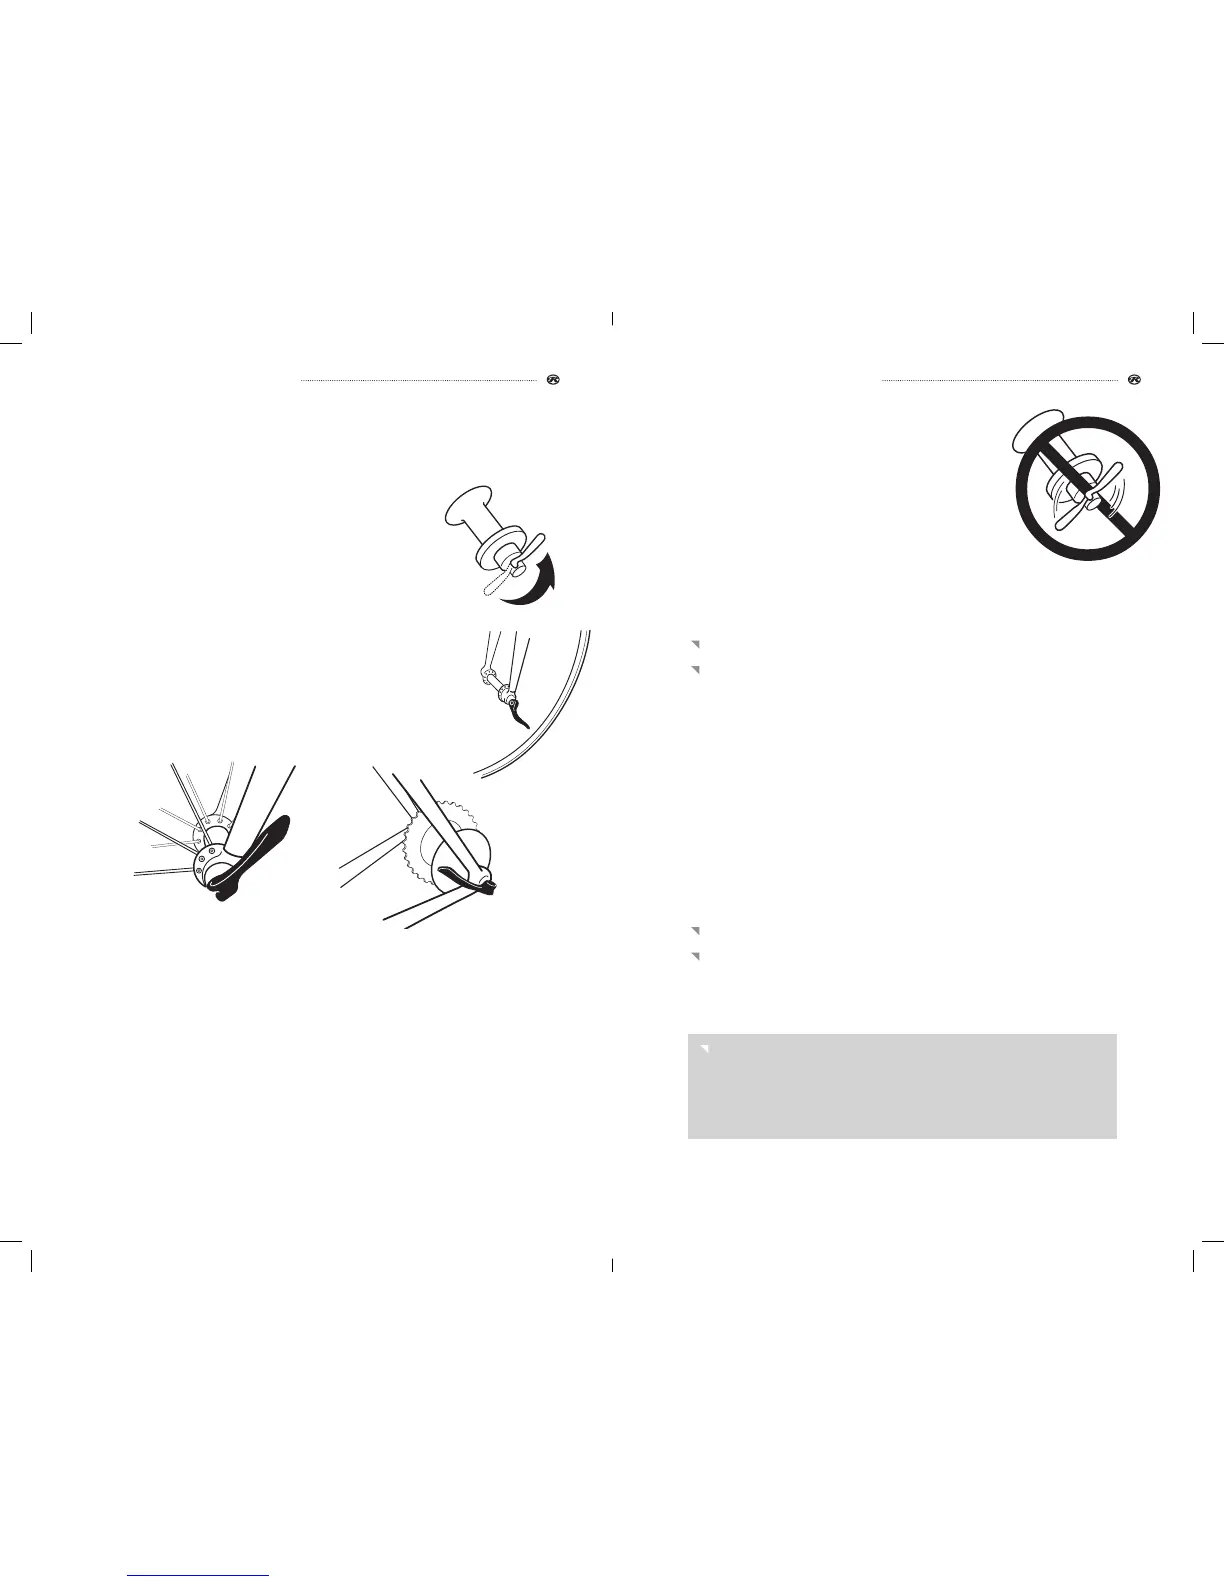
2. Move the quick release lever to the OPEN position and set the
wheel so it seats firmly in the frame or fork tips [figure 1].
3. With the lever about halfway between the OPEN and CLOSED
position [fig. 2], tighten the quick release adjusting nut on the
opposite end of the quick release axle until finger tight, ensuring that
the nut is threaded on a minimum of 5 turns.
4. Place the quick release lever in the palm of your hand and move the
lever fully into the CLOSED position. [figure 3 for front wheels, figure
4 for rear wheels]. At the halfway closed position you should feel
resistance to this motion.
5. If the quick release lever can be moved to the CLOSED position with little or no
resistance, clamping strength is insufficient. Return the lever to the OPEN position
and tighten the nut further. Close the lever, testing again for resistance. When the
quick release mechanism is properly tightened and clamped in the closed position, the
clamping force will be adequate to cause metal into metal engagement [embossing] of
the fork or frame tips. It should require effort to close the Quick Release, yet it should
not be difficult.
DO NOT TIGHTEN THE QUICK RELEASE MECHANISM BY USING THE QUICK
RELEASE LEVER LIKE A WING NUT [FIG 5]. OVER-TIGHTENING THE QUICK RELEASE
MECHANISM MAY CAUSE DAMAGE TO THE QUICK RELEASE ASSEMBLY.
6. Perform these two tests to ensure that the quick release
mechanisms are properly closed:
A. Lift the front of the bicycle and give the top of the tire
a sharp downward blow with a closed fist. The wheel
should not come out of the fork, be loose, or move
from side to side. Repeat this test to the rear wheel. If
uncertain, repeat the tightening process, as shown in
steps 2-6, above.
B. With the quick release lever properly adjusted and closed,
it will not be possible to rotate the quick release lever in a circular motion parallel to
the wheel as pictured in figure 5.
Inspection – Weekly
Check that there are no loose, damaged, or broken spokes
Check that there are no cracks in front or rear rims
As alloy rims near the end of their fatigue life, cracks may develop. If cracks are found, do not ride
the wheel. Take the wheel to your Rolf Prima dealer or contact Rolf Prima for service.
Carbon fiber rims may become damaged as a result of an accident, impact, or improper handling.
Damage to carbon fiber components may be contained internally, and the rims may appear
outwardly normal and undamaged at a glance. It is very important to thoroughly inspect all the parts
on your bicycle after an accident – but it is especially important that you thoroughly inspect your
carbon fiber rims for signs of damage. Look closely for cracks, deep scratches or gouges, delamina-
tion, loose fibers and other surface flaws. If you suspect the rim has been damaged, take your wheel
to your Rolf Prima dealer for further inspection.
Inspection – Monthly
Check that there is no excessive looseness in hub bearings in both wheels
Check both rims for wear
Bicycle rims will wear from the friction of rim braking and may eventually require replace-
ment. Inspect the rim sidewalls and braking surfaces for heavy grooving or cracks.
WARNING!
Inspect your wheels regularly. Make sure your Quick Release mechanisms are
closed properly before each ride. Worn or damaged components, or improperly
closed Quick Release mechanisms can cause an accident which may result in
serious injury or death.
CLOSED
OPEN
OPEN
CLOSED
FIGURE 1
FIGURE 2
FIGURE 3
FIGURE 4
FIGURE 5
 Loading...