46
ENGLISH
Using the Wall Mount
CAUTION!
Prior to drilling check that no supply pipes are concealed in the wall!
− First mark the holes to be drilled [A], by holding the base of the wall fixing
against the desired place of installation. When installing on stone or
concrete surfaces use a 6 mm masonry drill.
− After drilling the holes insert the supplied wall plugs into the holes so that
they are flush with the surface.
− Next secure the stand using screws from the assembly kit.
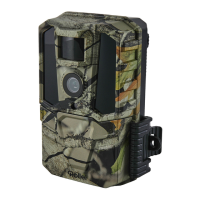
− Next place the wildlife camera onto the tripod bolt [B] and partly secure
the camera (approx. 3 turns). Turn the camera to the desired alignment and
secure with the counter screws [C].
Prior to installing the Wildlife Camera on the wall mounting a
memory card or batteries should be inserted or the power supply
should be connected. The camera should also be switched to „On“.
Don´t try to mount the camera facing the rising or setting sun. If
mounting to a feeder or in a dusty environment , be sure to clean the
camera lens and the PIR sensor regularly.
Periodically check the mounting of the camera to make sure it hasn’t
come loose. Check the batteries frequently to ensure they are still
providing power to the camera.


 To Next Page