from the side.
The ideal case is a completely flat plane. The (imaginary) subject plane can also be determined by individual significant points of a three-dimensional subject. Parts of the
subject to either side of this plane are reproduced with acceptable sharpness as long as they lie within the depth of field zone.
When using the depth tilt, the lens is always tilted towards the subject plane. Also be sure to use the correct value for the vertical distance of the camera from the subject
plane. When photographing a table top this distance is the camera height above the surface of the table; when photographing a ceiling it is the vertical distance from the
camera to the ceiling. The camera height becomes equal to the height of the tripod on which it is mounted only when shooting obliquely down on to the floor.
To get an idea of the use of the indicator, practice first finding the correct settings for imaginary subject conditions. This will also give an idea of the scope of this
procedure. You will find for instance that with the 80 mm lens, maximum lens tilt and a vertical distance of about 0.6 metros, the sharpness at full aperture can extend from
infinity down to as near as 1 meter.
After some practice with actual subjects you will soon gain sufficient experience to control the coverage in depth even without the indicator. For example:
Focusing with the depth tilt: Select the subject field to be covered on the focusing screen. Focus the lens sharply on the subject in the centre of the image. Keep this
distance setting fixed. Slowly tilt the lens and adjust the camera position so that the sharply focused centre of the subject remains in the centre of the screen. When the
subject appears fully sharp also at the upper and lower edges of the screen, you have the correct lens tilt. Now turn the focusing knob slightly to and fro to check whether
you really have the entire image focused for maximum sharpness.
Care of the Camera
The Rolleiflex SL 66 calls for the same care as any camera of which you expect long-term reliability. For cleaning use the following well tried methods:
Remove dust with a soft camel hair brush or a rubber blower bulb. To clean lens surfaces, breathe on them and remove persistent dirt with a soft, dry and fluffless
(frequently washed) rag. As an anti-static protection breathe on the glass surface but then let the deposited mistiness evaporate on its own.
Use special care in cleaning the Rolleiclear focusing screen: the embossed underside must only be treated with a soft brush or air blower. Protect this side especially against
soiling and finger marks.
Protect the camera against the constant influence of harmful vapors or moisture.
The increased atmospheric humidity in tropical and sub-tropical areas represents a corrosion risk to metal parts, and can give rise to mould on leather surfaces and to
fungus growth on glass surfaces. If at all possible, dry the camera frequently by fresh air and bright sun. Keep the magazine and surfaces in contact with the emulsion
specially clean (gelatins fragments rubbed off the film are particularly likely to breed fungus). When not in use for longer periods keep the camera in a light tight container
together With silica gel cartridges. Store the leather eveready case separately. Particularly protect the camera against every kind of dirt. .
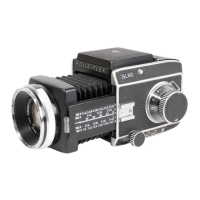
The Rolleiflex SL 66 and Accessories
We reserve the right to make any technical changes in the camera and its accessories
 Loading...