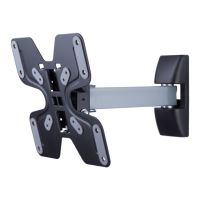
The device described in the manual is a ROSS Tilt & Turn TV Wall Mount, model number LN2SA200. It is designed to securely attach a television to a wall, offering both tilt and turn functionality for optimal viewing angles.
Function Description:
The primary function of this device is to provide a stable and adjustable mounting solution for televisions. It allows users to position their TV on the wall, freeing up space and enhancing the aesthetic of a room. The "tilt & turn" feature indicates that the mount can adjust the vertical angle (tilt) of the TV and also swivel it horizontally (turn), providing flexibility to achieve the best viewing experience from various positions within a room. This adjustability is crucial for reducing glare, accommodating different seating arrangements, and optimizing viewing comfort. The mount is designed for easy installation, with clear instructions and included hardware to facilitate the process.
Important Technical Specifications (Derived from included parts and instructions):
- Mount Type: Tilt & Turn TV Wall Mount.
- Mounting Surface Compatibility: Designed for installation onto a wooden joist or a solid wall. It explicitly warns against installation into plasterboard alone, emphasizing the need for a robust anchor point.
- Installation Hardware:
- Mounting Plate (A): The main wall-mounted component.
- Self-Taping Screws (B): x4, likely for wooden joist installation.
- Wall Plugs (C): x4, for solid wall masonry installation.
- Allen Key (D): x2, used for tightening angling bolts.
- Covers (G): x1, for aesthetic finishing of the base unit.
- TV Hooks (H): x2, these attach to the back of the TV.
- Various TV Screws (H1, H2, H3, H4, H5, H6, H7, H8): A comprehensive set of screws (M4, M5, M6, M8) in different lengths (M4 x4, M4 x4, M5 x4, M5 x4, M6 x4, M6 x4, M8 x4, M8 x4) to ensure compatibility with a wide range of TV brands and models. The manual includes a visual guide for selecting the appropriate screws based on TV requirements.
- Washers (O1, O2): x4 each, likely for use with the TV screws to protect the TV's back panel or ensure a secure fit.
- Adjustability: Features angling bolts that can be tightened with an Allen key to set the desired angle. The "tilt & turn" designation implies a range of motion for both vertical and horizontal adjustments.
- Security: Includes a secure bolt on the bracket that needs to be loosened during installation and tightened to secure the TV.
Usage Features:
- Easy Installation: The manual highlights "Easy installation" and provides a QR code for an installation video, indicating a user-friendly setup process.
- Step-by-Step Guide: The instructions are broken down into logical steps, starting from selecting the mounting position to securing the TV.
- Mounting Surface Versatility: Supports both wooden joist and solid wall installations, providing options for different home constructions.
- TV Compatibility: A wide array of included screws and washers ensures compatibility with numerous TV brands and models. Users are instructed to select the appropriate screws for their specific TV.
- Adjustable Viewing Angle: The tilt and turn functionality allows users to customize the TV's position for optimal viewing, reducing glare and improving comfort.
- Secure Attachment: The design incorporates securing bolts and robust wall fixings to ensure the TV is safely mounted.
- Aesthetic Integration: Covers (G) are provided to conceal the base unit, contributing to a cleaner, more finished look.
Maintenance Features:
- Tightening Securing Bolts: The initial setup involves tightening securing bolts with a screwdriver and angling bolts with an Allen key. While not explicitly stated as "maintenance," periodic checks to ensure these bolts remain tight would be good practice to maintain the mount's stability and safety.
- Contact for Support: The manual provides contact information (help@ross.co.uk) for additional information or if the supplied screws are not sufficient, indicating ongoing support for users.
- Durability: The emphasis on fixing to a solid object (wooden joist or solid wall) rather than plasterboard suggests a design intended for long-term, stable support of a television, implying a durable construction when installed correctly.
In summary, the ROSS LN2SA200 Tilt & Turn TV Wall Mount is a versatile, user-friendly, and secure solution for mounting televisions, designed to offer adjustable viewing angles and integrate seamlessly into various home environments. Its comprehensive hardware kit and clear instructions aim to simplify the installation process for a broad range of users and TV models.