No Diving or Jumping. Observe all Safety Rules.
1-15
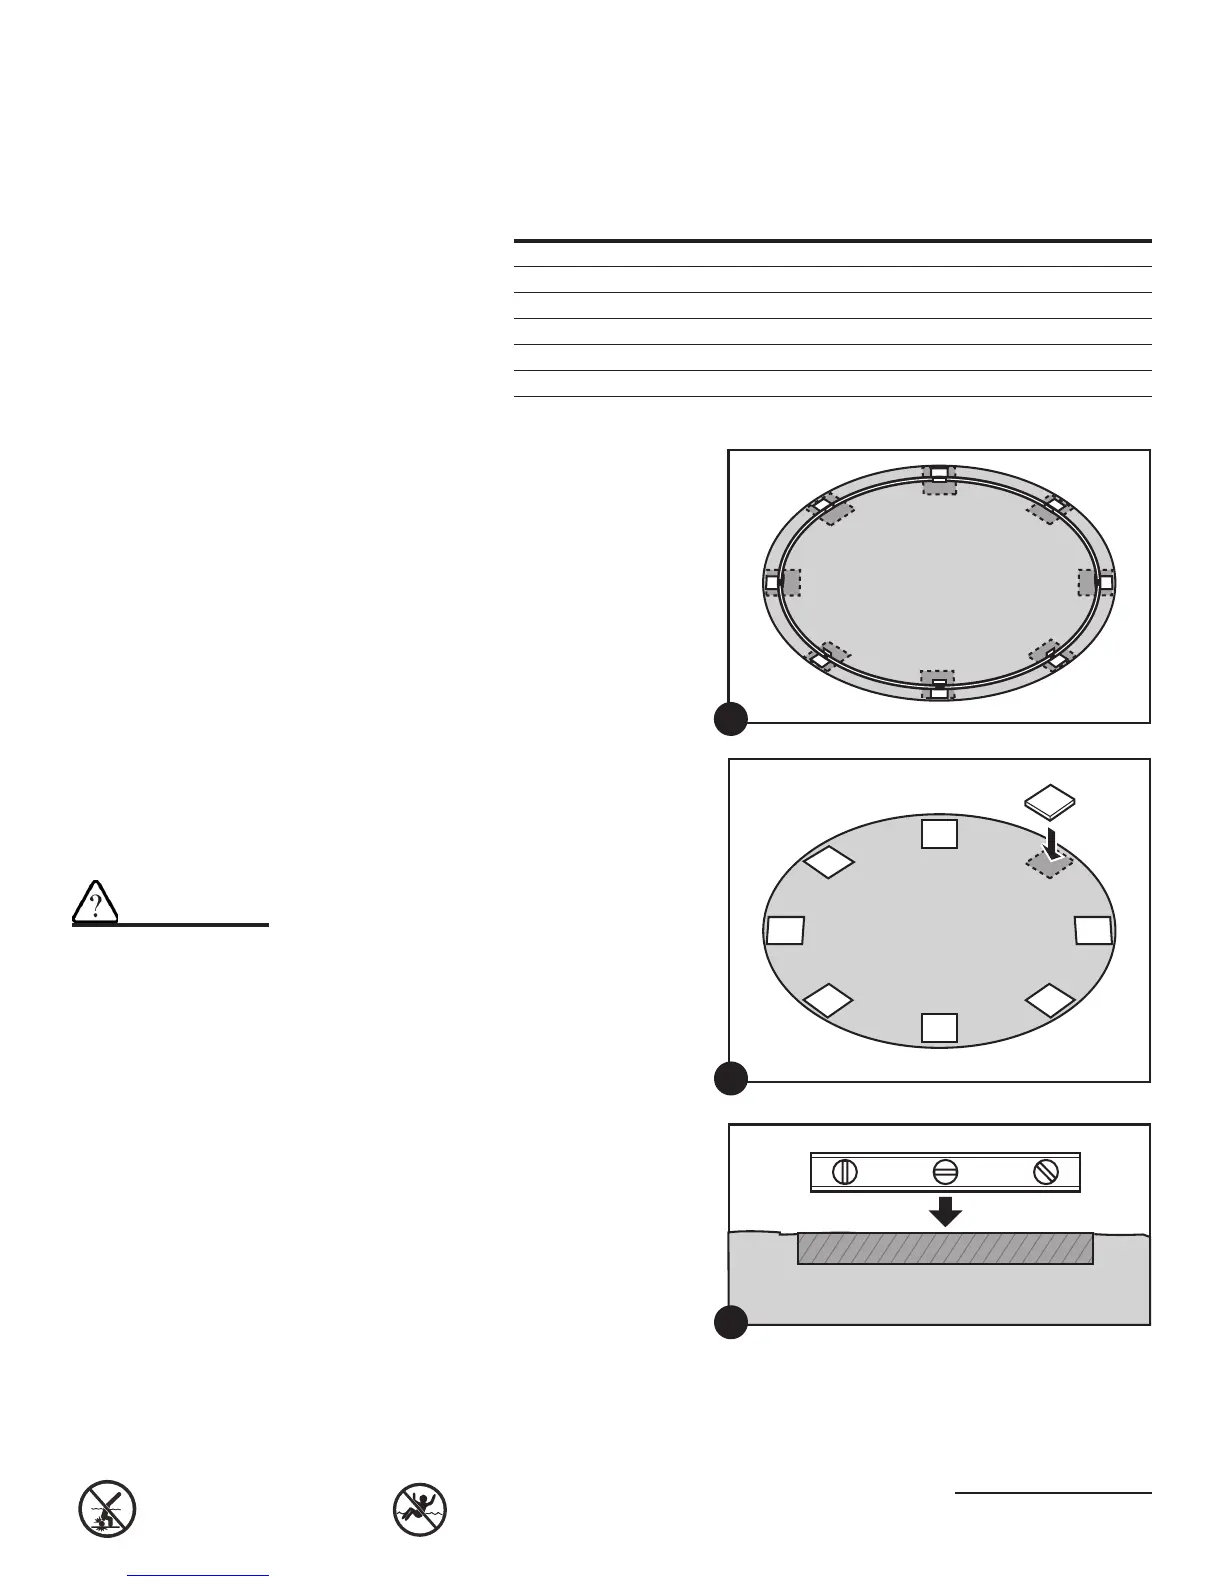
4. Patio Stones (Optional)
a. Concrete patio stones may be placed at the base of each vertical column (upright)
of your pool. Choose the number of patio stones you need for your pool from the
chart below.
Pool Size Number of Patio Stones (Optional)
12’ 10
15’ 10
18’ 12
21’ 14
24’ 16
27’ 18
b. Temporarily lay out the bottom rails
and bottom plates around the circle.
Each bottom plate will show the loca-
tion for a patio stone. Make a mark in
the ground at each bottom plate.
c. Remove the bottom rails and bottom
plates and lay out the patio stones
around the circle where the bottom
plates were.
d. The patio stones must be sunk into
the ground so the tops are ush with
the soil around them. Use the car-
penter’s level to make sure the patio
stones are perfectly level and ush
with the ground. Use either the car-
penter’s level and a 2-by-4 (5cm x
10cm) wood plank, or the optical
level between patio stones to make
sure the stones are level with each
other.
e. Do not install blocks or rails on loose
sifted soil or sand. There must be no
space between the ground and the
bottom of the rails. All patio blocks
must be ush with the ground, solid
and level with each other in all direc-
tions.
f. Remove the centre stake and 2-by-4.
5. Proceed to Section 2
Assembling the pool base.
Remember:
The outer 12” (30 cm)
of the circle must be
perfectly at. The bot-
tom edge of the pool
must rest at on the
ground and have no
gaps under it. Take the
time you need to be sure
this area is perfectly at
and level.
18
19
20
 Loading...