1
No Diving or Jumping. Observe all Safety Rules.
4-1
A. Attach your Verticals and Top Rails
1. ContinuellingyourPool
a. Continuellingyourpoolwithwater.Donotputinmorethan12"(30cm)ofwater
untilthetoprailsandverticalcolumnsareallattached.
b. Keepworkingonthetoprailsandverticalcolumnswhilethepoollls.
• Seethedrawingonthenextpageforanoverviewofallthepartsusedto
installtheverticals,toprailsandtopconnectors.
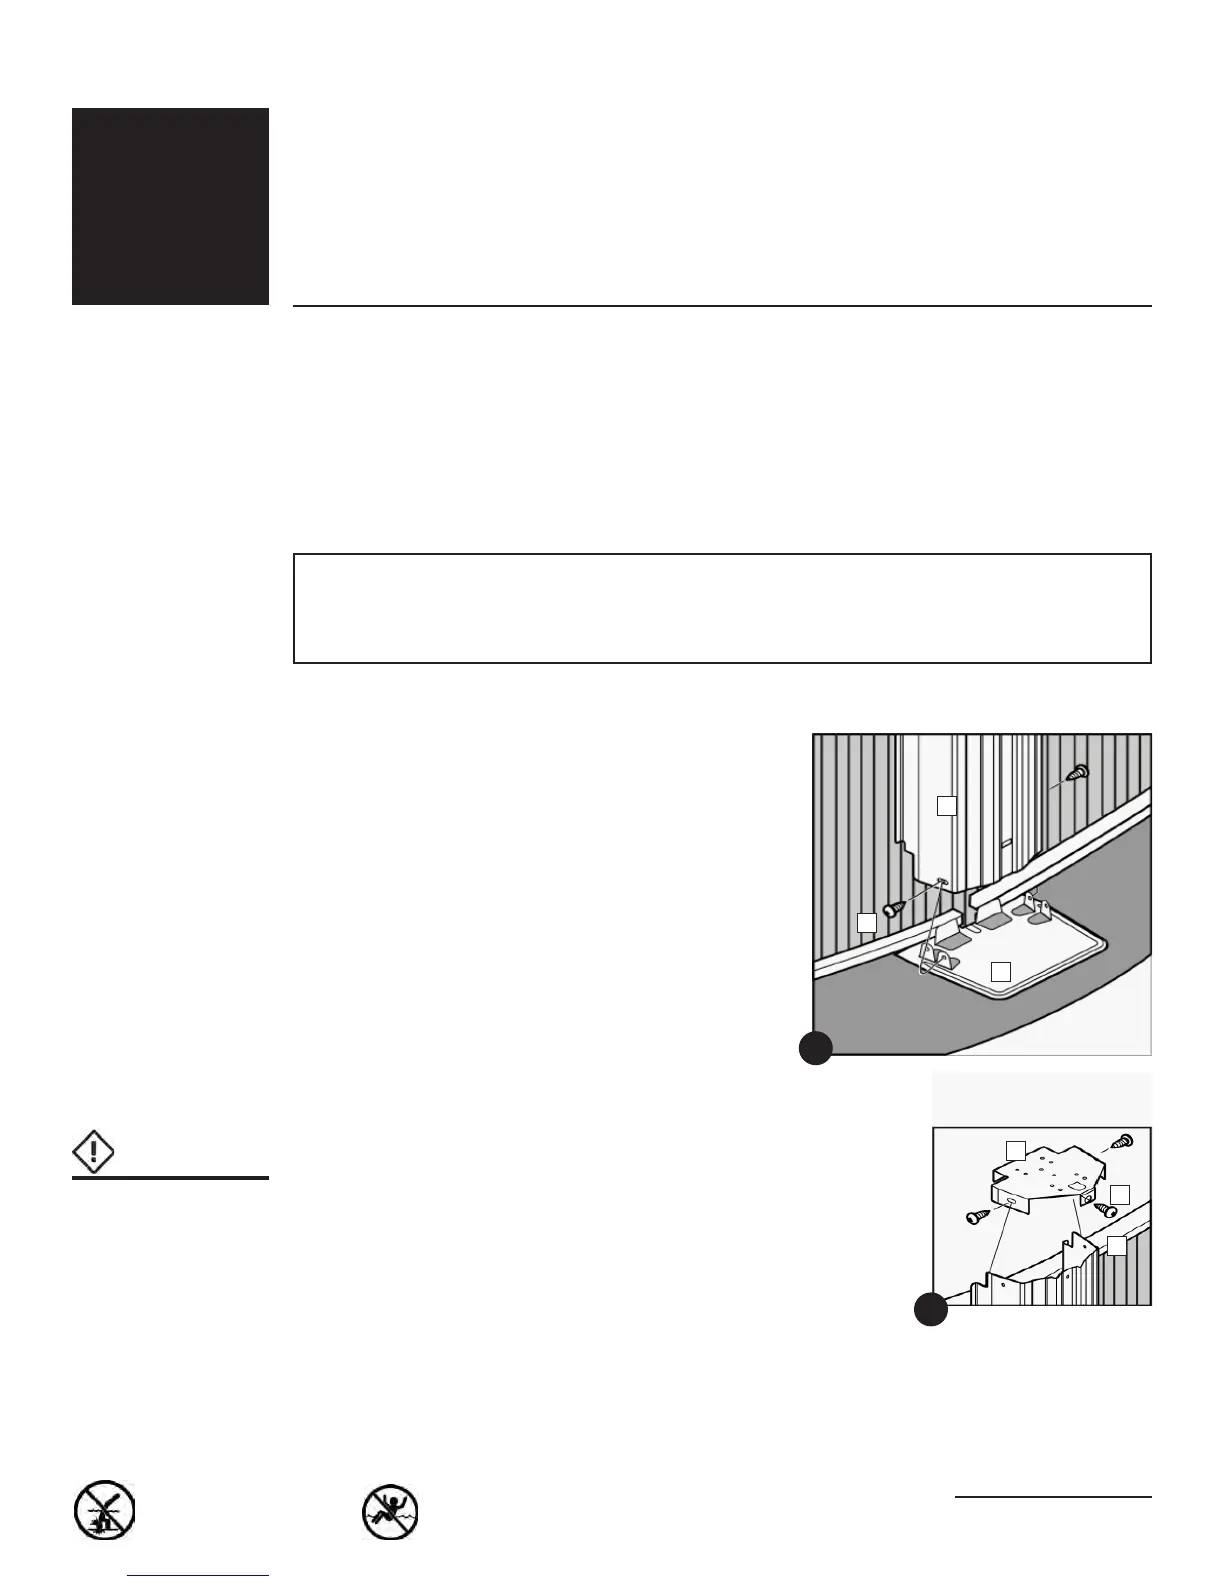
2. Install the Vertical Columns
a. Lineupthebottomofoneverticalcolumn(key
1)withthetwosmalltabsononebaseplate
(key2).Thetabsmustbeonthe inside ofthe
verticalcolumn.Thethreeholesonthefrontof
theverticalmustbenearestthetop.
b. Lineupthescrewholesandfastenwithone
self-tappingscrewoneachside(key3).
c. Hookatopplate(key4)overthetopedgeofthepoolwall
(key5).Placethetopplatedownover
thetopoftheverticalcolumnwiththetabson
theoutside ofthecolumn.Makesuretheverticalcolumnis
straightupanddown.
d. Lineupthescrewholesandfastenwithoneself-tapping
screwoneachsideandoneonthefront(key6).
e. Repeatthelastfourstepsforeachoftheverticalcolumns
aroundthepoolwall.
c. Priortoinstallingtheconnector,knockout
theholesshownindiagram10.
Section
PoolComponentInstallationManual
InstallingtheTopLedges&
Uprights
Hint:
Usetheridgesinthe
poolwalltomakesure
theverticalcolumnis
straightupanddown.
4
1
2
1
3
4
6
5
2
B
A
B
A
 Loading...