Produced in China for A. Mir & Co. Ltd.
© A. Mir & Co. Ltd. 4 / 6
www.royalcraft.co.uk
Step by step assembly instructions
All Bolt Head Caps should not be attached before finally tightening all Bolts with Spanner.
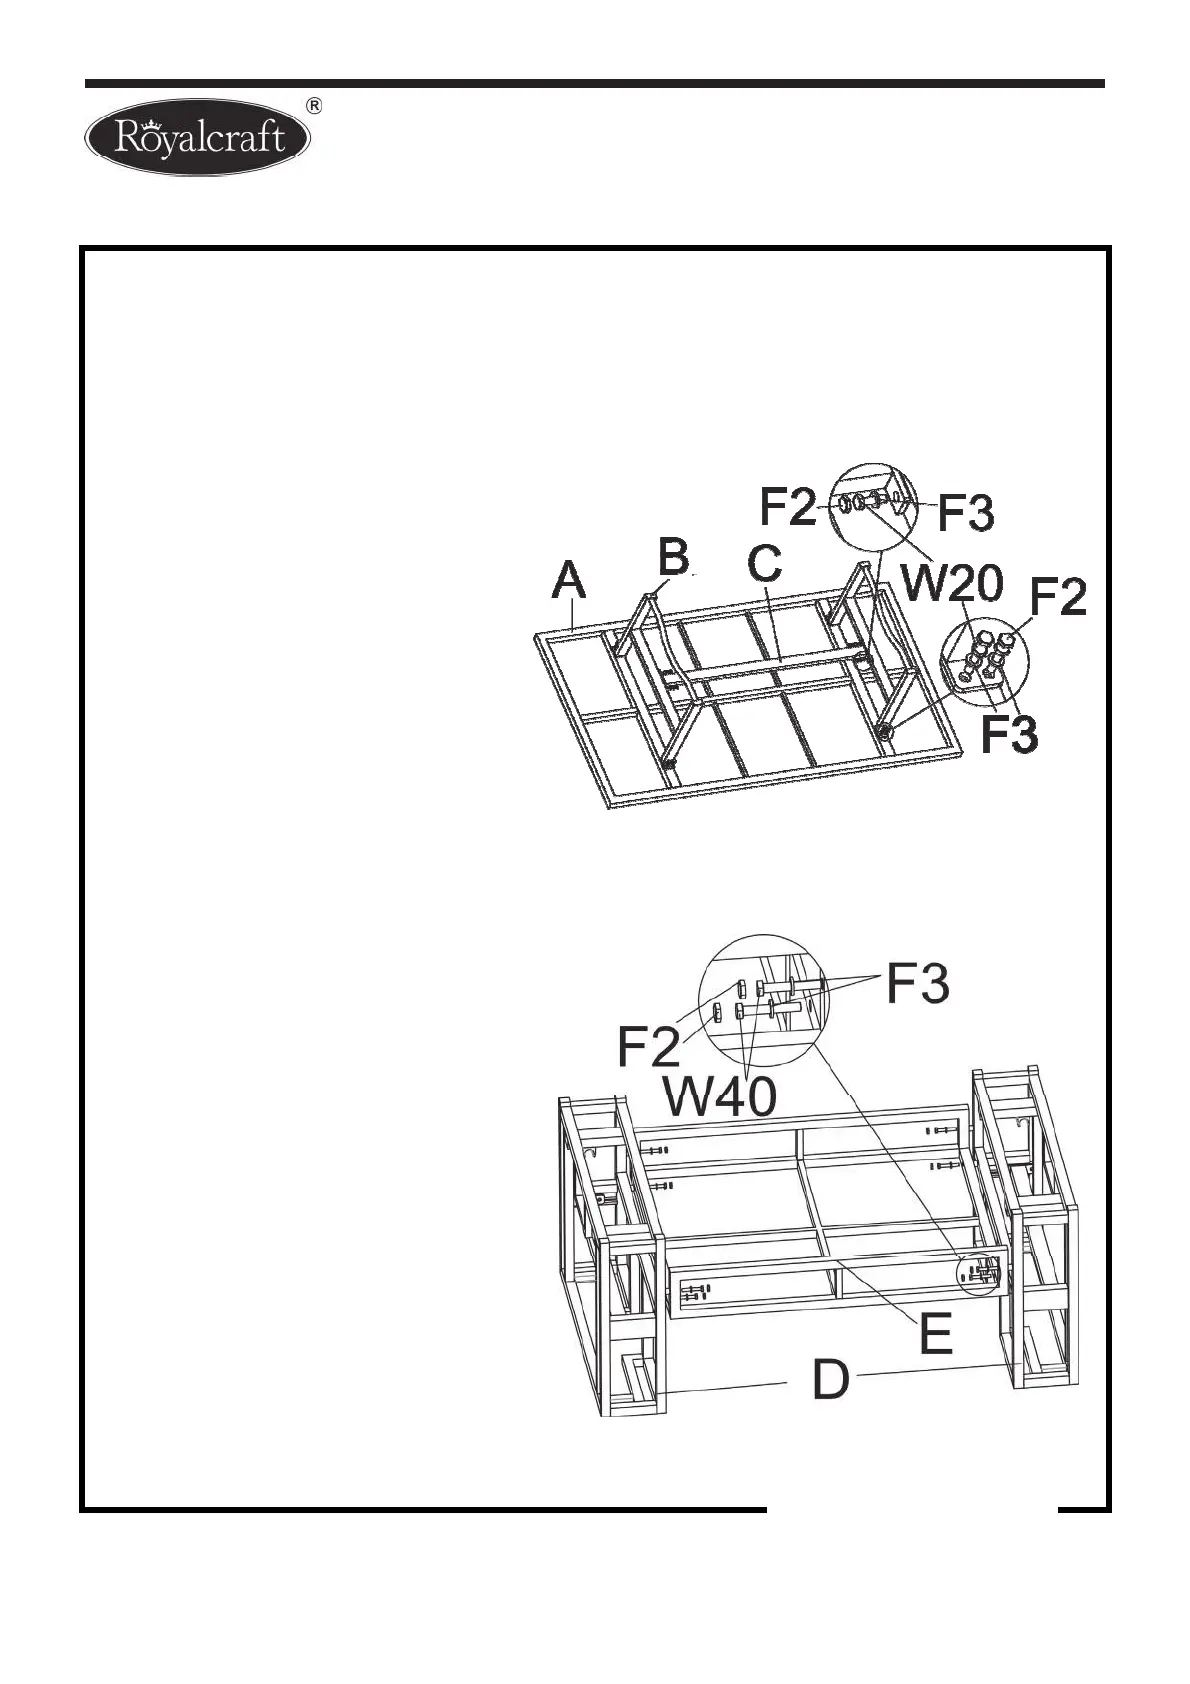
Step One
Open the packaging carefully. Leave the glass
on the carton until the rest of
the table is fully assembled.
With the help of another person,
place the Table T
op Frame (A)
upside down on a soft, level surface.
Attach the Legs (B) to the Table Top
Frame (A) using Washers (F3),
Bolts (W20) and Bolt Head Cap
s (F2).
Attach the Connecting Bar (C) between
the Legs (B) using Washers (F3),
Bolts (W20) and Bolt Head Caps (F2).
Step Two
Attach the Connecting Shelf (E)
Between the Bottom Bases (D)
using Washers (F3), Bolts (W40)
and Bolt Head Caps (F2).
Before attaching the Bolt Head Covers,
tighten all bolts with Spanner (S1).
Onyx 150 x 80cm
Rectangular Table
Assembly Instructions