17
OPERATION
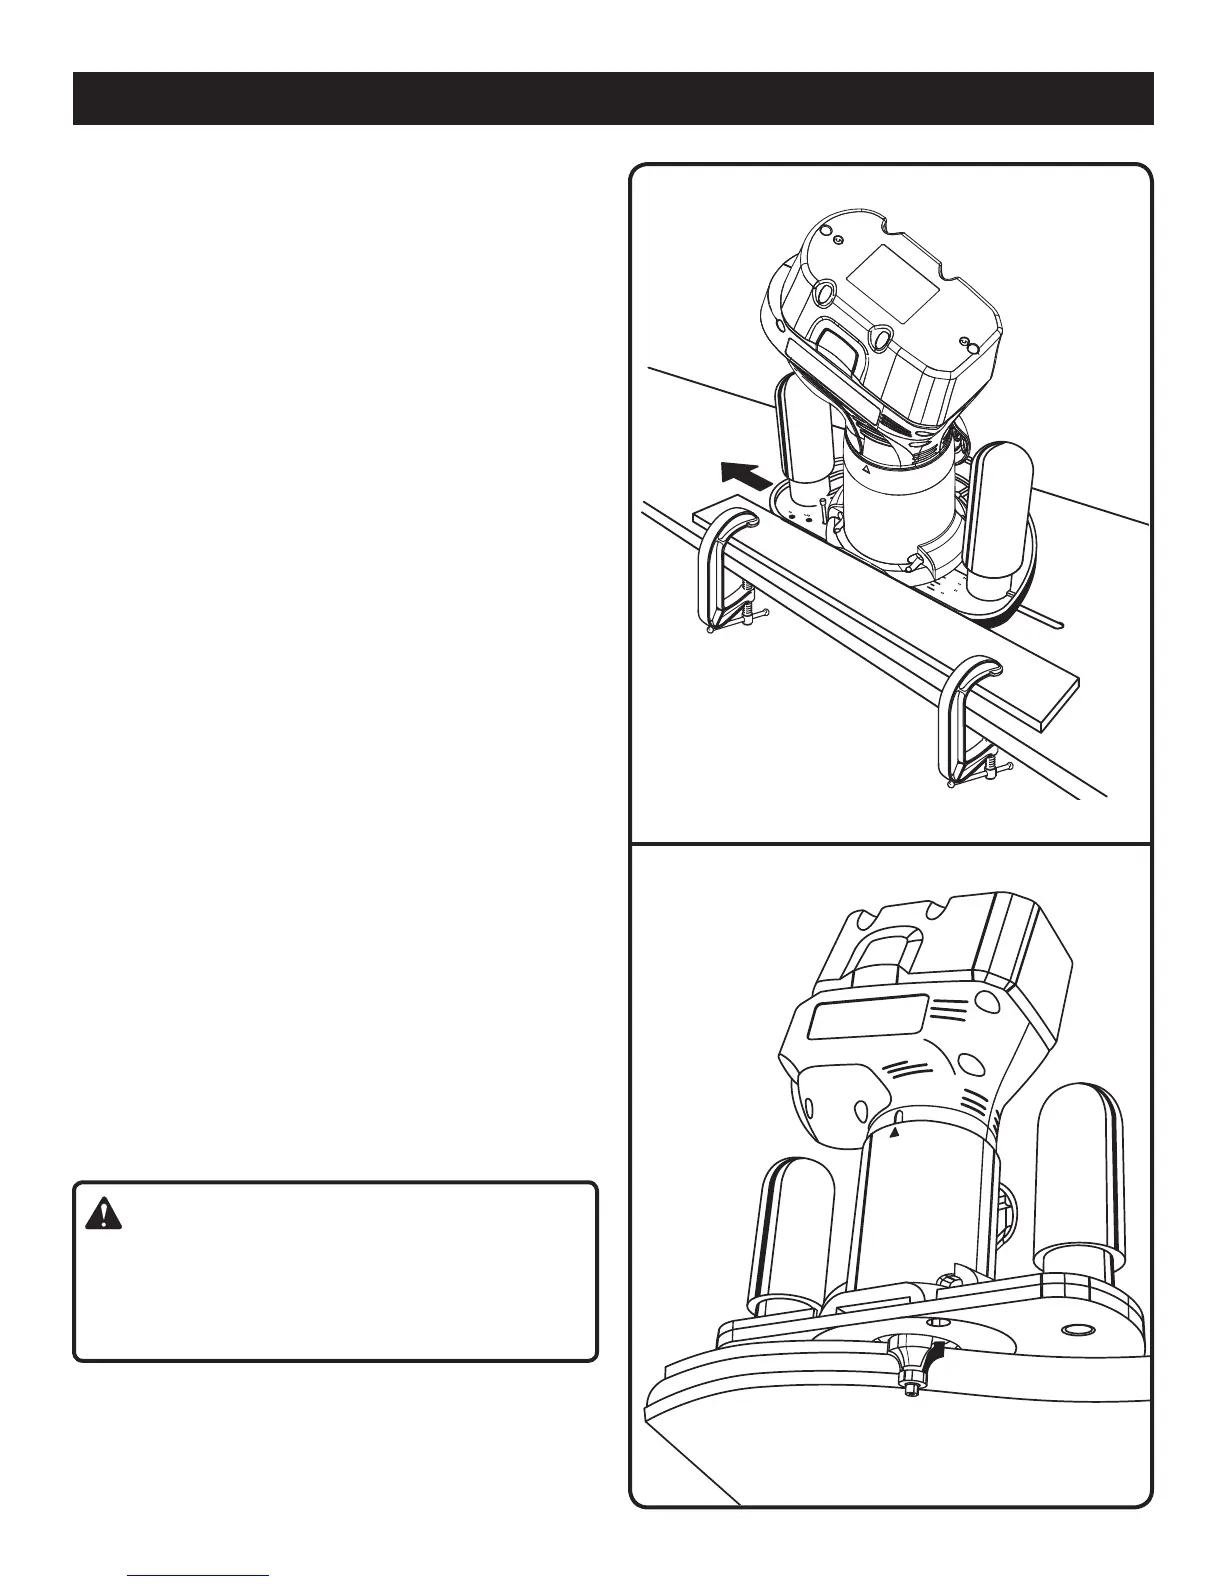
Fig. 13
ROUT GROOVE FROM RIGHT TO LEFT
ROUTING GROOVES IN A CIRCLE
See Figure 12.
There are three holes marked R2", R2-1/2", and R3" on
the woodworking sub-base. Each number represents a
radius and may be used when cutting circular grooves
that are 4 in., 5 in. or 6 in. in diameter.
Select the radius for the desired circle, place a finish-
ing nail through the hole and securely tack it into the
workpiece. This will create a pivot axis for that size ra-
dius.
Rout a circular groove in a clockwise direction only.
ROUTING GROOVES PARALLEL TO AN EDGE
See Figures 13 - 14.
You can use the scale provided on the woodworking sub-
base accessory to cut a straight parallel line up to 1 in. from
the edge of the workpiece.
The intersection of the horizontal and vertical lines at the
center of the woodworking sub-base accessory indicates
the center of the cutter. This is also the center of groove
being cut.
For grooves more than 1 in. from the edge of workpiece,
align the center of desired groove on the workpiece with
the centerline on the woodworking sub-base accessory.
Then measure from the centerline on the woodworking
sub-base accessory to the guiding portion of the straight
guide. Tighten the knob on the straight guide securely.
Using “C” clamps and a board to act as the straight edge,
place the cutter at the desired position on the workpiece
and make the cut from right to left.
NOTE: The board being used as a straight edge must be
1/4 in. thick to prevent contact with the trimmer base. It
must also be at least as long as the workpiece in order
to be a guide.
The thrust is from the trimmer against the straight
edge.
Do not make a cut that is too heavy in one pass. If a deep
cut is required, make successive passes at increasing
depths with each new pass until you reach the desired
groove depth.
WARNING:
If the desired depth of cut is greater than can be safely
cut in one pass, make cuts in two or more passes. Do
not remove more than 1/8 in. in a single pass. Excessive
depth of cut can result in loss of control and the possibility
of serious personal injury.
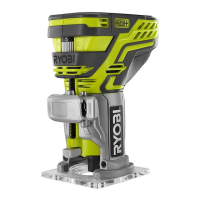
Fig. 14
TRIM ROUTER USED WITH A BALL-BEARING GUIDED BIT