1
2
To Use
Remove zip tie, remove ‘STOP’ sign,
raise swing stops and open gate
Optional: Using the swing stops
Gate will swing both ways
unless one of the swing stops is
down. Gate will not swing at all
if both swing stops are down.
7
©2023 Dorel Juvenile Group, Inc. Safety 1st™ and the Safety 1st logo and design are trademarks of Dorel Juvenile Group,
Inc. (800) 544- 1108 www.safety1st.com/ca-en Styles and colors may vary. Les styles et les couleurs peuvent varier.
Made in CHINA. Fabriqué en CHINE. Distributed by (distribué par) Dorel Juvenile Group, Inc., 2525 State St.,
Columbus, IN 47201-7494. Dorel Juvenile Canada, 2233 Argentia Road, Suite 110, Mississauga, ON L5N 2X7.
Importado y Distribuido en Chile por: Comercial e Industrial Silfa S.A. - San Ignacio 0201 / Parque Industrial
Portezuelo Quilicura, Santiago Chile. Fono (562) 2339 9000. En Perú por: Comexa S.A. - Los Libertadores
455 – San Isidro, Lima – Perú. Fono (511) 4469014. En Centro América, Caribe y Ecuador por: Best
Brands Group S.A. – Av. Balboa, Bay Mall Plaza, Planta Baja, local 9, Panamá. - Fono: (507) 300 2884.
En Colombia por: Baby Universe S.A.S. - Vía 40 No. 77-29, Barranquilla, Colombia - Fono: (575)
353 1110 Importador: DJGM, S.A. DE C.V. Gabriel Mancera No. 1041 Col. Del Valle, Benito
Juárez C.P. 03100 México, Ciudad de México R.F.C. DJG140305GN9 Tel. (55) 67199202 02/20/23 4358-8321A
OK
NO
IF you are using the SMALL extension, always add it to the gate
FIRST. Insert extension into gate. Insert extension caps ONLY IF
you are not adding another extension to this side.
TIP: Use the bolt side of the
bumper to gently extract the
extension caps from the gate.
Use 1 SMALL
and
2 MEDIUM
extensions,
Go to steps
2a
–
2e
Use 2 MEDIUM
extensions,
Go to steps
2b
–
2d
Use 1 SMALL
and
1 MEDIUM
extension,
Go to steps
2a
–
2d
Use 1 SMALL
extension,
Go to steps
2a
–
2c
Use 1 MEDIUM
extension,
Go to steps
2b
–
2c
If Opening is...If Opening is...If Opening is...
Measure opening
If Opening is... If Opening is...
Assemble
SMALL
extension
Add extensionRemove
extension
caps
TOP
BOTTOM
USA
USA
BOTTOM
TOP
A
BB
B
B
caps:
check!
Insert pressure
bumpers into 4
corners
x4
Remove extension caps from
gate. Keep them near by;
you will need them for final
assembly.
If Opening is
up to 32”
(81 cm)
go to step
3
. No extensions are required.
2
2b 2c
2d
2e
2a
3
MEDIUMSMALL
BOTTOM
TOP
A
BB
A
Lay out all parts
1
DO NOT REMOVE THE ZIP
TIE UNTIL INSTALLATION
IS COMPLETE
• Remove all contents from packaging and discard box, and/
or poly bags.
• Lay out all parts.
• Do not return this product to the place of purchase. To
address any issues or for helpful information on assembly/
installation or use, please visit us at www.safety1st.com/
ca-en to chat with us there. You can also text us at (812)
652-2525 or call Consumer Care at (800) 544-1108. Have
ready the model number (GA107, GA171) and date code
(manufacture date) located on inside of gate panel.
B
Parts List:
Basic Gate (1)
Small Extension (1)
Medium Extensions (2)
Top Extension Caps (2)
Bottom Extension Caps (2)
Pressure Bumpers (4)
Wall Cups (4)
Adhesive Pads (4)
Tools Needed
(not included):
• Measuring Tape
• Pencil
A
B
4
Install wall cups
4g
Remove paper
from adhesive.
Adhere to outside
of wall cup.
Remove paper
from other side.
• Wall cups MUST be installed for maximum safety.
• DO NOT remove adhesive until step
4f
.
• Install gate centered and flush to floor.
4f 4h
For best results,
allow to cure for
24 hours.
Use pencil to mark
around the wall cup.
Remove gate.
Repeat to trace
other 3 wall cups.
Insert a bumper into
gate.
Place a wall cup on
bumper.
4a
4b
USA
4e4d
Position gate flush
to the floor where
you will install it.
4c
Align 4 wall cups
to pencil marks
and press for 30
seconds.
Check and re-check the indicator
Be sure to re-check the indicator regularly
and re-tighten the bolts if you see any
red when gate is closed. Any red showing
indicates the gate is unlatched.
Red
6
Install in doorway
TIP: Think about
which side you’ll want
the handle on during
daily use when you
position the gate.
Position gate in wall
cups. Hand tighten top
and bottom pressure
bumpers until gate is
firmly in place.
5
USA
USA
USA
4
Adult assembly
required.
Age: 6 to 24 months.
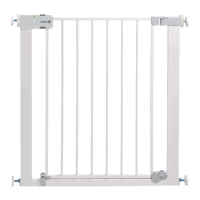
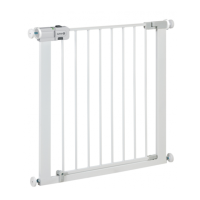
Easy Install Décor
Gate, GA107
Décor Metal Gate,
GA171
WARNING:
Children have died or been seriously injured when gates are not securely installed.
• TO PREVENT FALLS, NEVER use pressure installed gate at top of stairs.
•
ALWAYS install and use gates as directed using all required parts.
•
STOP using when a child can climb over or dislodge the gate.
•
Use only with the locking/latching mechanism securely engaged.
•
NEVER use to keep child away from pool.
•
Discontinue use of the gate if it becomes damaged, broken, or disassembled.
•
I
ntended for use with children from 6 months through 24 months.
•
Install according to manufacturer’s instructions.
•
ALWAYS install as close to the floor as possible.
•
For bottom of the stairs use, place gate on lowest stair from the bottom.
•
This product will not necessarily prevent all accidents. NEVER leave child unattended.
•
Gate is not meant to replace proper adult supervision.
•
Install with locking mechanism on side away from child.
Keep this instruction sheet for future reference, as it contains important information.
CAUTION:
•
ALWAYS
check regularly to ensure gate and locking systems are secure. Tighten locking
hardware as necessary.
DO NOT
over-tighten.
•
DO NOT
use gate if any parts are missing or broken. Contact Dorel Juvenile Group for
replacement parts and instructional literature if needed.
•
DO NOT
substitute parts or try to modify the product in any way. Parts not provided and
approved by Dorel Juvenile Group may result in an unsafe product.
Care and Maintenance:
DO NOT immerse in water. Wipe with a damp
cloth and dry.
You MUST install wall cups to keep the gate in
place. Without wall cups, child can push out and
escape.
WARNING:
TIP: Use the bolt side of the
bumper to gently extract the
extension caps from the gate.
Assemble
SMALL
extension
Remove
extension
caps
B caps:
check!
Remove extension caps from
gate. Keep them near by;
you will need them for final
assembly.
min 29” - max 47”
(119 cm)(74 cm)
Up to 47”Up to 44” Up to 41” Up to 35” Up to 38”
(89 cm) (96.5 cm) (104 cm) (112 cm) (119 cm)
Repeat steps
2b
–
2c
with 1 MEDIUM extension
on the other side of the
gate. Insert extension
caps ONLY IF you are not
adding another extension
to this side.
Repeat step
2c
with
final MEDIUM extension
on either side of the gate.
Insert extension caps in all
4 corners.
For openings
over 38” - 44”
only
For openings
over 44” - 47”
only
(112 cm - 119 cm)
(96.5 cm - 112 cm)