1
2
3
4
5
6
7
9
10
11
12
8
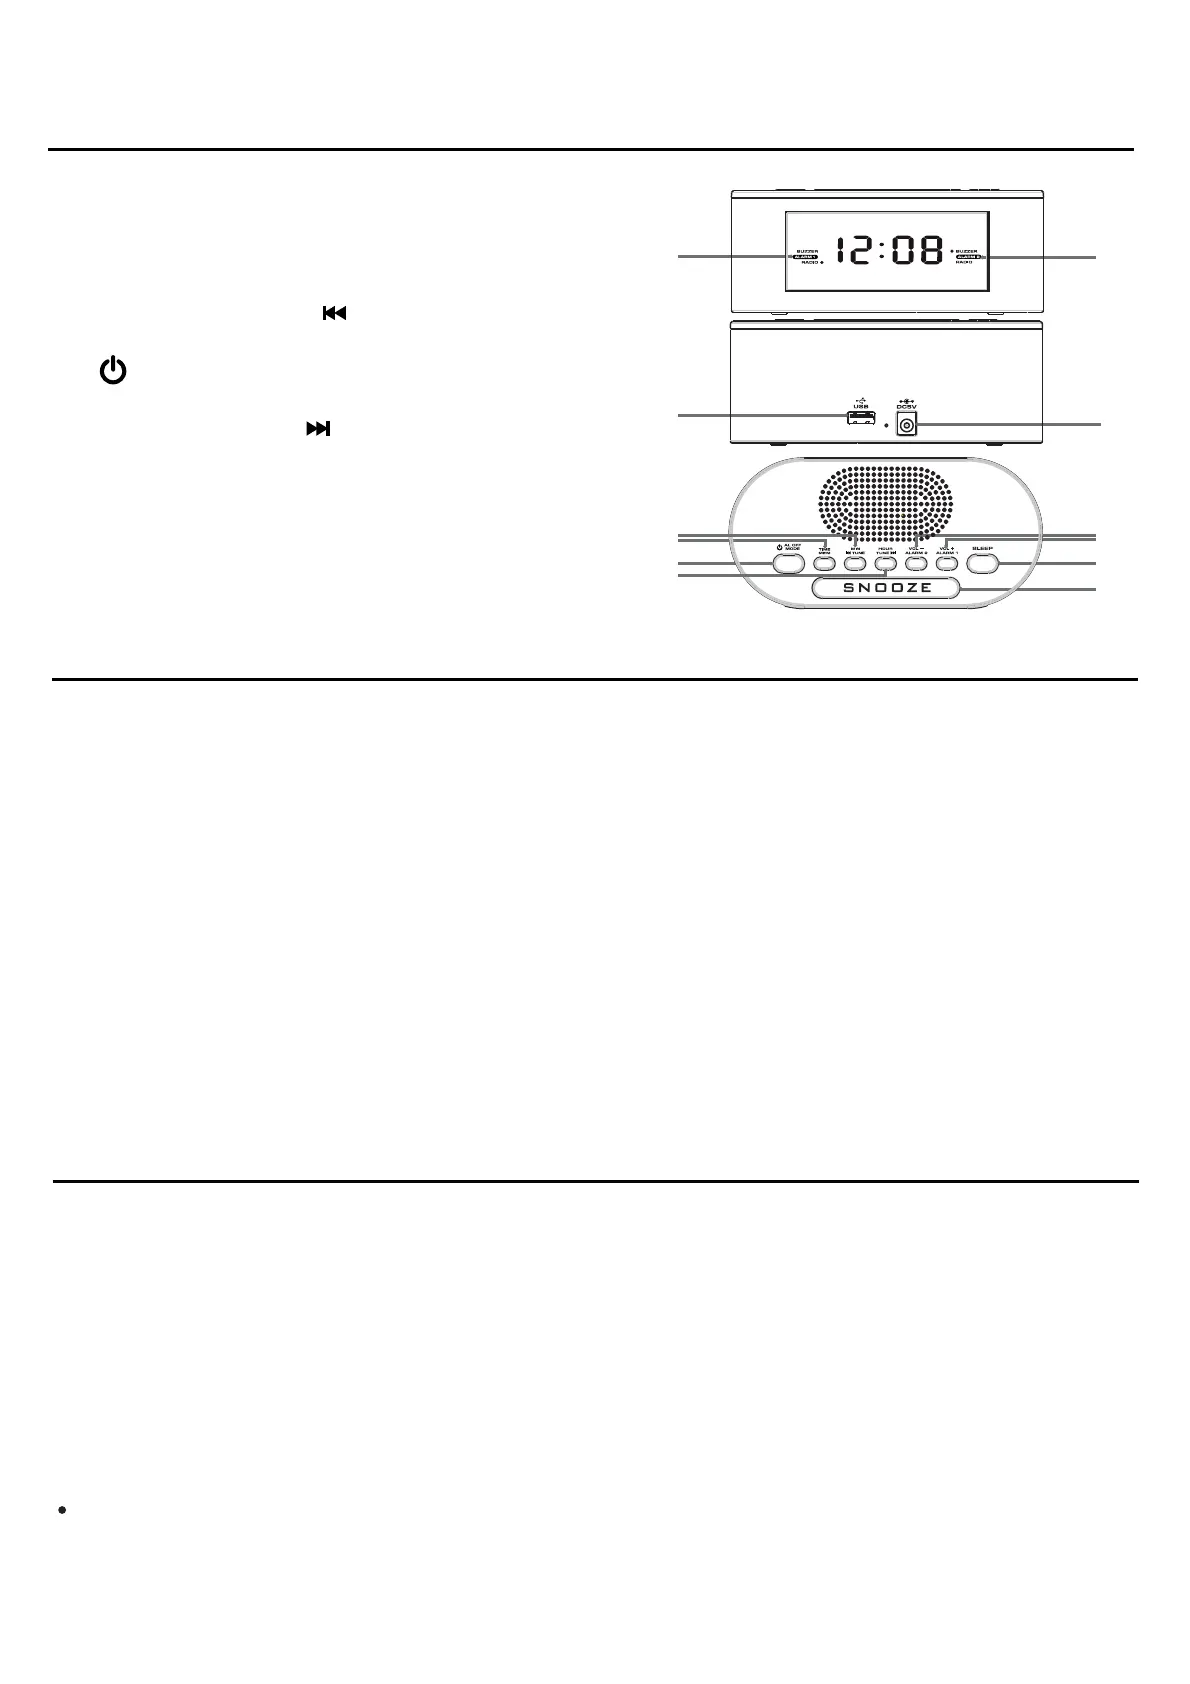
LOCATION OF CONTROL
POWER SUPPLY
1. Alarm 1 indicator
2. Alarm 2 indicator
3. USB charging port
4. DC5V jack
5. MINUTE / TUNING button
6. TIME / MEMORY button
7. POWER ON/OFF / ALARM OFF/
MODE button
8. HOUR / TUNING button
9. VOLUME - / ALARM 2 button
10. VOLUME + / ALARM 1 button
11. SLEEP button
12. SNOOZE button
13. AC adaptor (not shown)
Mains supply : Insert the AC adaptor into a 230V AC ~ 50Hz mains outlet and the other
end of the cord into the DC 5V jack (4) on the back of the unit.
Battery back up : The clock time and alarm (if set) can be maintained during a power
failure by 2 x AAA/ LR03 batteries (not supplied).
Once the power is restored, check the time to make sure it is accurate and re-set if
necessary.
Inserting the Batteries
1. Open the battery compartment at the bottom of the unit by pressing on the catch and
removing the cover.
2. Insert 2 x AAA/ LR03 batteries (preferably alkaline batteries) into the battery
compartment, following the polarity as shown on the diagram inside the compartment.
3. Replace the battery compartment cover
Setting the clock
1. Press and hold the TIME button (6) and the hour/minute digits will flash.
2. Use the HOUR button (8) to set the hours.
3. Use the MINUTE button (5) to set the minutes.
4. Press the TIME button (6)to confirm.
Setting the alarm
Before setting the alarm time, make sure the Clock has been set.
1. In standby mode, press and hold AL1 (10) / AL2 (9) until “0:00” flashes on the display.
2. While “0:00” is flashing, set the alarm time by repeatedly pressing HOUR / MIN.
Press and hold HOUR (8) / MIN (5) respectively for fast advance.
3. Repeatedly press AL1 (10) / AL2 (9) to select the desired alarm mode (1) (2)
(buzzer or radio).
SETTING THE CLOCK AND ALARM
8
EN
 Loading...