8 www.sam-dental.de
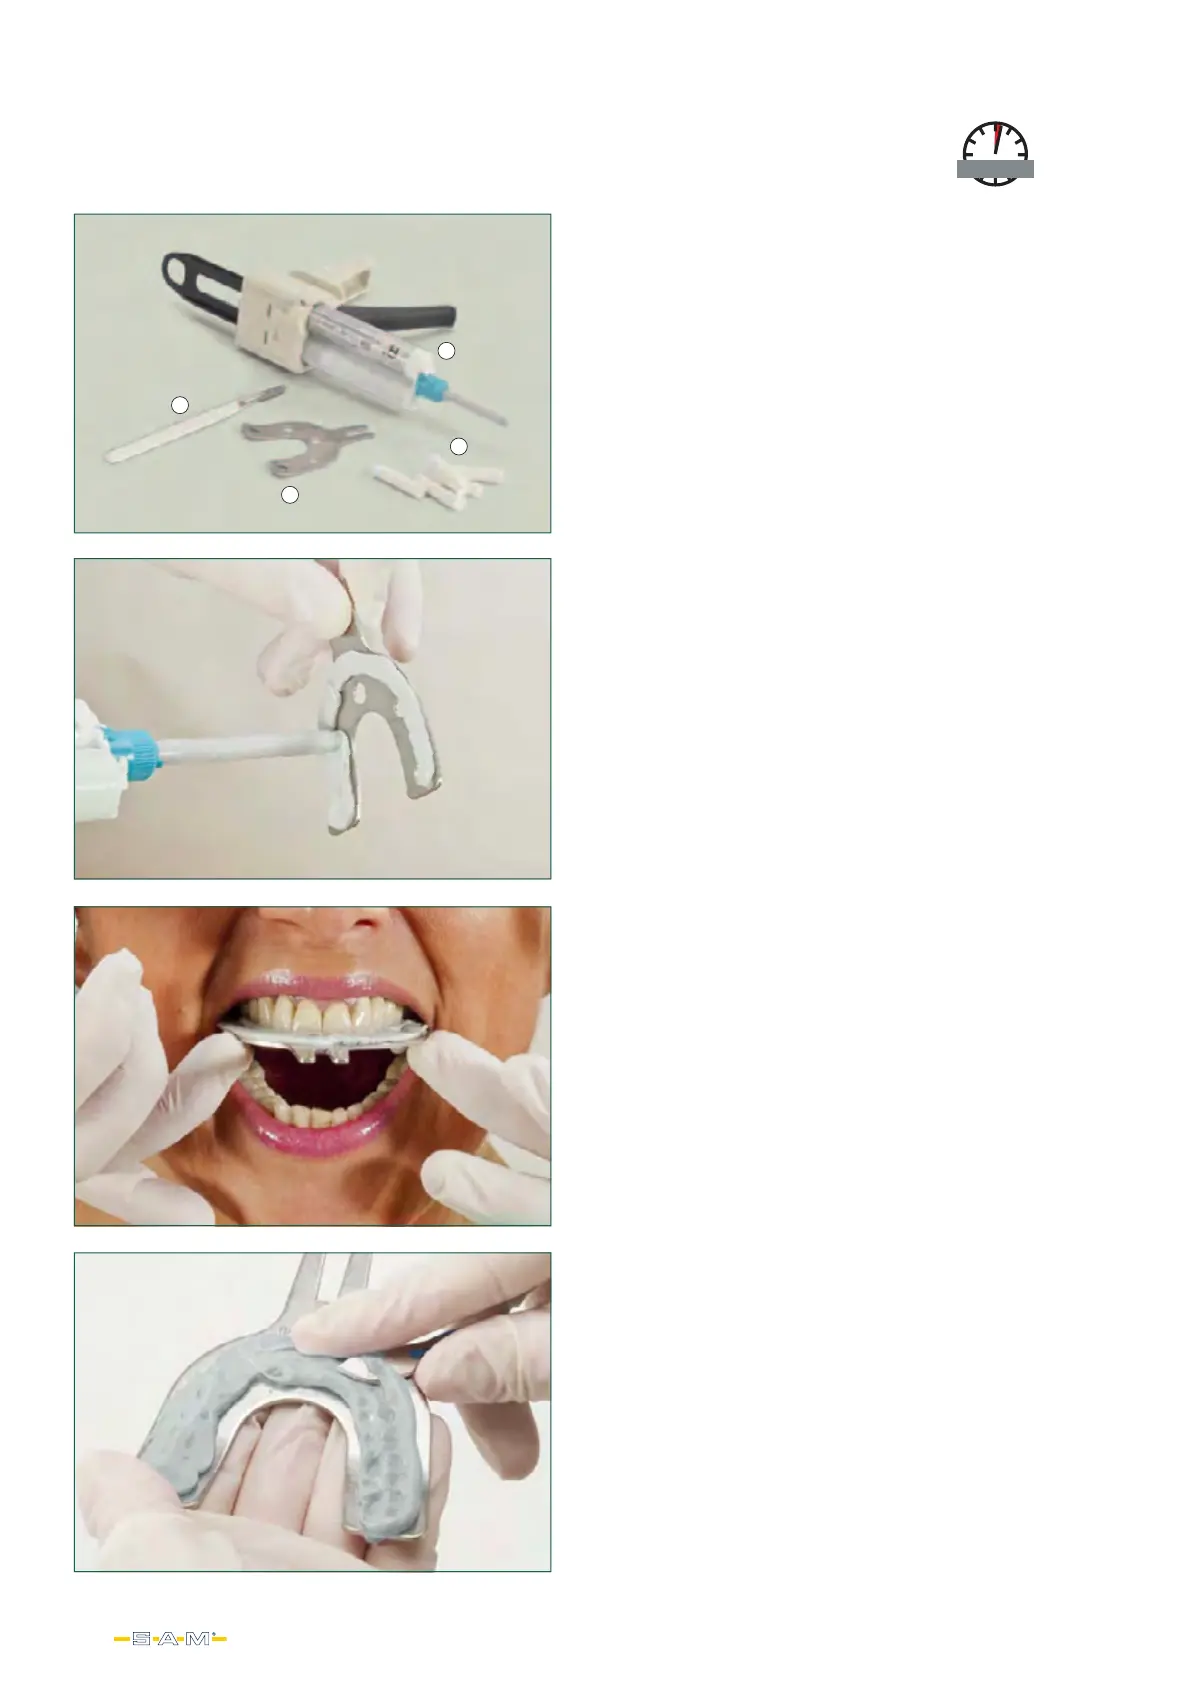
Vorbereitung Bissgabel
transfer fork preparation
Eine gleichmäßig dünne Schicht Polyvinylsiloxan Material
wird auf der Oberfläche der Bissgabel aufgetragen.
Place an even thin layer of PVC material on the top surface
of the transfer fork.
Sie benötigen dafür:/ You will need:
Die Bissgabel wird, wie hier dargestellt zur Mittellinie
ausgerichtet und positioniert. Die Bissgabel wird ohne
Bewegung gehalten, bis das PVS angezogen hat.
The transfer fork is is positioned as shown here with
projections in the midline. The transfer fork is held
without movement until PVS is set.
Nach dem Erhärten wird die Bissgabel entnommen
und alle tiefen Impressionen, abgeformten Fissuren
und Interdentalräume entfernt. Ein richtig gemachtes
Bissgabelregistrat braucht normalerweise keine Korrekturen.
After hardening the transfer fork is removed and all
deep impressions, molded fissures and interdental spaces
removed. A properly made transfer fork record normally
needs no corrections.
Tipp: Höckerspitzen mit einem wasserfesten Stift markieren
Tip: Mark the cusps with a waterproof pen
120 sec
Dauer / Duration
1
2
3
4
1) eine sterilisierte Bissgabel
2) Beschichtungsmaterial,
z.B. Metal-Bite (R-Dental)
3) Watterollen und
4) ein Skalpell
1) a sterilized transfer fork
2) coating material, such as
Metal-Bite (R-Dental)
3) cotton rolls and
4) a scalpel (4)
Alternativ könne Sie auch Bite-Tabs (Panadent®) oder
andere qualitativ hochwertige Materialien verwenden.
Alternatively you could use Bite-Tabs (Panadent®)
or other high-quality materials.
 Loading...