5.3 Adapting the display
The data representation on the positioner
display can be turned by 180°.
If the displayed data appear upside down,
proceed as follows:
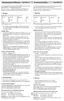
Reading direction for right
attachment of pneumatic
connections
Reading direction for left
attachment of pneumatic
connections
Turn the button until Code 2 appears,
and press the button to confirm Code 2,
Code 2 blinks.
Turn button until the display is adjusted
to the desired direction, then confirm read-
ing direction by pressing the button.
5.4 Limiting the signal pressure
If the maximum actuator force may cause
damage to the valve, the signal pressure
must be limited. Select Code 3 to enable
configuration and then access Code 16 to
set the pressure limit to 1.4, 2.4 or 3.7 bar.
The required signal pressure limit is only au
-
tomatically recognized on initialization
when the valve closed position AIR TO
OPEN is set.
5.5 Checking the operating
range of the positioner
To check the mechanical attachment and the
proper functioning, the valve should be
moved through the operating range of the
positioner in the manual operating mode
with the manual reference variable.
Code 0
Select
manual operation
Default
MAN
Code 1
Position valve using the
rotary pushbutton, the
current angle of rotation is
indicated
1. Turn the button until Code 0 appears,
then confirm Code 0 by pressing the
button.
2. Turn the button until MAN appears in
the display, i.e. manual operating mode,
confirm selected operating mode by
pressing the button.
3. Turn the button until Code
1 appears,
confirm Code 1 by pressing button.
The hand symbol and Code 1 blink.
4. Position control valve by turning the
button several times until pressure builds
up, and the control valve moves to its fi
-
nal positions so that the travel/angle of
rotation can be checked.
The angle of rotation on the back of the
positioner is indicated. A horizontal le
-
ver (mid position) is equal to 0°.
The permissible range has been ex
-
60 EB 8384-4 EN
Start-up and settings

 Loading...