Do you have a question about the Samsung AJ BXJ CH Series and is the answer not in the manual?
Covers crucial safety precautions and general guidelines for operating the air conditioner.
Details the California Proposition 65 warning regarding cancer and reproductive harm.
Provides essential safety warnings and instructions for the safe installation of the unit.
Highlights safety considerations for the power supply line, fuses, and circuit breakers.
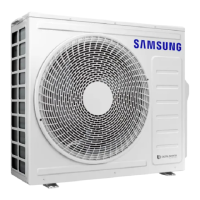
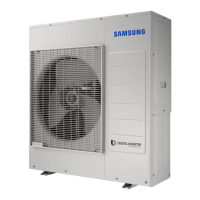
Guidance on selecting the optimal and safe location for installing the outdoor unit.
Specifies required minimum clearances around the outdoor unit for proper installation and operation.
Lists necessary accessories and tools required for the installation process.
Instructions on securely mounting and fixing the outdoor unit to its designated base.
Describes the method for wall-mounting the outdoor unit using a supporting rack.
Details the procedure for connecting the main power, outdoor-to-indoor power, and communication cables.
Explains how to use conduits to protect cables when connecting indoor and outdoor units.
Wiring diagrams and instructions for connecting various cables to the outdoor unit.
Provides specifications for circuit breakers, power supply cords, and wiring requirements.
Details the specifications and dimensions for outdoor-to-indoor power terminal connections.
Guidance on extending the power cable, including necessary tools and preparation steps.
Detailed steps for safely and correctly connecting cable wires using sleeves and crimping tools.
Instructions for connecting refrigerant pipes, including outside diameter and length specifications.
Details on piping length limits and maximum height differences between indoor and outdoor units.
Procedure for cutting and flaring refrigerant pipes correctly, including required tools and dimensions.
Instructions for connecting refrigerant pipes and performing vacuuming for system preparation.
Methods for performing gas leak tests on outdoor and indoor unit connections.
Guidance on calculating and adding the correct amount of R-410A refrigerant to the system.
Instructions for connecting the drain hose to the outdoor unit for proper condensation drainage.
Procedure for ensuring proper earthing connections and checking earthing resistance for safety.
Manual setting of indoor unit addresses and configuration options via the outdoor unit's display.
Details on setting various operational options for the outdoor unit and indoor units.
Performing operational tests for Cool and Heat modes, checking temperature differences.
Enables setting the unit to operate exclusively in Cool or Heat mode.
Procedure for safely collecting refrigerant into the outdoor unit before maintenance or relocation.
Steps for safely moving the indoor and outdoor units to a new location.
Instructions on how to properly open and close the stop valves for system operation.
Detailed steps for securely closing the stop valve after maintenance or adjustments.
Lists common error codes displayed on the outdoor unit PCB, covering system, sensor, and operation errors.
| Refrigerant | R410A |
|---|---|
| Power Supply | 220-240V, 50Hz |
| Cooling Capacity | 12000 BTU/h |
| Heating Capacity | 12000 BTU/h |
| Features | Auto Clean, Digital Inverter, Wi-Fi Control |
| Outdoor Unit Weight | 28 kg |
| Operating Temperature (Heating) | -15°C to 24°C |