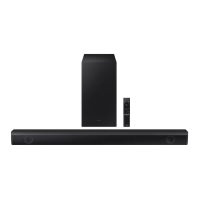
01
CHECKING
THE
COMPONENTS
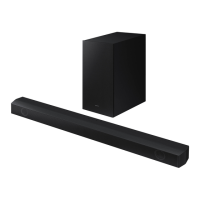
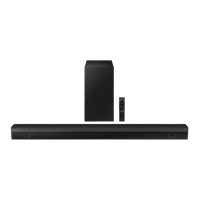
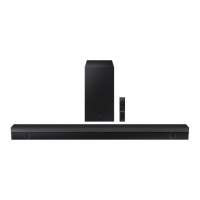
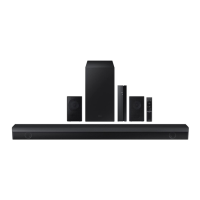
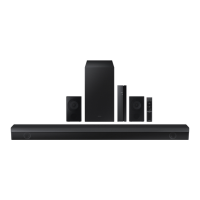
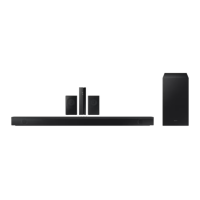
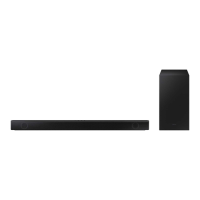
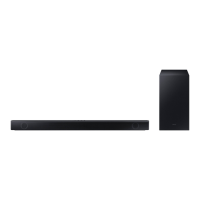
Sound
bar
Main
Unit/
Subwoofer
/
Remote
Control/ Batteries
/
Power
Cord
X 2
(Subwoofer,
Sound
bar)/
AC/DC
Adapter
(Sound
bar)/ Optical Cable/
Wall
Mount Guide/
Holder-Screw
X 2 / Bracket-Wall Mount X 2 /
Screw
(M4
x Ll0) X 2
NOTES
•
For
more
information about the power supply
and
power
consumption,
refer
to
the label attached to the product.
(Label:
Bottom of the
Sound
bar
Main
Unit)
•
To
purchase
additional components or optional
cables,
contact a
Samsung
Service
Center
or
Samsung
Customer
Care.
•
Design
and
specifications
are
subject to
change
without prior
notice.
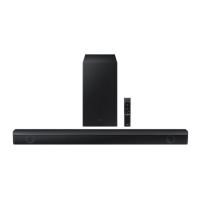
02
PRODUCT
OVERVIEW
Front
Panel/
Top
Panel
of
the
Sound
bar
D
Volume
Display
Press
the ~
(Source)
button
and
the
mode
to
be
changed
appears
on
the
display.
(D
.
IN
/
HDMI
/BT/
USB)
Bottom
Panel
of
the
Sound
bar
D
USB
(SV
0.SA)
Connect
a
USB
device
here
to
play
music
files stored
on
the
USB
device
through the
Sound
bar.
DC
24V
(Power
Supply
In)
Connect
the
AC/DC
power
adapter.
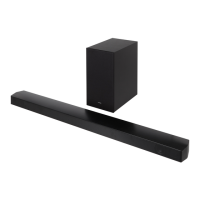
03
HDMI
Inputs digital
video
and
audio
signals
simultaneously
using
an
HDMI
cable.
Connect
to the
HDMI
output of
an
external
device.
HDMITOTV(ARC)
Connect
to the
HDMI
(ARC)
port
on
a
TV.
DIGITAL
AUDIO
IN
(OPTICAL)
Connect
to the digital (optical) output of
an
external
device.
CONNECTING
THE
SOUNDBAR
Connecting
the
power
and
units
•
For
more
information about the required electrical power
and
power consumption, refer
to
the label attached to the product.
(Label:
Bottom of the
Sound
bar
Main
Unit)
~
Bottom
of the
Soundbar
Main
Unit
Rear
of
Subwoofer
Manually
connecting
the
Subwoofer
D
Subwoofer
fJ
Remote
Control
(g
Soundbar
SSec
1
➔
1
5
Sec
Blinking
blue
fast
First,
press
the button
on
the
remote control to turn
on
the
display,
and
then
press
the
Up
button
on
the remote control
for at least 5
seconds.
19
Connection
The
LINK
LED
indicator stops blinking
and
complete
glows a
solid
blue (connection
complete).
 Loading...