22
1. Introduction
Installing the driver locally
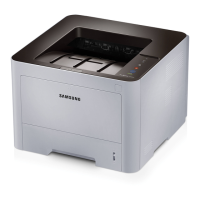
A locally connected machine is a machine directly attached to your computer
using a USB cable. If your machine is attached to a network, skip the following
steps below and go on to installing a network connected machine’s driver (see
"Installing driver over the network" on page 134).
• If you are a Mac, Linux, or UNIX operating systems user, refer to the
"Installation for Mac" on page 125, "Installation for Linux" on page 127, or
"Installing the UNIX printer driver package" on page 139.
• The installation window in this User’s Guide may differ depending on the
machine and interface in use.
• Only use a USB cable no longer than 3 meters (118 inches).
13
Windows
1
Make sure that the machine is connected to your computer and powered on.
2
Insert the supplied software CD into your CD-ROM drive.
If the installation window does not appear, click
Start
>
All programs
>
Accessories
>
Run
.
X:\
Setup.exe
replacing “X” with the letter, which represents your CD-ROM
drive and click
OK
.
• For Windows 8,
If the installation window does not appear, from
Charms
, select
Search
>
Apps
and search for
Run
. Type in X:\Setup.exe, replacing “X” with the
letter that represents your CD-ROM drive and click
OK
.
If “
Tap to choose what happens with this disc
.” pop-up window
appears, click the window and select
Run Setup.exe
.
3
Review and accept the installation agreements in the installation window,
and then, click
Next
.
4
Select
USB
on the
Printer Connection Type
screen. Then, click
Next
.
5
Follow the instructions in the installation window.
You can select the software applications in the Select Software to Install
window.

 Loading...