Do you have a question about the Samsung SL35 and is the answer not in the manual?
Instructions for installing the camera's application software on a PC for image transfer and editing.
Step-by-step guide on how to capture an image using the camera.
Procedure for connecting the camera to a PC using the supplied USB cable.
Guidance on verifying and turning on the camera's power supply.
Instructions on locating the camera as a removable disk in Windows Explorer.
Lists and illustrates the items included in the camera package.
Shows optional accessories available for purchase.
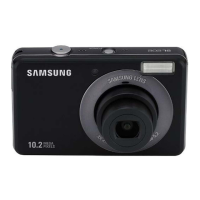
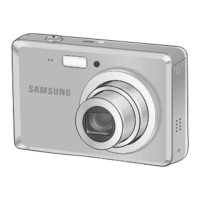
Identifies and labels the components on the front and top of the camera.
Identifies and labels the components on the back of the camera.
Identifies and labels the components on the bottom of the camera.
Describes the function and status indicators of the self-timer lamp.
Explains the meaning of different states of the camera status lamp.
Illustrates icons used to represent various camera shooting modes.
Explains how to select different shooting modes using the MENU button.
Guide to using the Smart Auto mode for automatic scene detection and settings.
Instructions for using the Auto mode for quick and simple picture taking.
Details on using the Program mode for manual control of settings.
Explanation of the Digital Image Stabilisation (DIS) mode features and limitations.
Guide on using the Photo Help mode for learning optimal picture-taking methods.
Describes various scene modes and their optimal shooting conditions.
Instructions for using the Frame Guide mode to assist with framing shots.
Guide on adjusting shutter speed and aperture, particularly in Night mode.
Explanation of the Long Time Shutter mode for adjusting exposure in low light.
Instructions for recording movie clips, including size and file type details.
Steps to record movie clips without capturing audio.
How to temporarily pause and resume movie recording (Successive Recording).
Function of the power button for turning the camera on/off.
Usage of the shutter button for capturing images and recording video.
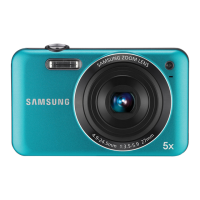
Operation of the zoom buttons for optical and digital zoom.
Function of the Info button to display image information and Up button.
How to use the Macro button for close-up shots and the Down button.
Steps to access and enable various camera functions via the menu.
How to adjust exposure settings automatically or manually using EV.
Adjusting white balance settings for natural color reproduction.
Setting the ISO sensitivity for different lighting conditions.
Utilizing face detection for automatic focus and exposure adjustment.
Guide for taking self-portraits using the face detection feature.
Using Smile Shot to automatically capture images when a smile is detected.
Function to detect and capture blinking eyes in photos.
Adjusting skin tone in images within the beauty shot mode.
Improving skin appearance in beauty shot mode using retouching tools.
Selecting appropriate image resolutions for still and movie modes.
Choosing compression ratios and frame rates for image and movie quality.
Automatic Contrast and Brightness adjustment for challenging lighting.
Changing metering methods (Multi, Spot, Center-Weighted) for exposure control.
Selecting shooting modes: Single, Continuous, Motion Capture, AEB.
Choosing between Center AF and Multi AF for focus area selection.
Applying various visual effects and styles to images directly.
Adjusting image contrast, sharpness, and saturation.
Adding voice-overs to still images.
Recording audio clips for extended periods.
Function to pause and resume voice recording sessions.
Steps to record movie clips without audio.
Setting the volume level for various camera sounds.
Configuring the sound played when the camera is turned on.
Selecting the sound played when the shutter button is pressed.
Enabling beep sounds for button presses and operations.
Activating sound alerts for autofocus confirmation.
Selecting the display language for the camera's menus and interface.
Enabling or disabling descriptions for camera functions on the display.
Choosing the image displayed when the camera is turned on.
Setting the duration for viewing captured images immediately after shooting.
Adjusting the brightness level of the LCD monitor.
Configuring the power save feature to automatically turn off the LCD monitor.
Procedure for formatting the memory card, erasing all data.
Restoring all camera settings to their default values.
Setting the camera's date, time, and date format.
Selecting the format for naming image files.
Option to include date and time stamps on still images.
Configuring the automatic power-off timer to save battery.
Choosing the video output signal format (NTSC or PAL).
Turning the autofocus assist lamp on or off.
Configuring USB connection mode for PC or printer.
Optimizing camera performance based on the selected battery type.
How to view still images stored in the camera's memory.
Instructions for playing back recorded movie clips.
Capturing still images directly from movie clips.
How to play back recorded audio files.
Playing back voice memos attached to still images.
Function of the play mode button for switching modes and power.
Controls for viewing thumbnails, enlarging images, and running Smart Album.
Using Smart Album to view, categorize, and search files.
How to search for and delete files within the Smart Album.
Viewing enlarged images and checking the enlargement indicator.
Extracting and saving specific parts of an image.
Displaying image information and navigating menus.
Controls for playing, pausing, and confirming actions in Play mode.
Navigation and menu selection buttons used in various modes.
Changing the resolution (size) of captured images.
Rotating stored images by various degrees (horizontal, vertical, 180).
Applying various effects to images without editing software.
Adjusting Red, Green, and Blue values for custom color effects.
Removing red-eye effects from captured images.
Modifying image quality, brightness, and retouching.
Making skin appear clear and beautiful in images.
Automatically adjusting brightness of dark areas in images.
Adjusting the contrast level of the image.
Adjusting the saturation level of the image.
Adjusting the brightness level of the image.
Adding noise to images for a classic photographic feel.
Displaying images continuously at preset intervals, viewable on external monitor.
Choosing images to view in the Multi Slide Show.
Applying unique screen effects to the Multi Slide Show.
Adjusting the time interval between displaying images in the slideshow.
Selecting background music for the Multi Slide Show.
Procedure for deleting selected or all images from the memory card.
Locking specific images to prevent accidental deletion.
Adding voice memos to still images.
Embedding print information for DPOF-compatible printers.
Printing images in an index format.
Specifying print sizes for images compatible with DPOF 1.1 printers.
Copying images, movie clips, and voice files to the memory card.
Steps to connect the camera to a PictBridge-supported printer.
Configuring camera settings for printer connection via USB.
Steps to connect the camera to a PC for data transfer.
Procedure for safely disconnecting the camera from the PC.
How to download images from the camera to a PC.
Guide to downloading images and folders using Samsung Master software.
Using Samsung Master's image viewer to browse stored media.
Utilizing Samsung Master's tools for editing still images.
Editing movie clips, narration, and music using Samsung Master.
| Sensor Type | CCD |
|---|---|
| Optical Zoom | 3x |
| ISO Sensitivity | Auto, 80, 100, 200, 400, 800, 1600, 3200 |
| Type | Compact |
| ISO Range | 80-3200 |
| Video Resolution | 640 x 480 |
| Image Sensor | 1/2.33" |
| Supported Flash Memory | SD, SDHC |
| Storage Media | SD Card, SDHC Card |
| Shutter Speed | 8-1/1500 sec |