Do you have a question about the Samsung SM421 and is the answer not in the manual?
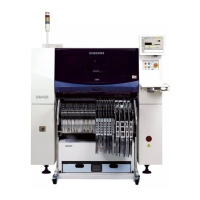
Identifies and labels physical components of the machine's front and rear views.
Details the buttons, indicators, and controls on the machine's operation panel.
Explains the layout and components of the Machine-Machine Interface (MMI) software.
Outlines the steps for connecting the power source and checking the rated voltage for the machine.
Lists different nozzle types with their external shapes and dimensions for part placement.
Describes the procedure for safely turning the main power switch on and off.
Details initial inspections, including power connection and general machine checks before operation.
Explains the process of initializing the Machine-Machine Interface (MMI) and checking system modules.
Describes how to return the machine to its home position using the 'Start' button.
Details the procedure for warming up the machine for optimal placement accuracy.
Covers initial steps for production, including loading PCB files and setting up the machine.
Guides on adjusting conveyor width and setting up PCB fixing methods.
Explains how to position and install backup pins to support PCBs during placement.
Covers the main production phase, including loading PCB programs and starting operations.
Details the process of stopping production and shutting down the machine.
Describes methods for temporarily halting and resuming production operations.
Explains how to restart production after the machine enters a 'FREEZE' mode due to an error.
Details how to manage system-initiated emergency stops and resume operation.
Covers manual emergency stops using the 'EMG' switch or 'MOTOR FREE' button.
Outlines the sequence of operations in an SMT In-Line system and related measures.
Provides instructions on modifying machine settings and procedures for new job setups.
Provides checks for proper mounting and functionality of the feeder and its components.
Details how to check if the feeder's locker mechanism is properly engaged for tape feeding.
Explains how to correctly mount part reels on the feeder for smooth component feeding.
Guides on verifying correct feeder installation, including probe pins and LED status.
Describes how to adjust the part pickup height based on tape type for accurate component placement.
Details the procedure for closing the reel arm after a reel change, with specific attention to lifting.
Advises on precautions when checking reel information, emphasizing opening the reel arm first.
Explains how to determine optimal positions for backup pins to support PCBs.
Guides on setting the correct height for backup pins to ensure PCB flatness.
Describes how to check PCB flatness using a ruler in diagonal and horizontal directions.
| Brand | Samsung |
|---|---|
| Model | SM421 |
| Category | Laboratory Equipment |
| Language | English |