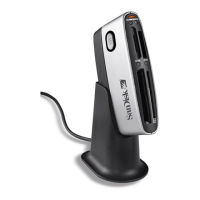
Installation Instructions for Windows Users
Windows XP/Me
1. No driver CD installation is necessary.
2. Plug the ImageMate into an available USB port.
3. Restart the computer.
4. Open ‘My Computer’ on the desktop.
Read ‘How to Use, Section 5, 6 & 7’ for further details
Windows 98/SE/2000
1. Insert the ImageMate Installation CD.
2. Follow the on-screen installation instructions.
3. Restart the computer.
4. Plug the ImageMate into an available USB port.
5. Open ‘My Computer’ on the desktop.
Read ‘How to Use, Section 5, 6 & 7’ for further details
Installation Instructions for Macintosh Users
Mac OS X, v10.1.2 and higher
1. No driver CD installation necessary.
2. Plug the ImageMate into an available USB port.
3. Restart the computer.
4. Removable Disk Volume will appear on the desktop. (see Section 6 for Icon examples)
Read ‘How to Use, Section 5, 6 & 7’ for further details.
Mac OS X, v10.0
1. Upgrade to the latest Mac OS X release, v10.1.2 or higher.
2. Proceed with Mac OS X, v10.1.2 and higher installation instructions.
Mac OS 8.6+/9.1.X+
1. Insert the ImageMate Installation CD.
2. Double-click on the SanDisk installation CD icon.
3. Choose the correct operating system installation folder.
4. Double-click the installation file.
5. Follow the on-screen instructions.
6. Restart the computer.
7. Plug the ImageMate into an available USB port.
8. Restart the computer.
Read ‘How to Use, Section 5, 6 & 7’ for further details.
3