Do you have a question about the Sanipex Bagno Design Revolution and is the answer not in the manual?
Specifies the required hot water supply temperature limits for the mixer.
Details the maximum and minimum working pressures for the mixer.
The mixer is supplied with a cover plate for installation at a depth from 70 mm to 89 mm.
The temperature control knob is pre-set from the manufacturer at 38°C.
Details the female thread sizes for mixer ports, including G ½”, G ¼”, NPT½”, NPT ¼”.
The mixer has an additional bottom outlet, requiring a flow control when used.
Consider the thickness of the final coating (tiles, marble etc.) for installation.
Keep a 135x100 mm hole in the wall for protection and future maintenance.
The plate slides from a minimum of 21 mm to a maximum of 1mm.
Once the mixer is installed, cut along the finished wall and remove the plastic guard.
Put the silicone between the plastic guard and the finished wall.
Fix the cover plate on the threaded rod and the adapter with o-ring.
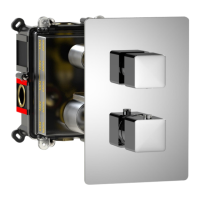
Position closure handle, fix grub screws, and attach thermostatic handle and caps.
Steps for removing, cleaning, and replacing the thermostatic cartridge.
Instructions for unscrewing, cleaning filters, and replacing valve holders.
How to place the stop ring and set the temperature to 38°C.
Steps to unscrew threaded rod, remove headwork, and replace the diverting cartridge.
Wipe with a soft, damp, clean cloth; avoid abrasive cleaners.
Close system and empty mixer during prolonged disuse in winter to prevent frost damage.
| Brand | Sanipex |
|---|---|
| Model | Bagno Design Revolution |
| Category | Plumbing Product |
| Language | English |