ADJUSTMENT PROCEDURES
L
L
GENERAL REMARKS
● Before the adjustments, wipe offstains onthe tape con-
tatting surfaces of the parts and the belt with a soft cloth
soaked in alcohol. Trouble may occur because of oil and
grease stains.
● Carefully handle the belt because grease easily attaches
to it. Then, check the used rubber parts. If the rubber has
deteriorated or is scratched, replace the parts with new
ones.
EQUIPMENT REQUIRED
● Vnlfvf
● Frequency Counter
● DC Constant-voltage Regulator
● Dummy Load (4Q)
● Test Tapes
t
For Tape Speed Adjustment:
● Using Tape ..... ..
Mini-cassette Tape of 18P thick
(A-BEX SSC-1582)
● Frequency of Recorded Linear Sweep Signal
. . . ..............................
4,575
- 3,925Hz
● Recording Level ....................................... –lOdB
● Recording Time ................ ..................... 84.5sec.
● Recording Tape Speed 4.75cm/sec. (1-7/8 ips. )
i
For Head Azimuth Adjustment
● Using Tape Mini-cassette tape of 18P thick
(A-BEX SSC-1584)
● Recording Signal ..... .................................... 4kHz
● Recording Level ....................................... –lOdB
● Recording Tape Speed . . 4.75cm/sec. (1-7/8 ips. )
TAPE SPEED ADJUSTMENT
1. Connect a frequency counter to the earphone jack and
play back the above described test tape for the Tape
Speed Adjustment.
Frequency Counter
3,000!iZ&5~o
I
Dummy Load 4Q
EARPHONE
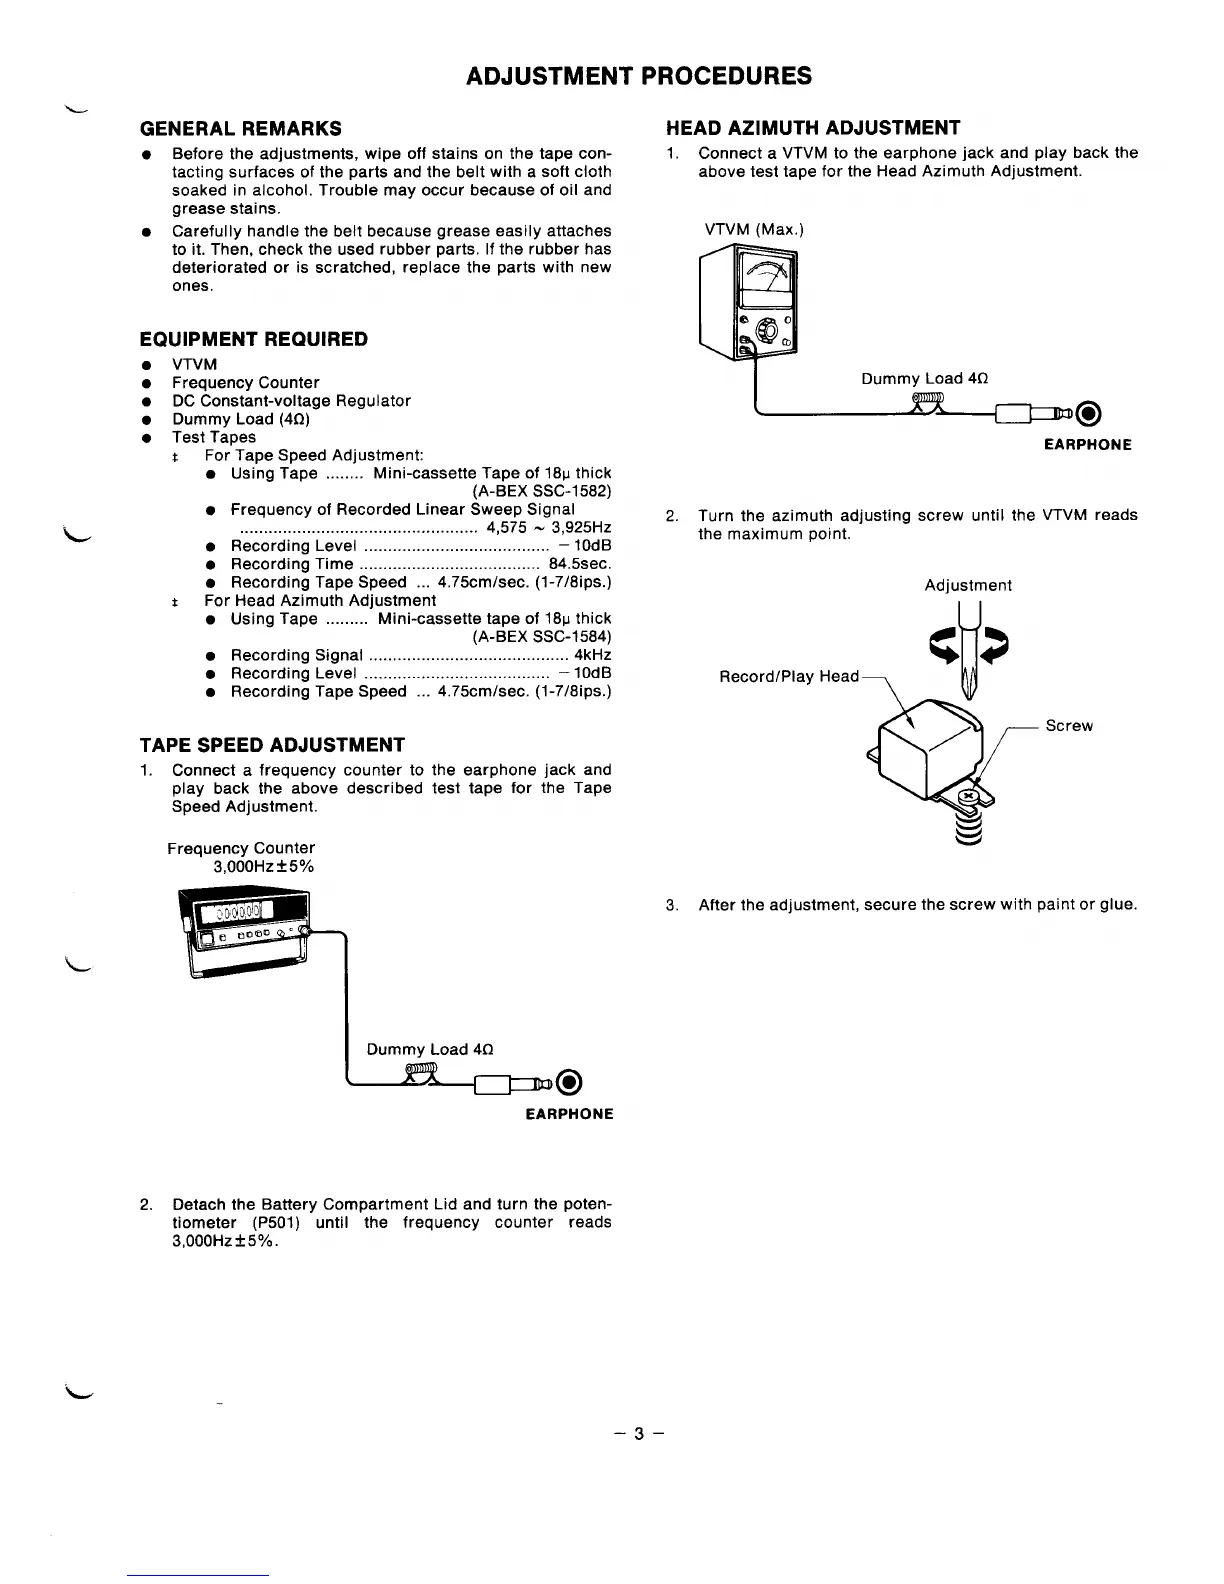
HEAD AZIMUTH ADJUSTMENT
1. Connect a VTVM to the earphone jack and play back the
above test tape for the Head Azimuth Adjustment.
2.
VTVM (Max.)
I
Dummy Load 4fl
EARPHONE
Turn the azimuth adjusting screw until the VTVM reads
the maximum point.
Adjustment
v
c>
RecordlPlay Head
Q
/
Screw
x
g
3. After the adjustment, secure the screw with paint or glue.
2. Detach the Battery Compartment Lid and turn the poten-
tiometer [P501) until the frequency counter reads
–3–