7
Stand 09/18 TM
AUFBAUANLEITUNG / ASSEMBLY INSTRUCTIONS
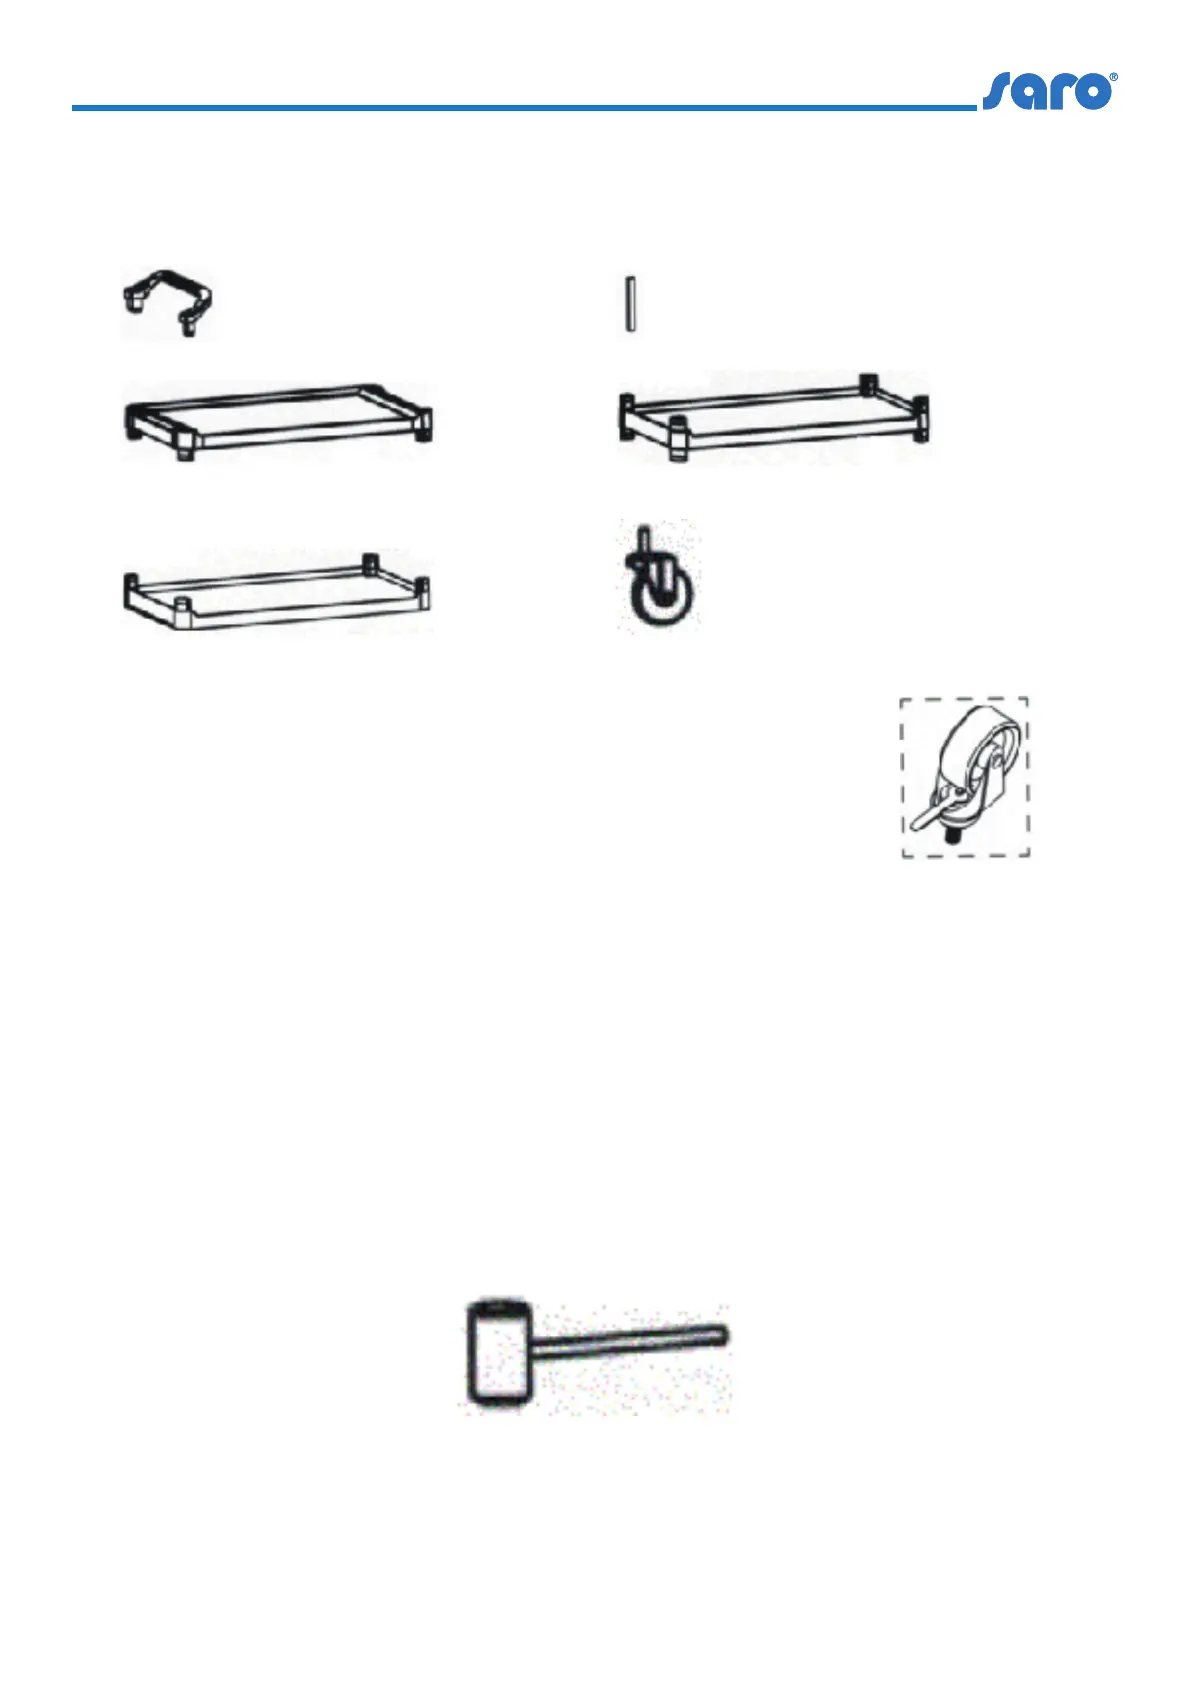
2 x Gri
2 x handle
1 x Boden oben (C)
1 x base top (C)
1 x Boden unten (E)
1 x base bottom (E)
8 x Zwischenstück (B)
8 x adaptor (B)
1 x Boden mittig (D)
1 x base center (D)
4 x Rad (davon 2 x mit Feststellbremse) (F)
4 x caster (of which 2 x with brake) (F)
• Sie benötigen einen Gummihammer (Abb. H)
und einen Maulschlüssel der Größe 7 für die Radmontage�
• Alle Teile vorsichtig aus dem Karton entnehmen und
Verpackungsmaterial entfernen�
• Boden oben (C) mit der Oberseite auf den Boden legen, auf
eine Decke / Tuch um Kratzer zu vermeiden�
• 4 Zwischenstücke (B) jeweils in die Aufnahme des Bodens
(C) einstecken, andrücken und mit dem Gummihammer
etwas nacharbeiten� Bitte vorsichtig hämmern und auf
geraden Sitz der Zwischenstücke (B) achten�
• Den Zwischenboden (D) (Oberseite nach unten) auf die
befestigten Zwischenstücke (B) aufsetzen, andrücken und
mit dem Gummihammer nacharbeiten� Bitte vorsichtig
hämmern�
• You need a rubber hammer (Fig. H) and a size 7
spanner for wheel assembly�
• Carefully remove all parts from the box and remove
packing material�
• Place the oor on top (C) with the top on the oor, on a
blanket / cloth to avoid scratches�
• Insert 4 intermediate pieces (B) into the bottom
receptacle (C), press them against the oor and rework
them slightly with the rubber hammer� Please hammer
carefully and ensure that the intermediate pieces (B) are
seated straight�
• Place the intermediate oor (D) (upper side down) on
the xed intermediate pieces (B), press down and nish
with the rubber hammer� Please hammer carefully�
Abb� H / Fig. H