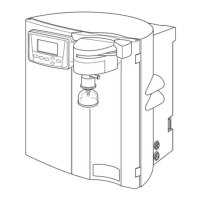
Cartridge Installation
• Open both doors of the system.
• Remove both cartridge packs from
their packaging.
One cartridge pack has a label with
a blue dot and the number 1, the
other cartridge has a red dot and
the number 2. In the housing to
the lower left side you will find a
blue labeled cartridge adaptor, on
the lower right side a red cartridge
adaptor.
• Remove the red plugs from the
top of the cartridge pack and push
the blue adapter onto the cartridge
pack with the blue dot. Press
vigorously. Be sure the label with
the blue dot faces you. The adapter
displays “front”.
Two screws each are seated in
the cartridge cover. The two screw
heads must rise from the drillings
of the safe guard slides with the
upper ring of the spacers.
• Push both safe guard slides all
the way under the upper ring
of the spacers, as shown in the
figure opposite.
• Place the cartridge pack with the
blue dot left into the housing and
push until properly seated. Be sure
the label faces you.
• Proceed with the cartridge pack
with the red dot in the same
manner on the right side of the
unit and connect the red coupler.
• Close both doors.
Note
– Moisten the O-rings of the
cartridge pack adapter with
water to facilitate connection.
– Before initial operation the
cartridge packs have to be flushed,
see Cartridge Flush section.
– Screw the final filter onto the NPT
fitting of the dispensing valve only
after flush cycle and sanitization
of cartridge packs and ultrafilter.
13
Initial Operation
Press the adapter onto the cartridge (e.g. red cartridge pack)
Secure the adapter by pushing the two safe guard slides forward over the security
screws

 Loading...