Input voltage range: 12/24V
Output power: 5W (5V 1A)
Standby current draw: < 0.03W
Certifications: Qi, CE, FCC, ROHS
Waterproof rating: IPX6 front and back
Techinical information
Alcohol Wipe
x1
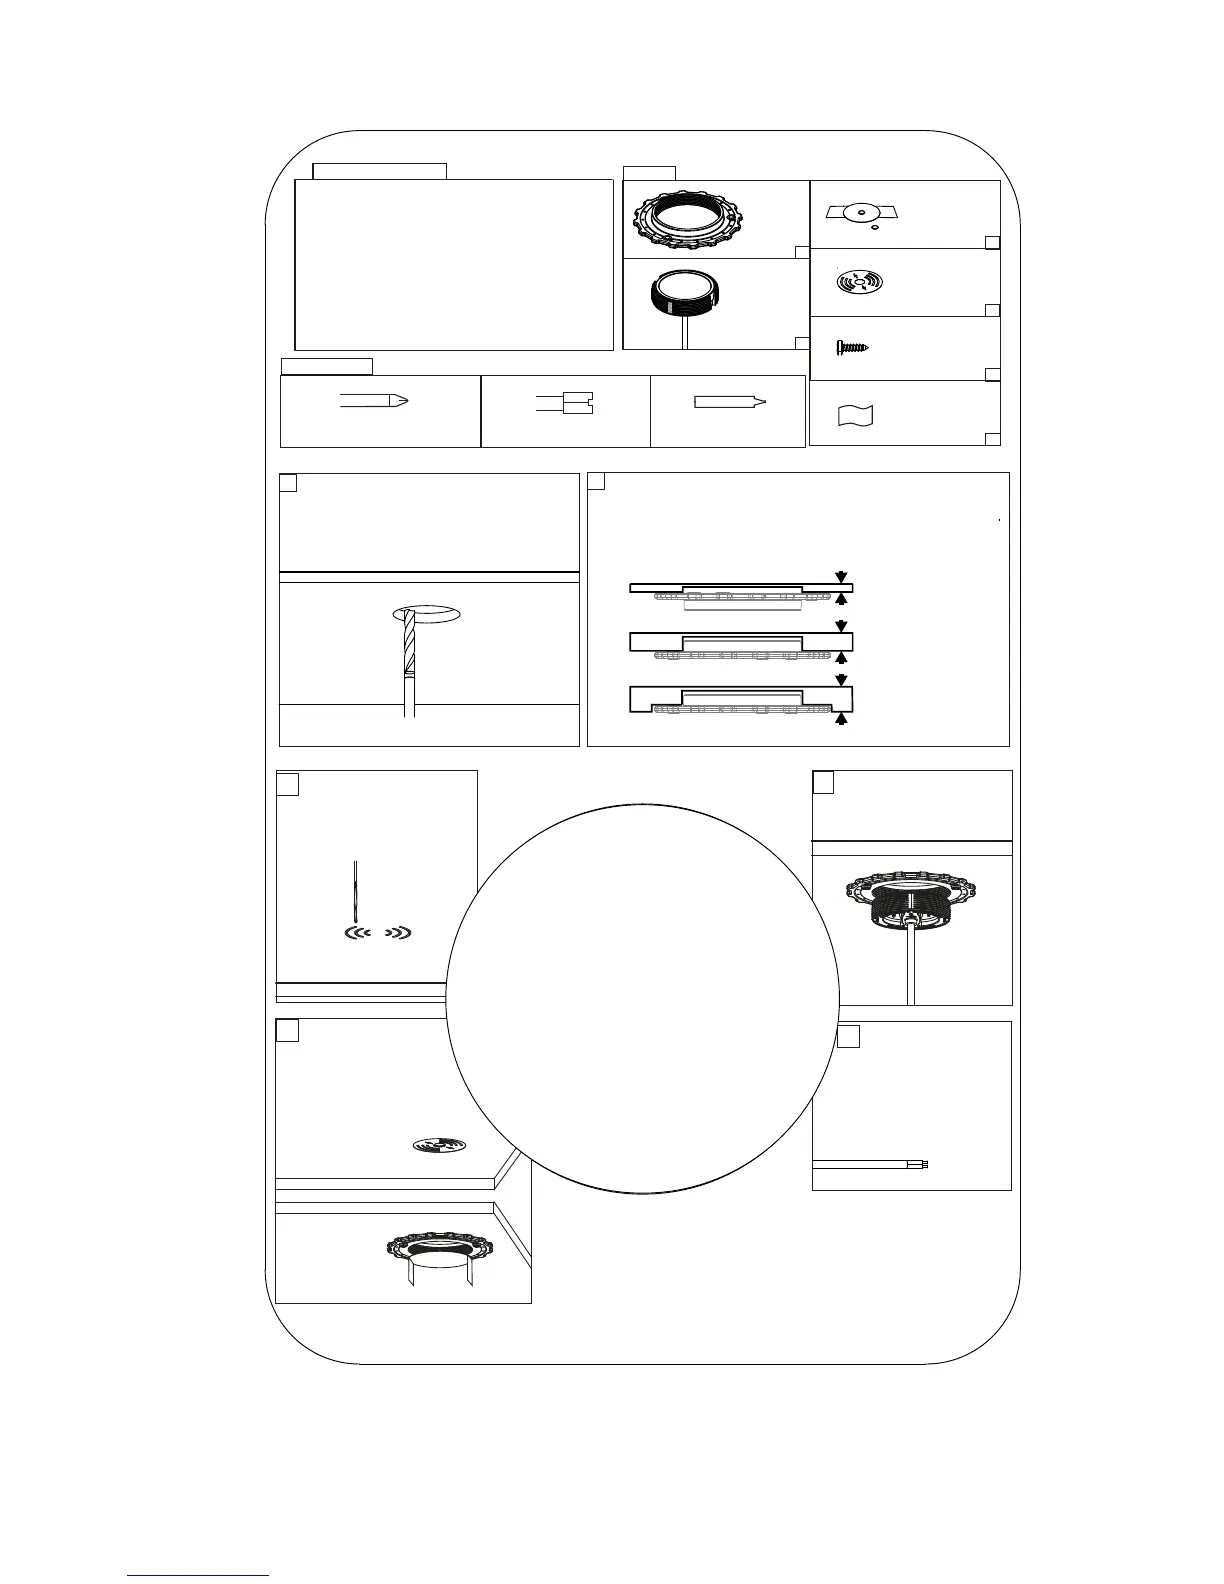
Parts List
Locking
Ring
x1
x1
x1
x3
Charging
Puk
Magnet
Installation
Tool
Vinyl Sticker
No6 x 1/2”
self tapping screw
x1
Tools Required
Straight Router
Pozi Screwdriver
Sikaex 292-i
(recommended)
1
Measure mounting surface. If surface
is more than 3mm thick, route a pocket
67mm (2.6”) diameter till 3mm thickness
is achieved.
2
Screw or bond locking ring in correct orientation
to underside of surface according to the
measured material thickness (Sikaex 292-i
recommended).
3-9mm
9-18mm
>18mm
3
Option 1 - CNC
etch logo onto top
surface
4
Screw in PUK until
rm, do not over
tighten.
5
Connect wires to
12/24V supply,
ensuring a
waterproof
conenction.
6
Option 2 - Use
vinyl sticker and
align with magnet
tool provided.
Ensure surface is
free from dirt
or grease.
For further installation infomation please visit
www.scanstrut.com/rokk-wireless