THE PRESENT MANUAL BELONGS TO - Schenker Italia - ALL RIGHTS RESERVED
25
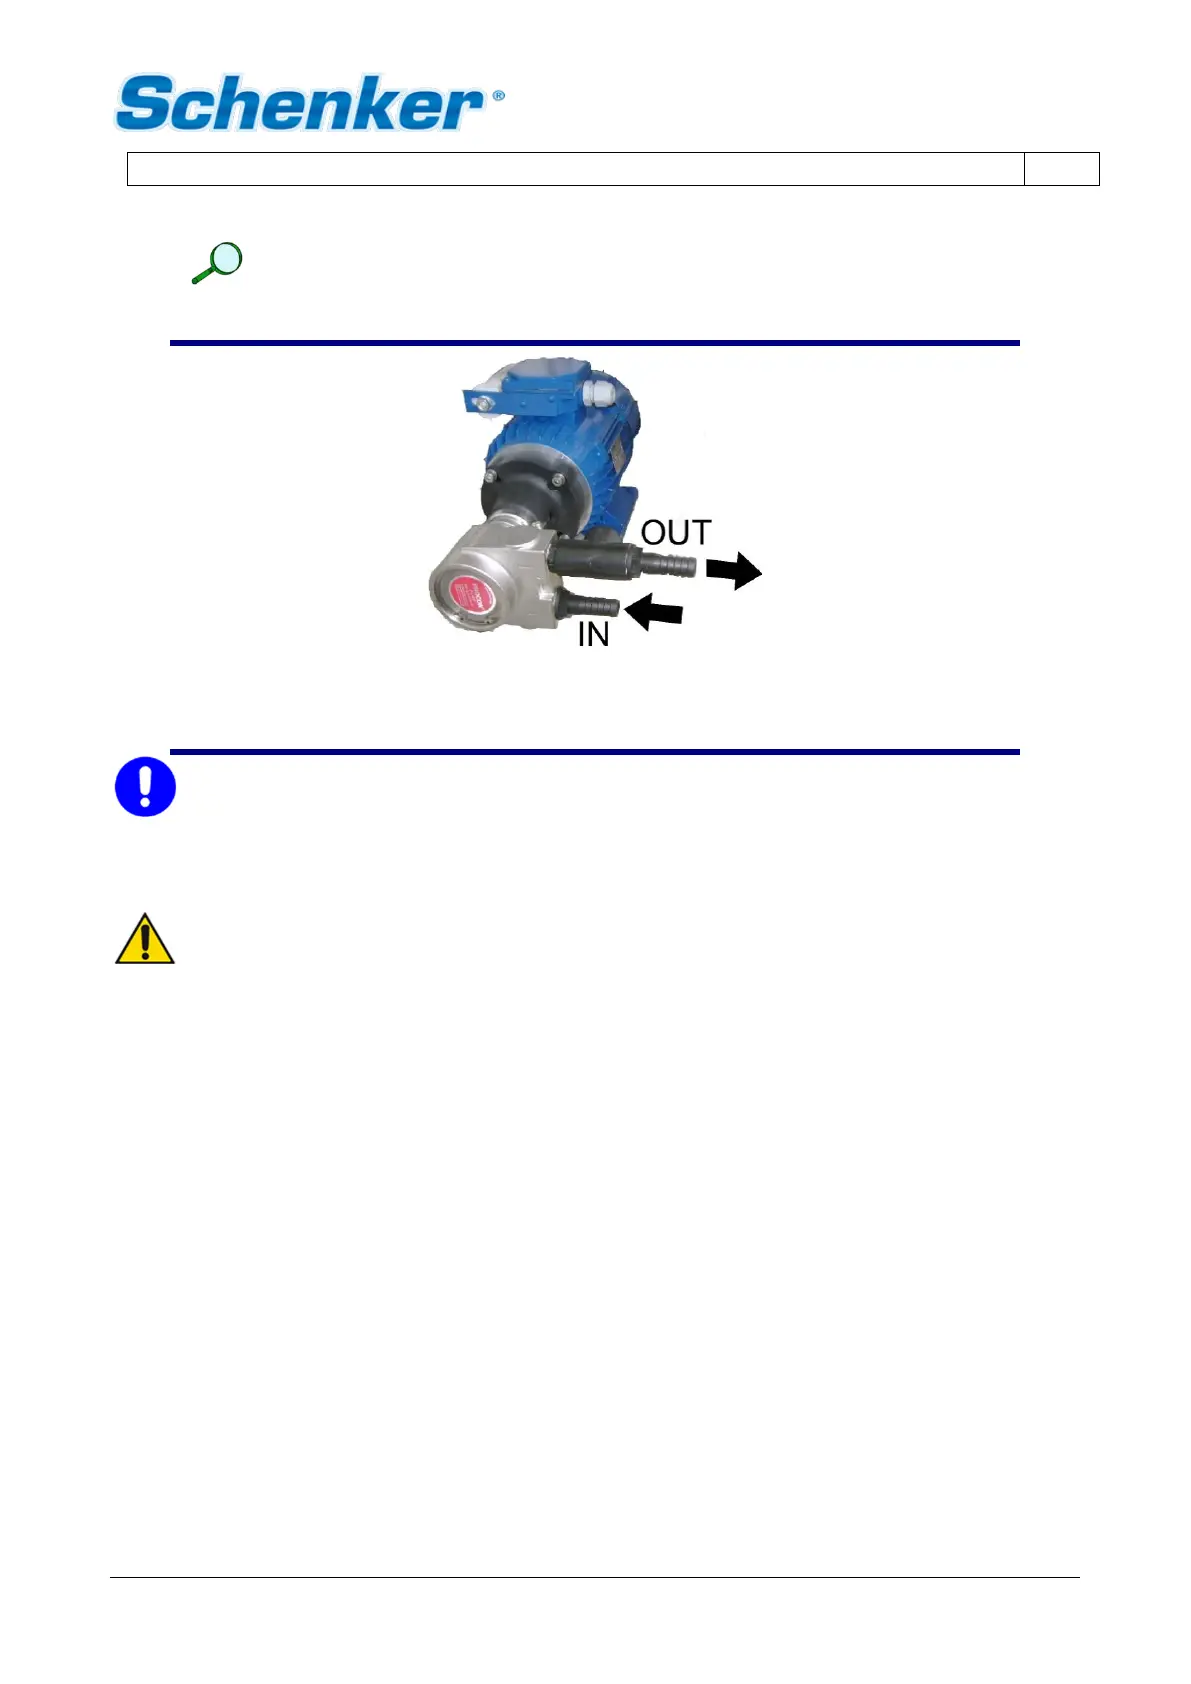
PUMP CONNECTIONS:
Connect the in/out hoses to the pump as follows:
PUMP IN AND OUT
FIG. 4-8
CAUTION
The pump has to be placed as close as possible to the seawater intake and as low as possible
to the seawater line; furthermore, it is recommended to avoid long and convoluted path of the
connection hoses.
ATTENTION
The use of improper hoses can cause them to burst which endangers the security of the vessel.
WATERMAKER CONNECTIONS:
WATERMAKER INLET (Sea water inlet from the pump):
Make use of the holder located on the right side of the watermaker (marked IN).
WATERMAKER OUTLET (Discharge outboard):
Make use, for this connection, of the holder located on right side of the unit (marked OUT). Create a Swan
neck upward, when the drain outlet on the vessel is positioned below the watermaker unit, in order to guarantee
a water head.
PRODUCTION FRESH WATER CONNECTION
The connection has to be made using the small hose supplied with the equipment. The connection has to be
made between the polyethylene pipe that comes out the watermaker unit (on the right), and the upper side of
the tank, on a ¼” outlet if available.
It is possible, in case of metal tanks, to make a ¼” threaded hole to connect the supplied male connector.
Another option is to Tee into the tank air vent hose.There are no particular limits on the connection length.
 Loading...