CONTAINS SEALED, NON-SPILLABLE LEAD-ACID BATTERY. MUST BE DISPOSED OF PROPERLY.
WARNING: Possible explosion hazard. Contact with battery acid may cause severe burns and blindness.
Keep out of reach of children.
1. IMPORTANT SAFETY INSTRUCTIONS
WARNING – When using this product, basic precautions should always be followed, including the following:
1.1 Read all the instructions before using the product. Failure to do so could result in serious injury or death.
1.2 To reduce the risk of injury, close supervision is necessary when the product is used near children.
1.3 Do not put ngers or hands into the product.
1.4 Do not expose the power pack to rain or snow.
1.5 Use of an attachment not recommended or sold by the power pack manufacturer may result in a risk of
re, electric shock, or injury to persons.
1.6 To reduce risk of damage to the electric plug and cord, pull the plug rather than the cord when
disconnecting the power pack.
1.7 Do not use a battery pack or appliance that is damaged or modied. Damaged or modied batteries may
exhibit unpredictable behavior resulting in re, explosion or risk of injury.
1.8 Do not operate the power pack with a damaged cord or plug, or a damaged output cable.
1.9 Do not disassemble the power pack, take it to a qualied service person when service or repair is required.
Incorrect reassembly may result in a risk of re or electric shock.
1.10 To reduce the risk of electric shock, unplug the power pack from the outlet before attempting any
instructed servicing.
1.11 WARNING – RISK OF EXPLOSIVE GASES.
a. WORKING IN VICINITY OF A LEAD ACID BATTERY IS DANGEROUS. BATTERIES GENERATE
EXPLOSIVE GASES DURING NORMAL BATTERY OPERATION. FOR THIS REASON, IT IS OF
THE UTMOST IMPORTANCE THAT YOU FOLLOW THE INSTRUCTIONS EACH TIME YOU USE
THE POWER PACK.
b. To reduce risk of battery explosion, follow these instructions and those published by battery manufacturer
and manufacturer of any equipment you intend to use in vicinity of the battery. Review cautionary
markings on these products and on engine.
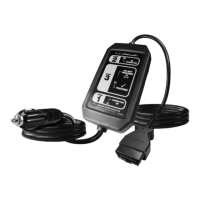
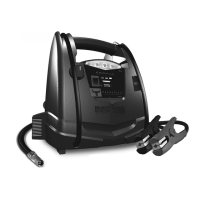
Jump Starter and DC Power Source
OWNERS MANUAL
PLEASE SAVE THIS OWNERS MANUAL AND READ BEFORE EACH USE.
This manual will explain how to use the jump starter safely and effectively. Please
read and follow these instructions and precautions carefully.
FOR MODELS
BE01253
FR01239
FR01241
SJ1329
SJ1342
0099001704-02
For the manual with Spanish and French, plus warranty cards,
visit www.batterychargers.com or call 1-800-621-5485.
Para obtener el manual en español y francés más tarjetas de garantía,
visite www.batterychargers.com o llame al 1-800-621-5485.
Pour le manuel avec espagnol et français ainsi que les cartes de garantie,
visitez le site www.batterychargers.com ou appelez le 1-800-621-5485.