EasyManua.ls Logo

Schumacher Electric SC1402 User Manual

Schumacher Electric SC1402
32 pages
To Next Page IconTo Next Page
Page #1 background imageLoading...
Page #1 background image
0099002034-00
MODEL / MODELO / MODÈLE :
SC1402
Automatic
Battery Charger
Cargador de baterías
automático
Chargeur de batterie
automatique
OWNERS MANUAL
MANUAL DEL USUARIO
MANUEL D’UTILISATION
PLEASE SAVE THIS OWNERS MANUAL AND READ BEFORE EACH USE.
This manual will explain how to use the battery charger safely and effectively.
Please read and follow these instructions and precautions carefully.
POR FAVOR CONSERVE ESTE MANUAL DEL USUARIO Y LEALO ANTES
DE CADA USO. En este manual le explica cómo utilizar el cargador de batería
de manera segura y conable. Por favor, lea y siga las siguientes instrucciones
y precauciones.
GARDER LE MANUEL D’INSTRUCTION ET LISEZ LE AVANT CHAQUE
UTILISATION. Ce manuel explique comment utiliser le chargeur de batterie
d’une façon securitaire et efcace. S’il vous plaît lisez et suivez ces instructions
et precautions.
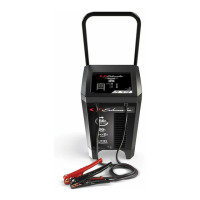
Table of Contents

Questions and Answers:

Schumacher Electric SC1402 Specifications

General IconGeneral
Input Voltage120V AC
Output Voltage6V/12V
Battery Type CompatibilityStandard, AGM, Gel, Deep-Cycle
Microprocessor ControlledYes
Automatic Voltage DetectionYes
Reverse Hook-Up ProtectionYes
TypeBattery Charger
Charge Rate2A
Charging ModesEngine Start
Display TypeLED
Cable Length6 ft

Summary

Safety Instructions and Precautions

Explosive Gas Hazard Warning

Warning about explosive gases generated by lead-acid batteries during normal operation.

Preventing Sparks and Accidental Shorts

Avoid sparks near batteries. Be cautious of dropping tools to prevent shorts.

Handling Battery Acid and Personal Protection

Keep water/soap nearby. Wear protective gear. Wash acid off skin immediately.

Battery Type and Charging Restrictions

Use only lead-acid batteries (22-59Ah). Never charge a frozen battery.

Preparing to Charge

Battery Preparation Steps

Remove battery if needed, ensure ventilation, clean terminals, check water levels.

Consulting Manufacturer Guidelines

Study battery manufacturer's precautions and rates. Set charger voltage and charge rate correctly.

Charger Location and Setup

Optimal Placement and Ventilation

Locate charger away from battery, avoid direct placement above, and ensure ventilation.

Safe Connection and Disconnection

Disconnect AC power before connecting/disconnecting clips. Ensure clips do not touch each other.

Connecting Battery in Vehicle

Cable Routing and Component Clearance

Position AC/DC cords away from moving engine parts to prevent damage.

Identifying Battery Polarity and Grounding

Check battery post polarity and determine which post is grounded to the chassis.

Connecting to Negative Grounded Vehicle

Connect RED clip to POSITIVE post, BLACK clip to chassis or engine block away from battery.

Connecting to Positive Grounded Vehicle

Connect BLACK clip to NEGATIVE post, RED clip to chassis or engine block away from battery.

Connecting Battery Outside Vehicle

Battery Polarity and Cable Connection

Check polarity. Attach 24-inch insulated cable to NEGATIVE post, connect RED clip to POSITIVE post.

Final Connection and Disconnection Procedure

Make final connection, then disconnect in reverse sequence, breaking first connection away from battery.

Grounding and Extension Cord Usage

Grounding Requirements for Safety

Charger must be grounded to reduce shock risk. Use properly installed and grounded outlets.

Extension Cord Guidelines

Use appropriate gauge and condition extension cords if necessary, matching charger plug.

Assembly Instructions

Attaching Wheels and Feet

Attach the feet to the charger base using the provided screws.

Extending the Handle

Pull the handle upward until it locks into place; press silver buttons inward if needed.

Control Panel Overview

ON/OFF Switch Functions

Selects between OFF, Charge/Maintain, Boost, and Engine Start modes.

Rate Selection Button

Chooses between 6<>2A Charge/Maintain and 20A Boost settings.

LED Indicator Lights

Displays status: reversed clamps, bad battery, charging, or charged/maintaining.

Operating Instructions

Charging a Battery in the Vehicle

Steps for charging a battery while it remains installed in the vehicle.

Charging a Battery Outside the Vehicle

Steps for charging a battery that has been removed from the vehicle.

Using the Engine Start Feature

Engine Start Procedure

Steps for using the 150A engine start feature to jump-start a vehicle.

Engine Start Warnings and Notes

Avoid using without a battery; follow cooldown periods and retry intervals.

Automatic Charging Modes

Battery Charging Times

Table showing estimated charging times for different battery sizes and applications.

Aborted Charge and Desulfation

Information on charging aborts, desulfation mode, and the BAD BATTERY LED.

Charge Completion and Maintain Mode

Indication of charge completion and how maintain mode keeps batteries fully charged.

Maintenance and Troubleshooting

Charger Maintenance

Basic cleaning and care for clamps and charger case to ensure longevity.

Troubleshooting Common Problems

Solutions for issues like charger not turning on or engine start not working.

Troubleshooting Specific Issues

Red LED Indicator Issues

Diagnosing problems indicated by the red LED, such as battery defects or overheating.

Battery Voltage Drop Issues

Addressing issues where battery voltage drops in maintain mode or fails to hold charge.

Repair and Specifications

Returning Unit for Repair

Contact customer service for troubleshooting assistance and RMA number before shipping.

Technical Specifications

Details on input voltage, current, and output voltage/current ratings.

Limited Warranty Information

Warranty Coverage and Duration

Three-year limited warranty against defective material or workmanship.

Warranty Exclusions and Limitations

Covers misuse, unauthorized repair, and disclaims implied warranties and consequential damages.

Warranty Registration

Online Warranty Activation

Register product online at www.batterychargers.com for quick and easy warranty activation.

Mail-in Warranty Card

Instructions for filling out and mailing the warranty card if online registration is not possible.

Related product manuals