Assembly Instructions
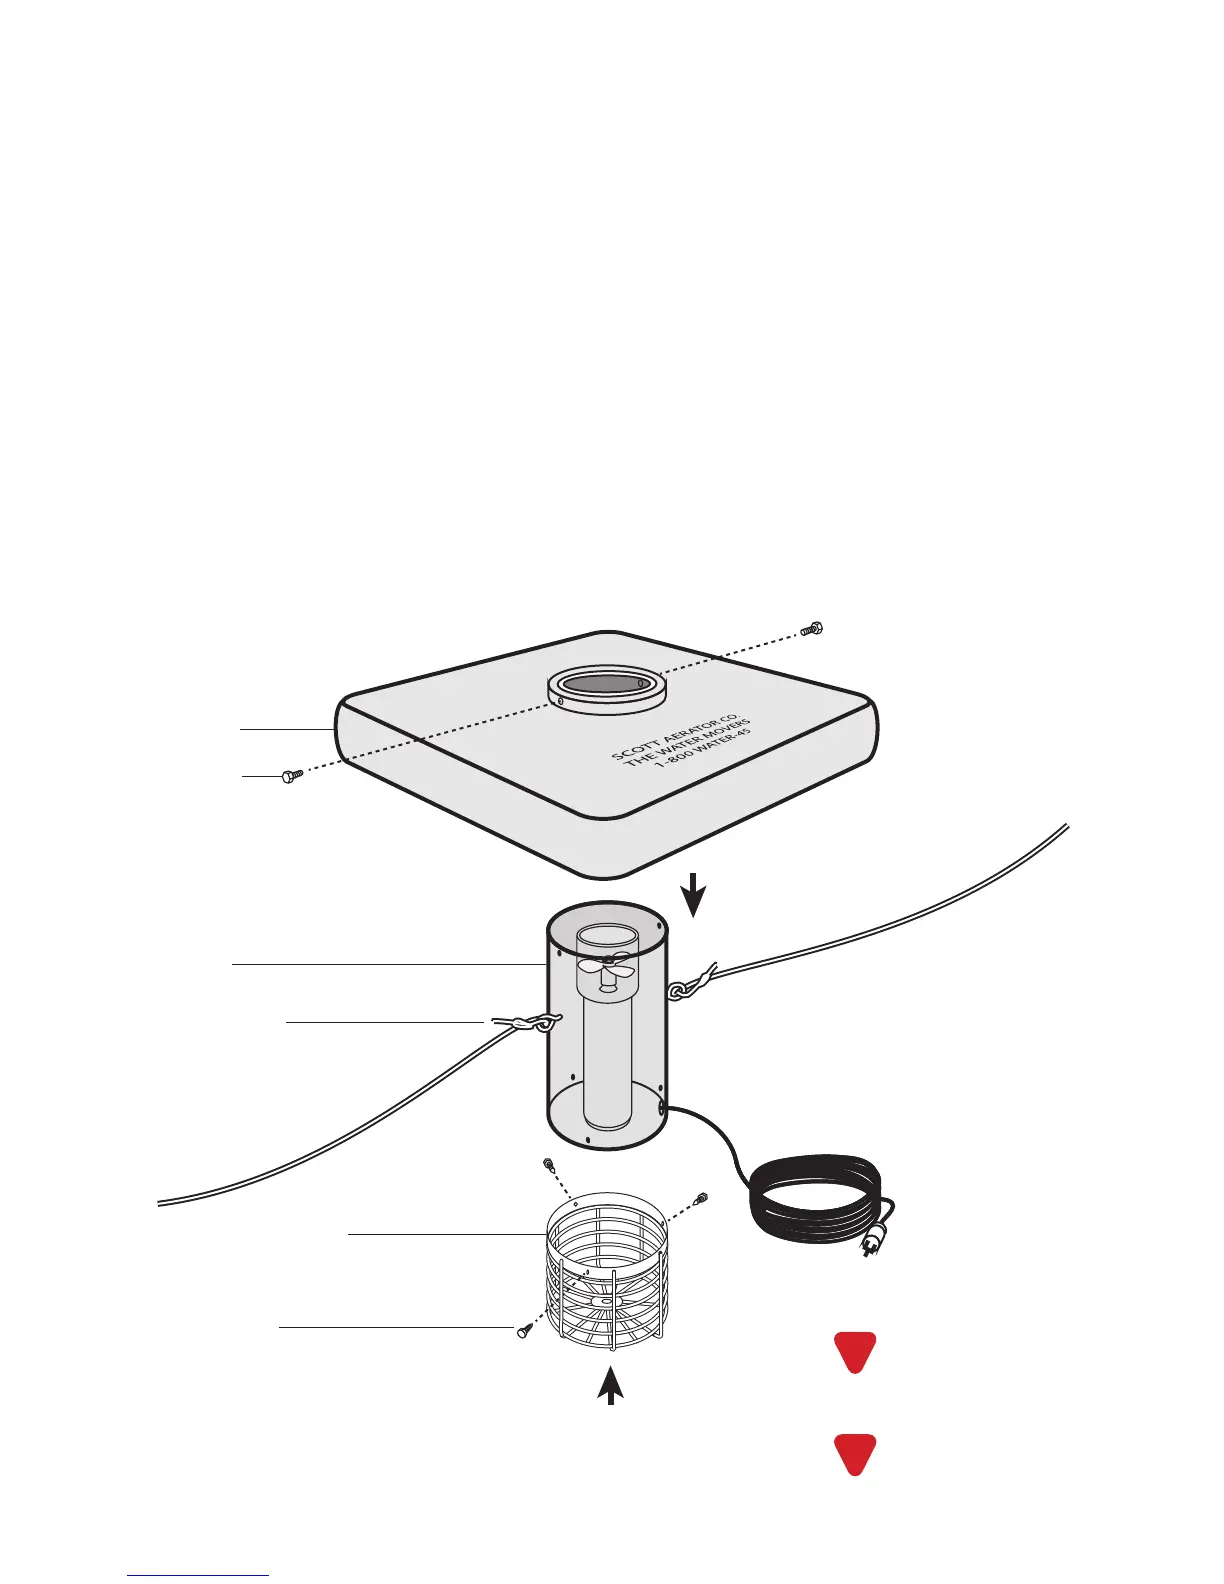
1. Remove the two stainless steel bolts from the oat. Fig. 1
2. Place pump assembly on end, propeller side facing up. Slip the oat platform, with the Scott Aerator name and phone
number facing up, over the pump assembly, aligning the two holes on the oat platform to the pre-drilled holes on the
pump assembly. Use the pre-drilled holes to fasten the oat platform to the pump assembly, using the two stainless-
steel bolts.
3. Turn the pump and oat assembly over and place on its opposite end. Remove and discard the protective packaging
and secure the stainless-steel lter basket by aligning the three lter holes to the pre-drilled holes on the pump
assembly and securing with the enclosed self-tapping screws. Fig. 3
4. Secure a 3/8" or thicker nylon anchoring line (not provided) to each of the two attached eyebolts. Fig. 2 Make sure lines
are long enough to extend outwards, 25 feet apart at a 45° angle to the pond or lake bottom.
5. At this point, your Display Aerator can be oated into position in your pond or lake. Once a suitable location is
determined, simply attach a boat anchor, concrete block, or similar weighted item to each of the two nylon lines (refer
to Fig. 5 for minimum anchor weight for your size aerator). Once attached, place the anchors at the bottom of the pond
spaced a minimum of twenty-ve feet apart.
6. The nal step is to supply electric power to your Display Aerator, taking extra caution to always use a ground fault
circuit interrupter and a licensed electrical contractor. See Fig. 6 for guidelines on supplying power.
!
Fig. 1
Fig. 2
Fig. 3
FLOAT PLATFORM
PUMP ASSEMBLY
NYLON ANCHORING LINE
STAINLESS STEEL FILTER BASKET
SELF-TAPPING SCREWS
STAINLESS STEEL
BOLTS
Do NOT use an extension cord
to supply power to the motor
Always use a GFCI
Always disconnect the power
when swimmers are present
!
 Loading...