All SCOTT bikes are fitted with a so-called index rear
derailleur. This derailleur can be positioned exactly
below the required sprocket through pre programmed
"clicking”. Changing gears is easy with the index sys-
tem, provided it is properly adjusted. Contrary to the
adjustment of any ordinary derailleur, the adjustment of
the index derailleur requires special attention and is
therefore best left to your SCOTT dealer. Should you
nevertheless want to adjust the index system yourself,
proceed as follows:
1. Change to the largest gear (smallest rear sprocket).
2. Drive the pedals forward a few times. In case of
chain noise, adjust the derailleur with the adjus-
ting screws.
3. Pull the derailleur control cable tight and secure it
with the cable screw in the rear derailleur to
tighten the cable screw even further.
4. Use the shift lever to change to the next sprocket.
There should be no chain noise. If necessary,
adjust the cable screw.
OWNER MANUAL
Introduction on derailleurs
The front and the rear derailleur have already been
adjusted by your SCOTT dealer. Therefore, no readjust-
ment will be necessary to begin with. However, it is
advisable to check the adjustment of the gear change
mechanism regularly.
When the gear lever is fully pushed towards the front,
the chain should be below the smallest or the biggest
sprocket.
When the adjustment of the derailleur is inaccurate, for
example when the chain is a little slack, it can jump off
either between the biggest sprocket and the spoke on
the left side and/or between the smallest sprocket and
the frame on the right side. This can lead to severe
damages and/or a fall.
The adjustment of the rear derailleur must not be too
slack (causing the chain to derail), nor too tight. In the
latter case, chain noise occurs when the chain is on the
smallest or largest sprocket. The stroke of the derailleur
can be limited both on the left and the right side by
means of two limit screws.
Changing gears Adjustment of the Index
rear derailleur
Adjustment of the Index rear
derailleur
Adjustment of the front derailleur
Usually, the front derailleur is secured to the seat
tube with a clamping strip, fitted with a bolt. As a
result the derailleur can be moved up/down and tur-
ned, the front derailleur can be adjusted in such a
way that the chain does not derail when the
derailleur is in its highest position. The derailleur
should not protrude beyond the largest chain wheel
by more than 2 mm and must not touch the pedal
crank. For correct adjustment proceed as follows.
OWNER MANUAL
4-5
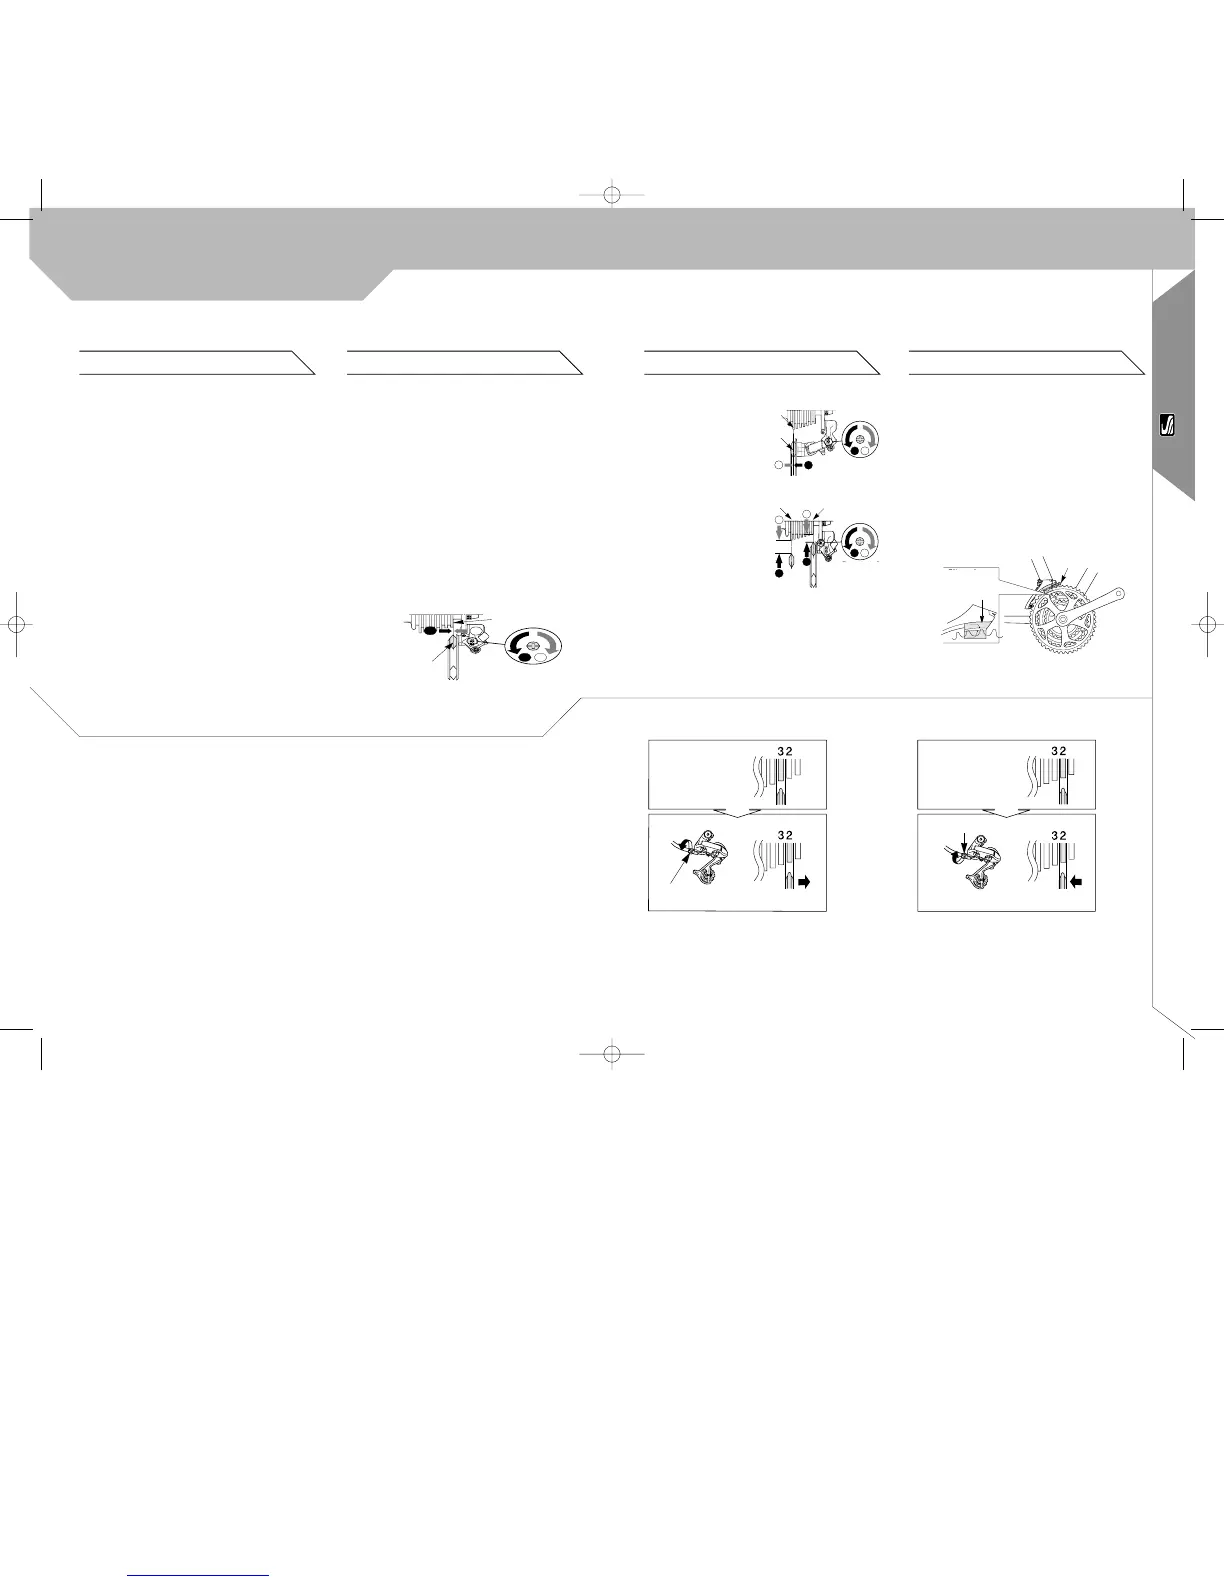
Top adjustment
Turn the top adjustment screw
to adjust so that the guide pul-
ley is in line with the outer line
of the smallest sprocket when
looking from the rear
Top adjustment screw
Outer line of smallest
sprocket
Guide pulley
Low adjustment
Turn the low adjustment screw so
that the guide pulley moves to a
position directly in line with the lar-
gest sprocket.
How to use the B-tension adjust-
ment screw
Mount the chain on the smallest
chainring and the largest sprocket,
and turn the crank arm backward.
Then turn the B-tension adjustment
screw to adjust the guide pulley as
close to the sprocket as possible but
not so close that it touches. Next, set
the chain to the smallest sprocket and
repeat the above to make sure that
the pulley does not touch the sprocket.
largest sprocket
smallest sprocket
B-tension
adjustment screw
Low adjustment
screw
guide pulley
Largest
sprocket
adjustment screw
adjustment screw
in case of no
noise
If chain moves back
to third sprocket
pro set adjustment block
The derailleur must be adjusted as per
illustration. The pro-set adjustment
block may not be removed.
Sprocket teeths
must be set in this
position
manual2_ A5 _Engl. 26.09.2003 16:29 Uhr Seite 6

 Loading...